Qt Quick 演示 - RSS 新闻
一个 QML RSS 新闻阅读器,使用XmlListModel 和XmlListModelRole 自定义 QML 类型下载 XML 数据,使用ListModel 和ListElement 创建分类列表,并使用ListView 显示数据。
RSS News演示了以下 Qt Quick功能:
- 使用自定义 QML 类型。
- 使用列表模型和列表元素表示数据。
- 使用 XML 列表模型下载 XML 数据。
- 使用列表视图显示数据。
- 使用Component 类型为新闻条目列表视图创建页脚。
- 使用Image 类型创建关闭应用程序的按钮。
运行示例
运行示例 Qt Creator,打开Welcome 模式,并从Examples 中选择示例。更多信息,请参阅Qt Creator: 教程:构建并运行。
使用自定义类型
在 RSS 新闻应用程序中,我们使用了以下自定义类型,每个类型都在单独的 .qml 文件中定义:
BusyIndicator.qmlCategoryDelegate.qmlNewsDelegate.qmlRssFeeds.qmlScrollBar.qml
创建主窗口
在Main.qml 中,我们使用带有自定义属性的Rectangle 类型创建应用程序主窗口:
Rectangle {
    id: window

    width: 800
    height: 480

    property string currentFeed: rssFeeds.get(0).feed
    property bool loading: feedModel.status === XmlListModel.Loading
    property bool isPortrait: Screen.primaryOrientation === Qt.PortraitOrientation
稍后我们将使用自定义属性加载 XML 数据,并根据屏幕方向调整屏幕布局。
创建分类列表
在Main.qml 中,我们使用在RssFeeds.qml 中指定的RssFeeds 自定义类型来创建 feed 类别列表:
RssFeeds { id: rssFeeds }
在RssFeeds.qml 中,我们使用ListModel 类型和ListElement 类型来创建类别列表,其中列表元素代表 feed 类别:
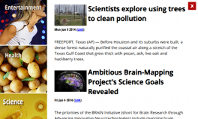
ListModel {
    ListElement { name: "Top Stories"; feed: "news.yahoo.com/rss/topstories"; image: "images/TopStories.jpg" }
    ListElement { name: "World"; feed: "news.yahoo.com/rss/world"; image: "images/World.jpg" }
    ListElement { name: "Europe"; feed: "news.yahoo.com/rss/europe"; image: "images/Europe.jpg" }
    ListElement { name: "Asia"; feed: "news.yahoo.com/rss/asia"; image: "images/Asia.jpg" }
    ListElement { name: "U.S. National"; feed: "news.yahoo.com/rss/us"; image: "images/USNational.jpg"  }
    ListElement { name: "Politics"; feed: "news.yahoo.com/rss/politics"; image: "images/Politics.jpg" }
    ListElement { name: "Business"; feed: "news.yahoo.com/rss/business"; image: "images/Business.jpg" }
    ListElement { name: "Technology"; feed: "news.yahoo.com/rss/tech"; image: "images/Technology.jpg" }
    ListElement { name: "Entertainment"; feed: "news.yahoo.com/rss/entertainment"; image: "images/Entertainment.jpg" }
    ListElement { name: "Health"; feed: "news.yahoo.com/rss/health"; image: "images/Health.jpg" }
    ListElement { name: "Science"; feed: "news.yahoo.com/rss/science"; image: "images/Science.jpg" }
    ListElement { name: "Sports"; feed: "news.yahoo.com/rss/sports"; image: "images/Sports.jpg" }
}
列表元素的定义与其他 QML 类型相似,除了它们包含角色定义集合,而不是属性。角色既定义数据的访问方式,也包括数据本身。
对于每个列表元素,我们使用name 角色来指定类别名称,使用feed 角色来指定加载数据的 URL,使用image 角色来显示类别的图片。
在Main.qml 中,我们使用ListView 类型来显示类别列表:
    ListView {
        id: categories
        property int itemWidth: 190

        width: window.isPortrait ? parent.width : itemWidth
        height: window.isPortrait ? itemWidth : parent.height
        orientation: window.isPortrait ? ListView.Horizontal : ListView.Vertical
        anchors.top: parent.top
        model: rssFeeds
        delegate: CategoryDelegate {
            itemSize: categories.itemWidth
            isLoading: window.loading
            onClicked: function () {
                if (window.currentFeed == feed)
                    feedModel.reload()
                else
                    window.currentFeed = feed

            }
        }
在纵向方向上,我们使用orientation 属性在窗口顶部水平布局类别列表;在横向方向上,我们使用 属性在窗口左侧垂直布局类别列表。根据方向,我们将列表的宽度或高度绑定为一个固定值 (itemWidth)。
在两种方向上,我们都使用anchors.top 属性将列表视图定位在屏幕顶部。
我们使用model 属性从rssFeeds 模型加载 XML 数据,并使用CategoryDelegate 作为委托来实例化列表中的每个项目。
创建列表元素
在CategoryDelegate.qml 中,我们使用带有自定义属性的Rectangle 类型来创建列表元素:
Rectangle {
    id: delegate

    required property real itemSize
    required property string name
    required property string feed
    required property string image
    required property int index
    required property bool isLoading

    property bool selected: ListView.isCurrentItem
我们使用required 声明我们期望从模型获得的属性。
我们将selected 属性设置为ListView.isCurrentItem 附加属性,以指定如果delegate 是当前项目,则selected 就是true 。
我们使用Image 类型source 属性来显示图片,图片位于委托中心,由rssFeeds 列表模型中的image 角色为列表元素指定:
    Image {
        anchors.centerIn: parent
        source: delegate.image
    }
我们使用Text 类型为列表元素添加标题:
    Text {
        id: titleText

        anchors {
            left: parent.left; leftMargin: 20
            right: parent.right; rightMargin: 20
            top: parent.top; topMargin: 20
        }

        font { pixelSize: 18; bold: true }
        text: delegate.name
        color: delegate.selected ? "#ffffff" : "#ebebdd"
        scale: delegate.selected ? 1.15 : 1.0
        Behavior on color { ColorAnimation { duration: 150 } }
        Behavior on scale { PropertyAnimation { duration: 300 } }
我们使用anchors 属性将标题置于列表元素的顶部,并留出 20 像素的边距。我们使用font 属性来调整字体大小和文本格式。
我们使用color 和scale 属性来增亮文本,并在列表项为当前项时将其缩放得稍大一些。通过应用Behavior 属性,我们可以将选择和取消选择列表项的操作动画化。
当用户点击类别列表元素时,我们使用MouseArea 类型下载 XML 数据:
    MouseArea {
        anchors.fill: delegate
        onClicked: {
            delegate.ListView.view.currentIndex = delegate.index
            delegate.clicked()
        }
    }
anchors.fill 属性设置为delegate ,使用户可以在列表元素的任何位置轻点。
为了在clicked 事件中加载类别列表的 XML 数据,我们设置了ListView 附加属性的currentIndex ,并在onClicked 中发出clicked signal() 信号。
下载 XML 数据
在Main.qml 中,我们使用XmlListModel 类型作为ListView 元素的数据源,以显示所选类别中的新闻条目:
    XmlListModel {
        id: feedModel

        source: "https://" + window.currentFeed
        query: "/rss/channel/item"
我们使用source 属性和window.currentFeed 自定义属性来获取所选类别的新闻条目。
query 属性指定XmlListModel 为 XML 文档中的每个<item> 生成一个模型项。
我们使用XmlListModelRole 类型来指定模型项属性。每个模型项都有title 、content 、link 和pubDate 属性,这些属性与 XML 文档中相应<item> 的值相匹配:
        XmlListModelRole { name: "title"; elementName: "title"; attributeName: ""}
        XmlListModelRole { name: "content"; elementName: "content"; attributeName: "url" }
        XmlListModelRole { name: "link"; elementName: "link"; attributeName: "" }
        XmlListModelRole { name: "pubDate"; elementName: "pubDate"; attributeName: "" }
    }
我们在ListView 类型中使用feedModel 模型来显示数据:
    ListView {
        id: list

        anchors.left: window.isPortrait ? window.left : categories.right
        anchors.right: closeButton.left
        anchors.top: window.isPortrait ? categories.bottom : window.top
        anchors.bottom: window.bottom
        anchors.leftMargin: 30
        anchors.rightMargin: 4
        clip: window.isPortrait
        model: feedModel
        footer: footerText
        delegate: NewsDelegate {}
    }
为了在纵向方向上将新闻条目列在类别列表的下方,在横向方向上将新闻条目列在类别列表的右侧,我们使用isPortrait 自定义属性将新闻条目列表的顶部锚定在纵向方向上window 的左侧和categories 的底部,以及横向方向上categories 的右侧和window 的底部。
在两种方向上,我们都使用anchors.bottom 属性将列表视图的底部锚定到窗口底部。
在纵向方向上,我们将新闻条目的绘制剪切到列表视图的边界矩形上,以避免新闻条目滚动到其他条目上时出现图形假象。而在横向模式下,由于列表在垂直方向上横跨整个屏幕,因此不需要这样做。
我们使用model 属性从feedModel 模型加载 XML 数据,并使用NewsDelegate 作为委托来实例化列表中的每个项目。
在NewsDelegate.qml 中,我们使用Column 类型来布局 XML 数据:
Column {
    id: delegate

    required property string title
    required property string content
    required property string link
    required property string pubDate

    width: delegate.ListView.view.width
    spacing: 8
在列中,我们使用行和另一列来定位图片和标题文本:
    Row {
        width: parent.width
        spacing: 8

        Column {
            Item {
                width: 4
                height: titleText.font.pixelSize / 4
            }

            Image {
                id: titleImage
                source: delegate.content
                width: Math.min(delegate.width / 2, sourceSize.width)
                fillMode: Image.PreserveAspectFit
            }
        }

        Text {
            id: titleText

            text: delegate.title.replace(/'/g, "'")
            width: delegate.width - titleImage.width
            wrapMode: Text.WordWrap
            font.pixelSize: 26
            font.bold: true
        }
    }
我们使用timeSinceEvent() JavaScript 函数生成项目发布时间的文本表示:
    Text {
        width: delegate.width
        font.pixelSize: 12
        textFormat: Text.RichText
        font.italic: true
        text: delegate.timeSinceEvent(delegate.pubDate) + " (<a href=\"" + delegate.link + "\">Link</a>)"
        onLinkActivated: function(link) {
            Qt.openUrlExternally(link)
        }
    }
当用户选择链接时,我们使用onLinkActivated 信号处理器在外部浏览器中打开 URL。
向用户提供反馈
在CategoryDelegate.qml 中,我们使用BusyIndicator 自定义类型来表示加载 XML 数据时的活动:
    BusyIndicator {
        scale: 0.8
        visible: delegate.ListView.isCurrentItem && delegate.isLoading
        anchors.centerIn: parent
    }
我们使用scale 属性将指示器大小减小到0.8 。我们将visible 属性与delegate 列表视图的isCurrentItem 附加属性和主窗口的loading 属性绑定,以便在当前项目为分类列表项目且正在加载 XML 数据时显示指示器图像。
我们在BusyIndicator.qml 中定义了BusyIndicator 类型。我们使用Image 类型来显示图像,并对其rotation 属性应用NumberAnimation 来无限循环旋转图像:
Image {
    id: container

    source: "images/busy.png";

    NumberAnimation on rotation {
        running: container.visible
        from: 0; to: 360;
        loops: Animation.Infinite;
        duration: 1200
    }
}
在应用程序中,您还可以使用Qt Quick Controls模块中的BusyIndicator 类型。
创建滚动条
在Main.qml 中,我们使用自己定制的ScrollBar 类型在类别和新闻条目列表视图中创建滚动条。在您的应用程序中,您也可以使用Qt Quick Controls模块中的ScrollView 类型。
首先,我们在类别列表视图中创建一个滚动条。我们将orientation 属性与isPortrait 属性和Qt::Orientation 枚举类型的Horizontal 值绑定,以纵向显示水平滚动条,将Vertical 值绑定,以横向显示垂直滚动条:
    ScrollBar {
        id: listScrollBar

        orientation: window.isPortrait ? Qt.Horizontal : Qt.Vertical
        height: window.isPortrait ? 8 : categories.height;
        width: window.isPortrait ? categories.width : 8
        scrollArea: categories;
        anchors.right: categories.right
    }
与categories 列表视图一样,我们根据isPortrait 属性调整滚动条的宽度和高度。
我们使用scrollArea 属性在categories 列表视图中显示滚动条。
我们使用anchors.right 属性将滚动条锚定到类别列表的右侧。
    ScrollBar {
        scrollArea: list
        width: 8
        anchors.right: window.right
        anchors.top: window.isPortrait ? categories.bottom : window.top
        anchors.bottom: window.bottom
    }
其次,我们在新闻条目列表视图中创建另一个滚动条。我们希望无论屏幕方向如何,垂直滚动条都显示在视图的右侧,因此我们可以将width 属性设置为8 ,并将anchors.right 属性绑定到window.right 属性。我们使用anchors.top 属性将滚动条锚定到纵向类别列表的顶部和横向新闻条目列表的顶部。我们使用anchors.bottom 属性将滚动条底部锚定到两种方向的列表视图底部。
我们在ScrollBar.qml 中定义了ScrollBar 类型。我们使用带有自定义属性的Item 类型为滚动条创建一个容器:
我们使用BorderImage 类型在通过position() 函数计算出的 x 和 y 位置显示滚动条缩略图:
    BorderImage {
        source: "images/scrollbar.png"
        border { left: 1; right: 1; top: 1; bottom: 1 }
        x: container.orientation == Qt.Vertical ? 2 : container.position()
        y: container.orientation == Qt.Vertical ? container.position() : 2
        width: container.orientation == Qt.Vertical ? container.width - 4 : container.size()
        height: container.orientation == Qt.Vertical ? container.size() : container.height - 4
    }
我们使用size 函数根据屏幕方向计算拇指的宽度和高度。
我们使用states 在用户移动滚动区域时显示滚动条:
    states: State {
        name: "visible"
        when: container.orientation == Qt.Vertical ?
                  container.scrollArea.movingVertically :
                  container.scrollArea.movingHorizontally
        PropertyChanges { container { opacity: 1.0 } }
    }
当状态从"visible" 变为默认状态时,我们使用transitions 将NumberAnimation 应用到opacity 属性:
    transitions: Transition {
        from: "visible"; to: ""
        NumberAnimation { properties: "opacity"; duration: 600 }
    }
}
创建页脚
在Main.qml 中,我们使用Component 类型和Rectangle 类型为新闻列表视图创建页脚:
pragma ComponentBehavior: Bound

import QtQuick
import QtQuick.Window
import QtQml.XmlListModel

Rectangle {
    id: window

    width: 800
    height: 480

    property string currentFeed: rssFeeds.get(0).feed
    property bool loading: feedModel.status === XmlListModel.Loading
    property bool isPortrait: Screen.primaryOrientation === Qt.PortraitOrientation

    onLoadingChanged: {
        if (feedModel.status == XmlListModel.Ready)
            list.positionViewAtBeginning()
    }

    RssFeeds { id: rssFeeds }

    XmlListModel {
        id: feedModel

        source: "https://" + window.currentFeed
        query: "/rss/channel/item"

        XmlListModelRole { name: "title"; elementName: "title"; attributeName: ""}
我们将页脚的width 与组件的宽度绑定,将height 与关闭按钮的高度绑定,以便在不显示新闻条目时对齐。
创建按钮
在Main.qml 中,我们使用Image 类型创建一个简单的按压按钮,用户可以点击该按钮关闭应用程序:
        XmlListModelRole { name: "content"; elementName: "content"; attributeName: "url" }
        XmlListModelRole { name: "link"; elementName: "link"; attributeName: "" }
        XmlListModelRole { name: "pubDate"; elementName: "pubDate"; attributeName: "" }
    }

    ListView {
        id: categories
        property int itemWidth: 190

        width: window.isPortrait ? parent.width : itemWidth
        height: window.isPortrait ? itemWidth : parent.height
        orientation: window.isPortrait ? ListView.Horizontal : ListView.Vertical
        anchors.top: parent.top
        model: rssFeeds
        delegate: CategoryDelegate {
            itemSize: categories.itemWidth
            isLoading: window.loading
            onClicked: function () {
                if (window.currentFeed == feed)
                    feedModel.reload()
                else
                    window.currentFeed = feed

            }
        }
        spacing: 3
    }

    ScrollBar {
        id: listScrollBar

        orientation: window.isPortrait ? Qt.Horizontal : Qt.Vertical
        height: window.isPortrait ? 8 : categories.height;
        width: window.isPortrait ? categories.width : 8
        scrollArea: categories;
        anchors.right: categories.right
    }

    ListView {
        id: list

        anchors.left: window.isPortrait ? window.left : categories.right
        anchors.right: closeButton.left
        anchors.top: window.isPortrait ? categories.bottom : window.top
        anchors.bottom: window.bottom
        anchors.leftMargin: 30
        anchors.rightMargin: 4
        clip: window.isPortrait
        model: feedModel
        footer: footerText
        delegate: NewsDelegate {}
    }

    ScrollBar {
        scrollArea: list
        width: 8
        anchors.right: window.right
        anchors.top: window.isPortrait ? categories.bottom : window.top
        anchors.bottom: window.bottom
    }

    Component {
        id: footerText

        Rectangle {
            width: parent.width
            height: closeButton.height
            color: "lightgray"

            Text {
                text: "RSS Feed from Yahoo News"
                anchors.centerIn: parent
                font.pixelSize: 14
            }
        }
    }

    Image {
        id: closeButton
        source: "content/images/btn_close.png"
        scale: 0.8
        anchors.top: parent.top
        anchors.right: parent.right
        anchors.margins: 4
        opacity: (window.isPortrait && categories.moving) ? 0.2 : 1.0
        Behavior on opacity {
            NumberAnimation { duration: 300; easing.type: Easing.OutSine }
        }

        MouseArea {
            anchors.fill: parent
            onClicked: {
                Qt.quit()
            }
        }
    }
我们使用anchors 将关闭按钮定位在新闻列表视图的右上角,边距为 4 像素。由于关闭按钮在纵向方向上与类别列表重叠,因此我们对opacity 属性进行了动画处理,使按钮在用户滚动类别列表时几乎完全透明。
我们在MouseArea 中使用onClicked 信号处理器,在用户选择关闭按钮时调用quit() 函数。
另请参阅 QML 应用程序。
© 2026 The Qt Company Ltd. Documentation contributions included herein are the copyrights of their respective owners. The documentation provided herein is licensed under the terms of the GNU Free Documentation License version 1.3 as published by the Free Software Foundation. Qt and respective logos are trademarks of The Qt Company Ltd. in Finland and/or other countries worldwide. All other trademarks are property of their respective owners.
