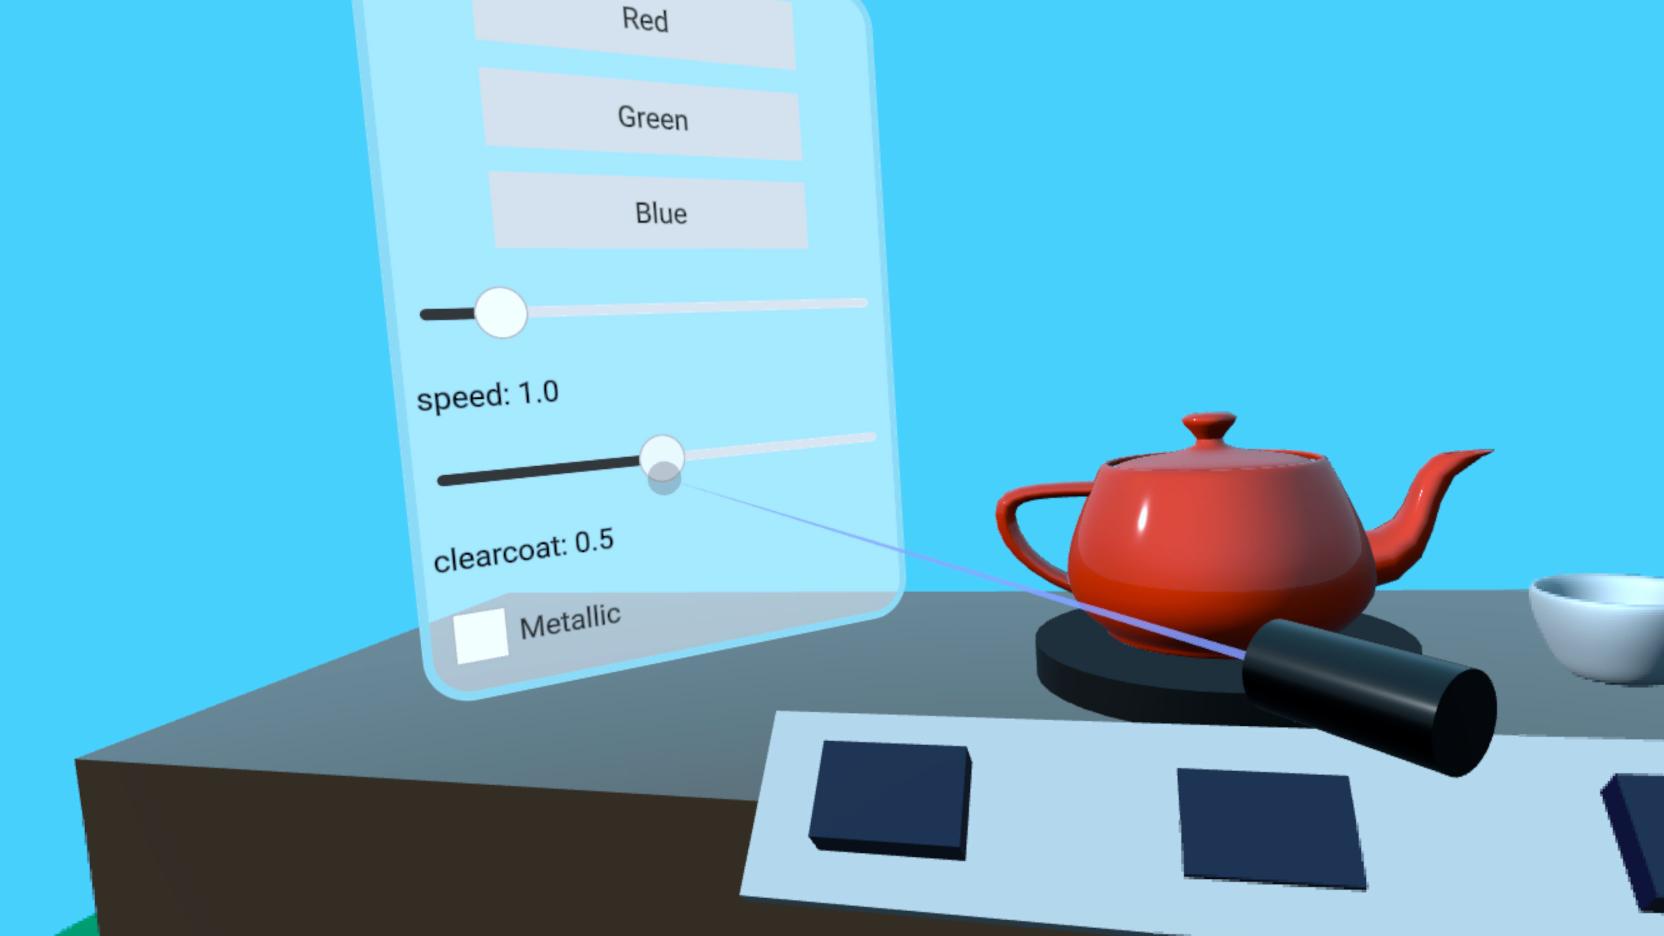
Qt Quick 3D - XR 简单输入示例
演示Qt Quick 3D XR 中的控制器输入。

本示例展示了如何使用Qt Quick 3D XR 中的底层输入 API 与场景中的二维和三维对象进行交互。它沿用了xr_simple示例的基本结构。
控制器输入
在本示例中,我们从XrController 的位置进行ray picking :
XrController {
    id: rightController
    controller: XrController.RightController
    poseSpace: XrController.AimPose

    property QtObject hitObject

    onRotationChanged: {
        const pickResult = xrView.rayPick(scenePosition, forward)
        if (pickResult.hitType !== PickResult.Null) {
            pickRay.hit = true
            pickRay.length = pickResult.distance
            hitObject = pickResult.objectHit
            cursorSphere.position = pickResult.scenePosition
            cursorSphere.visible = true
        } else {
            pickRay.hit = false
            pickRay.length = 50
            hitObject = null
            cursorSphere.visible = false
        }
    }

    Node {
        id: pickRay
        property real length: 50
        property bool hit: false

        Model {
            eulerRotation.x: -90
            scale: Qt.vector3d(0.005, pickRay.length/100, 0.005)
            source: "#Cone"
            materials: PrincipledMaterial {
                baseColor: rightTrigger.pressed ? "#99aaff" : "#cccccc"
                lighting: PrincipledMaterial.NoLighting
            }
            opacity: 0.8
        }
    }

    Node {
        z: 5
        Model {
            eulerRotation.x: 90
            scale: Qt.vector3d(0.05, 0.10, 0.05)
            source: "#Cylinder"
            materials: PrincipledMaterial {
                baseColor: "black"
                roughness: 0.2
            }
        }
    }
}
这将执行以下功能:
- 如果我们撞到了任何东西,我们就会改变
pickRay的长度,使其接触到我们撞到的东西。pickRay是一个半透明的圆锥体(锥形圆柱体),可以显示用户瞄准的位置。我们还将cursorSphere移动到射线击中的位置。(cursorSphere是一个半透明球体,是XrView 的子球体)。 - 我们将属性
hitObject设置为我们击中的物体。
我们还使用一个黑色圆柱体作为控制器的通用表示。
在本示例中,我们在文件ExampleButton.qml 中制作了一个简单的 3D 按钮。(我们创建了一个XrInputAction 来对按下的触发器做出反应:
XrInputAction {
    id: rightTrigger
    controller: XrInputAction.RightController
    actionId: [XrInputAction.TriggerPressed, XrInputAction.TriggerValue, XrInputAction.IndexFingerPinch]
    onTriggered: {
        const button = rightController.hitObject as ExampleButton
        if (button && button !== panel.activeButton) {
            panel.activeButton = button
        }
    }
}
rightTrigger 动作会对多个不同的 ID 做出反应,以便同时支持手部追踪和不同类型的控制器。当触发该动作时,它会检查我们上面设置的hitObject 是否属于ExampleButton 类型。在这种情况下,按钮将被激活。
为了让 3D 控制器与 2D 内容进行交互,我们需要添加一个XrVirtualMouse ,以便在它们之间进行映射:
XrInputAction {
    id: rightThumbstickX
    controller: XrInputAction.RightController
    actionId: [XrInputAction.ThumbstickX]
}
XrInputAction {
    id: rightThumbstickY
    controller: XrInputAction.RightController
    actionId: [XrInputAction.ThumbstickY]
}

XrVirtualMouse {
    view: xrView
    source: rightController
    leftMouseButton: rightTrigger.pressed
    scrollWheelX: rightThumbstickX.value
    scrollWheelY: rightThumbstickY.value
}
首先,我们再添加两个动作来检测拇指杆的水平和垂直位置。然后,我们创建一个XrVirtualMouse ,将XrController 作为位置源。我们使用之前制作的rightTrigger 动作来生成鼠标按下/释放事件,并使用拇指杆动作来生成鼠标滚轮事件。
最后,当pickRay 碰撞物体时,我们会添加一些触觉反馈:
XrHapticFeedback {
    controller: XrHapticFeedback.RightController
    condition: XrHapticFeedback.RisingEdge
    trigger: pickRay.hit
    hapticEffect: XrSimpleHapticEffect {
        amplitude: 0.5
        duration: 30
        frequency: 3000
    }
}
每次pickRay.hit 属性从false 变为true 时,都会触发触觉效果。
XrItem
在 3D 场景中嵌入 2D 用户界面的常规方法同样适用于 XR,但由于单位尺寸是一厘米,因此这些用户界面必须按比例缩放才有用。XrItem 类型通过设置三维项目的物理尺寸和二维表面的逻辑尺寸,提供了一种自动缩放的便捷方法。
XrItem {
    width: 75
    height: 100
    x: -100
    y: height + table.height + 5
    z: 40
    eulerRotation.y: 45
    color: "transparent"
    contentItem: Rectangle {
        color: Qt.rgba(1, 1, 1, 0.5)
        border.width: 5
        border.color: "lightblue"
        height: 400
        width: 300
        radius: 25
    ...
        }
    }
我们将XrItem 放置在三维空间中,并将其设置为 75 厘米宽、100 厘米高。然后添加一个矩形作为内容项,并将其设置为 300 x 400 单位。Qt Quick UI 元素的其余部分以正常方式添加为矩形的子元素,在此不作显示。2D 内容会自动按比例填充XrItem 。
© 2025 The Qt Company Ltd. Documentation contributions included herein are the copyrights of their respective owners. The documentation provided herein is licensed under the terms of the GNU Free Documentation License version 1.3 as published by the Free Software Foundation. Qt and respective logos are trademarks of The Qt Company Ltd. in Finland and/or other countries worldwide. All other trademarks are property of their respective owners.

