C
Using Data Inputs
Qt 3D Studio supports data-driven animations. This makes it possible to control timeline animations, object properties and slides with data input.
This page explains how to define and connect data inputs in the Qt 3D Studio editor. The data input value can be set using behavior scripts, DataInput QML Types, Presentation QML Types or Q3DSPresentation in the C++ API.
Data Types
| Data type | Description |
|---|---|
| Boolean | Binary true/false value |
| Float | Decimal value |
| Ranged number | Decimal value with maximum and minimum values defined |
| String | Text |
| Variant | Any of the basic data types (boolean, float and string) |
| Vector2 | 2 float values |
| Vector3 | 3 float values |
| Vector4 | 4 float values |
Manage Data Inputs
Add a Data Input
There are two ways to open the Add Data Input dialog:
- Select File > Data Inputs from the menu bar in Studio.
- Select Add Data Input.
- Click
 next to the desired slide, timeline or property.
 - Select Add New Data Input.
Note: Adding a data input this way will automatically connect it to the slide, timeline or property where it was created.
- Click
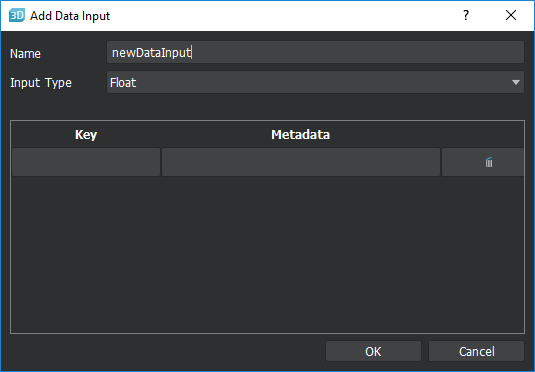
Once the dialog is open, follow the steps below to add the data input:
- Enter Name for the data input.
- Enter Input Type for the data input. If Ranged Number is selected, it is required to specify Minimum Range and Maximum Range.
- If desired, add metadata keys for the data input.
- Click OK.
Edit a Data Input
To edit a data input, follow the steps below.
- Select File > Data Inputs from the menu bar in Studio.
- Double-click the data input you want to edit.
- Make desired changes.
- Click OK.

Delete a Data Input
To delete a data input, follow the steps below.
- Select File > Data Inputs from the menu bar in Studio.
- Select the data input you want to delete by clicking on it.
- Select Remove existing data input.
Metadata Keys
It is possible to add metadata keys to your data inputs. You can add multiple single-value keys to each data input.
You can manage the metadata keys when you create or edit a data input.
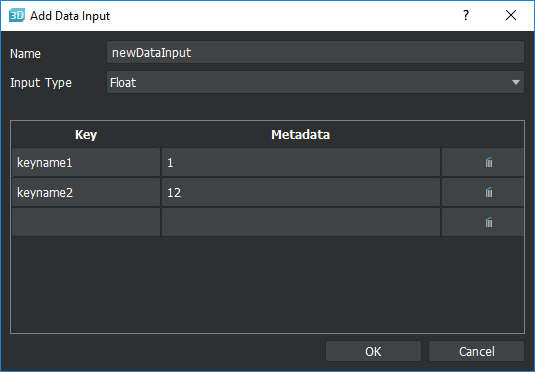
Add a Metadata Key
To add a metadata key, follow the steps below:
- Enter a Metadata key and a Metadata value (optional).
- Press OK.
Edit a Metadata Key
To edit a metadata key, follow the steps below:
- Edit desired values.
- Press OK.
Delete a Metadata Key
To delete a metadata key, click ![]() next to it in the list.
next to it in the list.
Control the Timeline with Data Input
Note: Only data input of Ranged Number type can be used to control the timeline.
To add a data input to control the timeline animation, follow the instructions below.
- Add the data input according to instructions above.
- Click the icon located in the bottom of the scene graph.
- Select the desired data input from the list by clicking it.
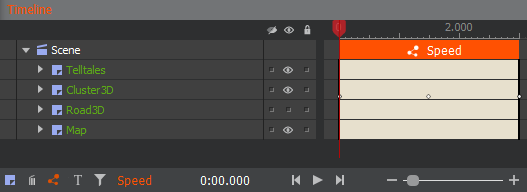
Once the data input has been added, it is clearly shown in the timeline palette which data input is controlling the timeline animation.
The minimum range value of the data input will correspond to the start of the timeline while the maximum range value will correspond to the end of the timeline.
To remove the data input, repeat step 2 above. Then select [No control] in step 3.
Control Slides with Data Input
Note: Only data input of String type can be used to control slides.
- Add the data input according to instructions above.
- In the slide palette, click the icon located below the slides.
- Select the desired data input from the list by clicking it.
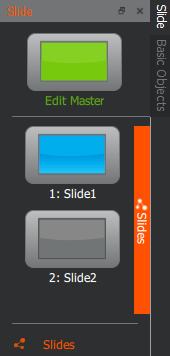
Once the data input has been added, it is clearly shown in the slide palette which data input is controlling slide transitions.
To remove the data input, repeat step 2 above. Then select [No control] in step 3.
Control an Object Property with Data Input
With data input, you can control many object properties. The properties that can be controlled is indicated with the data input icon ![]() next to the property name in the inspector palette.
next to the property name in the inspector palette.
The following data input types can be used to control object properties:
| Data input type | Usage |
|---|---|
| Boolean | To control binary true/false properties |
| Float | To control numeric properties |
| String | To control text properties |
| Variant | To control object properties with different data types using the same data input |
| Vector2 | To control properties with two numeric values such as 2D coordinates |
| Vector3 | To control properties with three numeric values such as 3D coordinates or RGB colors |
| Vector4 | To control properties with four numeric values such as RGBA colors |
- Add the data input according to instructions above.
- Select the desired object in the scene graph.
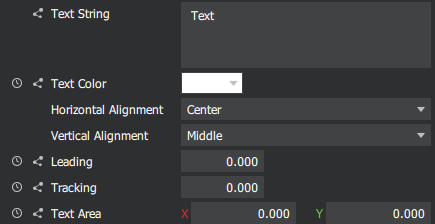
- In the inspector palette, click the icon next to the object property you wish to control.
- Select the desired data input from the list by clicking it.
![]()
Once the data input has been added, it is shown in the inspector palette which data input is controlling which property.
To remove the data input, repeat step 3 above. Then select [No control] in step 4.
Available under certain Qt licenses.
Find out more.