C
Animations
In Studio, it is easy to create keyframe animations to object and material properties. It is also possible to import animations from 3D creation tools such as Maya, 3D Studio Max, or Blender.
A keyframe is a a time marker that stores the value of a property. A keyframe can for example define the X position for an element. To create an animation, add another keyframe for the X position of the same element but in another position on the timeline. Studio will determine the correct X position for all frames between the two keyframes.
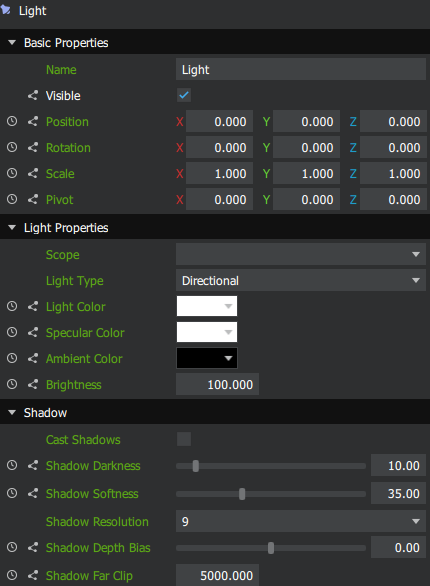
You can animate almost any object or material property. Animatable properties have the  icon next to their name in the inspector palette.
Create Animations
To animate a property, follow the steps below:
- Ensure that autoset keyframes is toggled on.
- Select the element in the timeline palette, and set the desire starting value for the animated property.
- Move the playhead to the position in the timeline where you want the animation to start.
- Enable animation for the property by clicking the icon next to the property name in the inspector palette.
- Move the playhead to a new position, then change the value for the animated property.
Now that you have two keyframes in the timeline, you can preview the animation by dragging the playhead in the timeline palette, or by running the presentation in the Studio or the Viewer.
Moving the playhead to a new position, and then changing the value of a property with animation enabled will create a new keyframe.
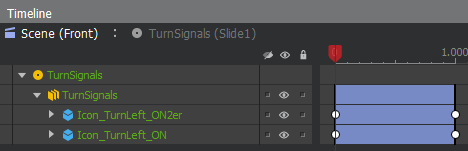
You can click the arrow icon next to the object with animated properties to expand it, this will display all animated properties and keyframes.

Furthermore, double-click one of the properties to display the property graph. The property graph displays the property animation curves and allows you to edit them.
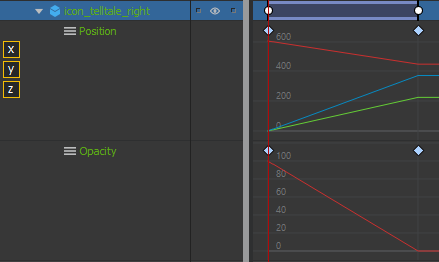
You can toggle channel visibility by clicking the channel icon on the left side of the scene graph (Ctrl + left mouse click to multi select). This function is only available if the animated property has more than one channel.
Edit Animations
Insert Keyframes
As mentioned above, changing the value of an animated property will create a new keyframe if there isn't already a keyframe in the same position. This requires that Autoset Keyframes is toggled on.
To manually insert a keyframe, first place the playhead in the position where you want to create the keyframe. Next, do one of the following:
- Right-click the timebar of the animated element, next select Insert Keyframe from the context menu.
- Left-click the timebar of the animated element, next press S.
Keyframes will be created for all animated properties for the selected element.
Delete Keyframes
To delete a keyframe, first select it (Ctrl + left mouse click to multi select). Next, do one of the following:
- Press Del.
- Right-click the keyframe and select Delete Selected Keyframe from the context menu.
To delete all keyframes of an element, do one of the following:
- Right-click the timebar and select Delete All Channel Keyframes.
- Left-click the timebar, next press Ctrl + Alt + K.
Move Keyframes
To move a keyframe to a desired position in the timeline, do one of the following:
- With the left mouse button, drag and drop it.
Note: Hold Shift while dragging to snap to timeline markers.
- Double-click the keyframe and enter the desired timeline position in the dialog window.
- Right-click the keyframe and select Set Keyframe Time. Next, enter the desired timeline position in the dialog window.
Change Property Values
To change a property value for a keyframe, follow the steps below:
- Move the playhead to the keyframe, hold
Shiftto snap the playhead to the keyframe. - Select the desired element in the timeline palette.
- In the inspector palette, change the value of the desired animated property.
Copy Keyframes
To copy keyframes from one element to another, follow the steps below:
- Select the keyframe(s) to copy on an element.
- Right-click on one of the selected keyframes and select Copy Selected Keyframes from the context menu.
- Position the playhead at the time where the first keyframe should be placed.
- Right click on the time bar for the element and select Paste Keyframes from. the context menu.
Animation Types
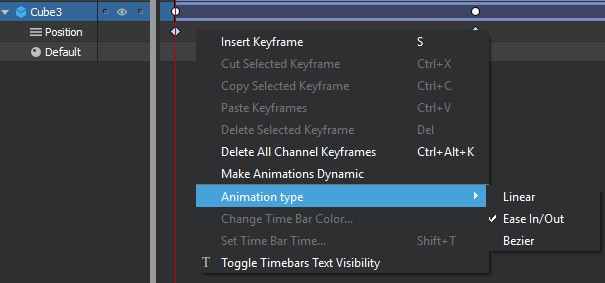
There are three different types of animations in Studio. These are described below.
To change animation type, right-click the property row in the timeline and select Animation Type.
Linear
With linear interpolation the value changes at the same rate from one value to the next.
Ease In/Out
As the playhead moves from one keyframe to the next, the Qt 3D Studio Runtime can perform linear interpolation, smooth interpolation, or a custom blending somewhere in-between. With linear interpolation the value changes at the same rate from one value to the next. With smooth interpolation the value starts off holding the previous keyframe value, accelerates towards the next keyframe value, and then decelerates to stop at the new value.
To set the interpolation, first select the keyframe(s) that you want to adjust, then right-click one of the selected keyframes, and from the context menu choose Set Interpolation. The Ease In setting controls how the value behaves as it approaches the keyframe and the Ease Out setting controls how the value behaves when leaving the keyframe.
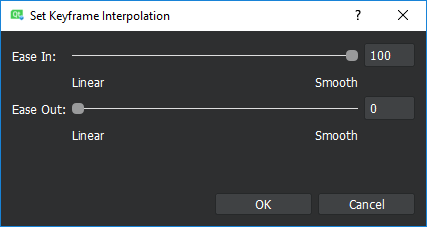
Note: You can set the default interpolation values for ease in/out animations in the studio preferences.
Bezier
Bezier animations are using a bezier curve to define the animation. This gives you much more control of the animation and interpolation.
Two or more end points define a bezier curve. Each end point represents the channel value of a keyframe. These end points have two control points (handles), or if they are located in the beginning or end of the timeline, one control point.
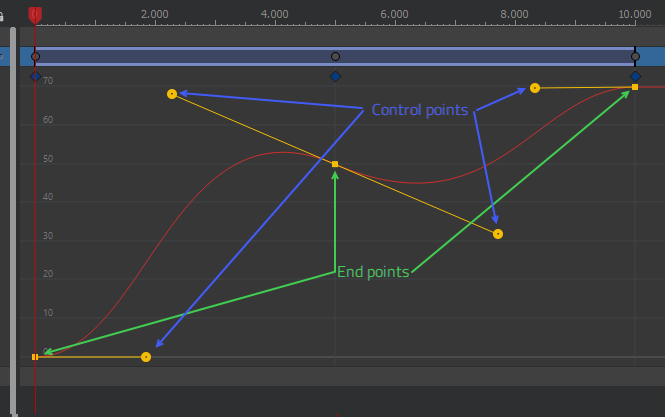
Control Points
Once you have created your animation, you can adjust it by moving the control points. To display the control points, first select the end point. Then, to move the control point, drag it with the left mouse button. If the end point has two control points, both will move simultaneously. To move just one, hold down the Ctrl key while dragging. You cannot move control points past previous or next keyframe.
End Points
To move an end point horizontally, you will need to move the actual keyframe on the timeline bar. To move it vertically, grab it with the mouse and drag it up/down.
Import Animations
You can import transform (scale/rotation/location) animations from 3D creation tools such as Maya, Blender, 3D Studio Max and Modo.
Read more in the 3D Assets section.
Further Topics
- The Timeline
The timeline palette provides direct access to all elements in your scene, and also gives you control over the animation and timing within a slide.
- Dynamic Keyframes
Dynamic keyframes are a powerful feature that allow you to smoothly interpolate between different animated values on different slides.
Available under certain Qt licenses.
Find out more.