QMLビデオの例
ビデオとカメラのビューファインダーコンテンツの変形。
QML Videoでは、QMLVideoOutput 、Camera タイプに適用できるさまざまな変換(移動、サイズ変更、回転、アスペクト比の変更)を紹介しています。
また、ネイティブコードとQMLを組み合わせることで、より高度な機能を実装できることも示しています。この例では、C++コードを使ってQMLのフレームレートを計算しています。QMLのフレームレートは、映像の上に半透明のアイテムとして表示されます。
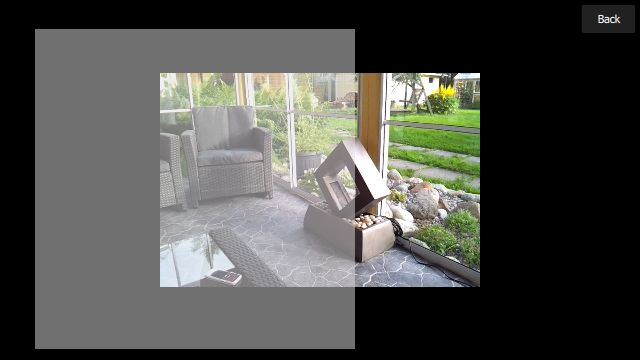
次の画像は、アプリケーションがビデオオーバーレイシーンを実行しているところです。ダミーのオーバーレイアイテム(半透明のRectangle )が作成され、VideoOutput アイテムを横切って移動します。

例の実行
からサンプルを実行するには Qt Creatorから例を実行するには、Welcome モードを開き、Examples から例を選択します。詳細については、Qt Creator:Tutorialを参照してください:ビルドと実行を参照してください。
アプリケーションの構造
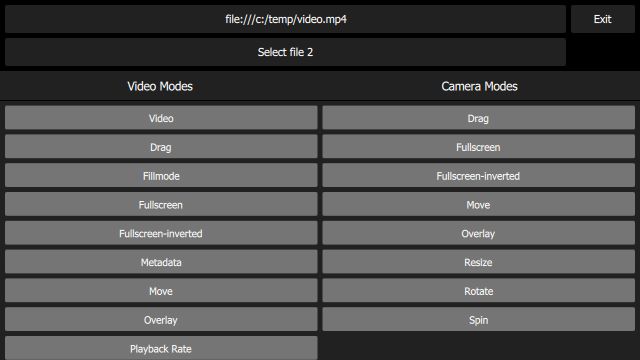
Main.qml ファイルは、以下の項目を含むUIを作成します:
- 2つの
Buttonインスタンス。各インスタンスはファイル名を表示し、FileDialogを起動するために使用できます。 - 終了
Button。 - 利用可能なシーンを表示するフリック可能なリストである
SceneSelectionPanel。 - 左下にはQMLの再描画レートを表示する項目があり、上の数字は瞬時のフレームレート、下の数字は過去1秒間の平均です。

例えば、video-basicシーン(画面中央に静的なVideoOutput )は、VideoBasic.qml 。コードからわかるように、これは一種の継承を利用しています。VideoBasic アイテム ...
SceneBasic {
    contentType: "video"
}
... はSceneBasic... 型である。
import QtQuick
import QtQuick.Controls

Scene {
    id: root
    property string contentType
    ...
    Content {
        id: content
    ...
    }

    Label {
        anchors {
            horizontalCenter: parent.horizontalCenter
            bottom: parent.bottom
            margins: 20
        }
        text: content.started ? qsTr("Tap the screen to stop content")
                              : qsTr("Tap the screen to start content")
        z: 2.0
    }

    MouseArea {
        anchors.fill: parent
        onClicked: {
            if (content.started)
                content.stop()
            else
                content.start()
        }
    }

    Component.onCompleted: root.content = content
}
... それ自身はScene :
import QtQuick
import QtQuick.Controls

Rectangle {
    id: root
    ...
    property QtObject content
    ...
    Button {
        id: closeButton
        anchors {
            top: parent.top
            right: parent.right
            margins: root.margins
        }
        z: 2.0
        text: qsTr("Back")
        onClicked: root.close()
    }
}
SceneBasic は、シーンの構造と動作を記述しますが、表示されるコンテンツのタイプについては不可知です - これは、Content によって抽象化されます。
このパターンによって、特定のユースケース(この場合、単に静的なコンテンツを表示する)を定義し、そのユースケースをビデオ・コンテンツ(VideoBasic )とカメラ・コンテンツ(({CameraBasic}) )の両方でインスタンス化することができます。このアプローチは、他の多くのシーンを実装するために使用される。たとえば、「コンテンツを左から右へ繰り返しスライドさせる」は、SceneMove によって実装され、VideoMove とCameraMove がベースになっている。
トップレベルのシーンインスタンスのcontentTypeプロパティの値によって、埋め込まれたContent アイテムは、MediaPlayer またはCamera アイテムを作成します。
QMLペインティング率の計算と表示
FrequencyMonitorクラスは、(notify()スロットを介して受信した)イベントのストリームを、瞬間的な頻度と平均化された頻度に変換します:
class FrequencyMonitor : public QObject
{
    Q_OBJECT
    QML_ELEMENT
    Q_PROPERTY(qreal instantaneousFrequency READ instantaneousFrequency NOTIFY
                       instantaneousFrequencyChanged)
    Q_PROPERTY(qreal averageFrequency READ averageFrequency NOTIFY averageFrequencyChanged)
    ...
public slots:
    Q_INVOKABLE void notify();
};
FrequencyMonitorクラスは、上記のようにクラス宣言にQML_ELEMENT というマクロを追加することでQMLに公開され、そのデータはFrequencyItemというQMLアイテムを定義することで表示されます:
import frequencymonitor

Rectangle {
    id: root
    ...
    function notify() {
        monitor.notify()
    }

    FrequencyMonitor {
        id: monitor
        onAverageFrequencyChanged: {
            averageFrequencyText.text = monitor.averageFrequency.toFixed(2)
        }
    }

    Text {
        id: labelText
        anchors {
            left: parent.left
            top: parent.top
            margins: 10
        }
        color: root.textColor
        font.pixelSize: 0.6 * root.textSize
        text: root.label
        width: root.width - 2*anchors.margins
        elide: Text.ElideRight
    }

    Text {
        id: averageFrequencyText
        anchors {
            right: parent.right
            bottom: parent.bottom
            margins: 10
        }
        color: root.textColor
        font.pixelSize: root.textSize
    }
}
結果は次のようになります:

あとは、QQuickView オブジェクトのafterRendering()シグナルをJavaScript関数に接続し、最終的にfrequencyItem.notify() を呼び出すだけです:
int main(int argc, char *argv[])
{
    QGuiApplication app(argc, argv);
    ...
    QQuickView viewer;
    ...
    QQuickItem *rootObject = viewer.rootObject();
    ...
    QObject::connect(&viewer, SIGNAL(afterRendering()), rootObject, SLOT(qmlFramePainted()));
© 2025 The Qt Company Ltd. Documentation contributions included herein are the copyrights of their respective owners. The documentation provided herein is licensed under the terms of the GNU Free Documentation License version 1.3 as published by the Free Software Foundation. Qt and respective logos are trademarks of The Qt Company Ltd. in Finland and/or other countries worldwide. All other trademarks are property of their respective owners.

