지도 뷰어(QML)
지도 뷰어 예제에서는 지도를 표시하고 지도와 상호 작용하며 주소를 검색하고 운전 경로를 찾는 방법을 보여 줍니다.
이 예는 Qt Location 에서 지도, 포지셔닝 및 내비게이션 서비스의 여러 가지 기본 사용법을 다루는 큰 예입니다. 이 페이지는 코드의 스니펫을 사용하여 이러한 각 기능 영역을 다루는 섹션으로 나뉘어져 있습니다.
예제 실행하기
에서 예제를 실행하려면 Qt Creator에서 예제를 실행하려면 Welcome 모드를 열고 Examples 에서 예제를 선택합니다. 자세한 내용은 Qt Creator: 튜토리얼을 참조하세요 : 빌드 및 실행을 참조하세요.
이 예제는 사용 가능한 모든 지역 서비스 플러그인에서 작동할 수 있습니다. 그러나 일부 플러그인은 제대로 작동하기 위해 plugin parameters 추가가 필요할 수 있습니다. Plugin parameters 명령줄에서 --plugin 인수를 사용하여 형식을 전달할 수 있습니다:
--plugin.<parameter name> <parameter value>
지원하는 플러그인 매개변수에 대한 자세한 내용은 각 지역 서비스 플러그인의 설명서를 참조하세요. 이 예제에서 사용하는 기본 플러그인은 Qt Location 오픈 스트리트맵 플러그인으로, 매개변수가 필요하지 않습니다.
개요
이 예제에 표시된 QML 유형:
- 지도 표시
- 주소 찾기
- 길 찾기 및 이동 경로
지도 표시하기
화면에 지도를 표시하려면 아래 그림과 같이 MapView 유형을 사용합니다.
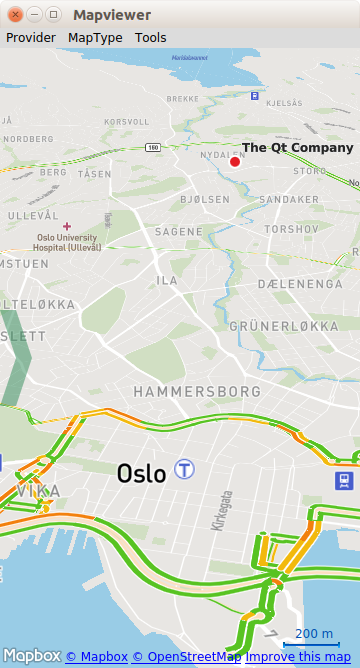
MapView {
    id: view
    map.zoomLevel: (maximumZoomLevel - minimumZoomLevel)/2
    map.center {
        // The Qt Company in Oslo
        latitude: 59.9485
        longitude: 10.7686
    }
}
MapView 는 map 으로 구성되며 기본 탐색 기능을 위해 확장됩니다. 이 예에서는 위도와 경도가 설정된 초기 중심 좌표를 지도에 제공합니다. 또한 초기 확대/축소 수준을 50%(최대와 최소의 중간)로 설정합니다.
주소 찾기(지오코딩)
지도에서 특정 주소나 장소를 찾으려면 지오코딩이라는 프로세스를 사용합니다. 지오코딩 작업을 수행하려면 먼저 결과를 수신할 수 있도록 지도 개체를 조정해야 합니다.
지오코딩 결과 수신은 GeocodeModel 을 통해 이루어집니다:
GeocodeModel {
    id: geocodeModel
    plugin: view.map.plugin
    onStatusChanged: {
        if ((status == GeocodeModel.Ready) || (status == GeocodeModel.Error))
            view.geocodeFinished()
    }
    onLocationsChanged:
    {
        if (count === 1) {
            view.map.center.latitude = get(0).coordinate.latitude
            view.map.center.longitude = get(0).coordinate.longitude
        }
    }
}
GeocodeModel 의 내용을 표시하기 위해 MapItemView:
MapItemView {
    parent: view.map
    model: geocodeModel
    delegate: pointDelegate
}
MapItemView 는 delegate 라는 객체를 사용하여 생성하는 항목의 템플릿 역할을 합니다. 여기에는 원하는 모든 지도 개체를 포함할 수 있지만, 여기서는 마커 이미지가 포함된 MapQuickItem 을 표시합니다:
Component {
    id: pointDelegate

    MapQuickItem {
        id: point
        parent: view.map
        coordinate: locationData.coordinate

        sourceItem: Image {
            id: pointMarker
            source: "../resources/marker_blue.png"
        }
    }
}
이 세 개의 객체만 있으면 지오코드 응답을 받아 지도에 표시하기에 충분합니다. 마지막 단계는 실제 지오코드 요청을 보내는 것입니다.
지오코드 요청을 보내려면 먼저 Address 객체를 만들고 원하는 매개 변수로 채웁니다.
Address {
    id :fromAddress
    street: "Sandakerveien 116"
    city: "Oslo"
    country: "Norway"
    state : ""
    postalCode: "0484"
}
그런 다음 geocodeModel.query 을 채워진 Address 으로 설정하고 GeocodeModel 에서 update()를 호출합니다.
// send the geocode request
geocodeModel.query = fromAddress
geocodeModel.update()
길 찾기 및 이동 경로
GeocodeModel 와 유사하게 Qt Location 에는 RouteModel 유형이 있어 두 개 이상의 지점 사이의 경로(예: 운전 경로)에 대한 정보를 Map 로 수신하여 사용할 수 있습니다.
여기에서도 RouteModel 를 맵의 프로퍼티로 인스턴스화합니다:
RouteModel {
    id: routeModel
    plugin : view.map.plugin
    query:  RouteQuery {
        id: routeQuery
    }
    onStatusChanged: {
        if (status == RouteModel.Ready) {
            switch (count) {
            case 0:
                // technically not an error
                view.routeError()
                break
            case 1:
                view.showRouteList()
                break
            }
        } else if (status == RouteModel.Error) {
            view.routeError()
        }
    }
}
사용자에게 모델의 콘텐츠를 표시하려면 뷰가 필요합니다. 다시 한 번 MapItemView 을 사용하여 맵에 경로를 객체로 표시합니다:
MapItemView {
    parent: view.map
    model: routeModel
    delegate: routeDelegate
뷰에서 생성하려는 객체의 템플릿 역할을 하기 위해 델리게이트 컴포넌트를 만듭니다:
Component {
    id: routeDelegate

    MapRoute {
        id: route
        route: routeData
        line.color: "#46a2da"
        line.width: 5
        smooth: true
        opacity: 0.8
이제 모델, 뷰, 델리게이트가 완성되었으므로 이제 남은 유일한 구성 요소는 경로 요청 프로세스를 시작하기 위한 모델에 대한 일종의 제어입니다. 가장 간단한 경우에는 이미 사용 가능한 두 개의 좌표를 사용하여 경로 요청을 작성할 수 있습니다:
property variant fromCoordinate: QtPositioning.coordinate(59.9483, 10.7695)
property variant toCoordinate: QtPositioning.coordinate(59.9645, 10.671)
다음 코드 조각에서는 요청 객체를 설정하고 모델에 업데이트를 지시하는 방법을 보여드리겠습니다. 또한 라우팅 요청의 시작 좌표를 중심으로 지도가 정렬되도록 지시합니다.
// clear away any old data in the query
routeQuery.clearWaypoints();
// add the start and end coords as waypoints on the route
routeQuery.addWaypoint(startCoordinate)
routeQuery.addWaypoint(endCoordinate)
routeQuery.travelModes = RouteQuery.CarTravel
routeQuery.routeOptimizations = RouteQuery.FastestRoute
routeModel.update();
// center the map on the start coord
view.map.center = startCoordinate;
이것이 지도에 경로를 표시하는 데 필요한 전부입니다. 그러나 이동 경로에 대한 서면 길 찾기와 설명을 검색할 수 있는 기능도 유용합니다. 이 예에서는 ListView 요소에 이러한 내용이 표시됩니다. 이 콘텐츠를 만들기 위해 표준 ListModel과 ListView 쌍을 사용합니다. ListModel의 데이터는 routeModel의 출력에서 구축됩니다:
ListView {
    interactive: true
    model: ListModel { id: routeInfoModel }
    header: RouteListHeader {}
    delegate:  RouteListDelegate{
        routeIndex.text: index + 1
        routeInstruction.text: instruction
        routeDistance.text: distance
    }
}
위에서 볼 수 있듯이 RouteModel 안에 onStatusChanged 핸들러를 추가하여 showRouteList() 를 호출하여 routeInfoModel 를 업데이트합니다:
routeInfoModel.clear()
if (routeModel.count > 0) {
    for (var i = 0; i < routeModel.get(0).segments.length; i++) {
        routeInfoModel.append({
            "instruction": routeModel.get(0).segments[i].maneuver.instructionText,
             "distance": Helper.formatDistance(routeModel.get(0).segments[i].maneuver.distanceToNextInstruction)
        });
    }
}
© 2026 The Qt Company Ltd. Documentation contributions included herein are the copyrights of their respective owners. The documentation provided herein is licensed under the terms of the GNU Free Documentation License version 1.3 as published by the Free Software Foundation. Qt and respective logos are trademarks of The Qt Company Ltd. in Finland and/or other countries worldwide. All other trademarks are property of their respective owners.
