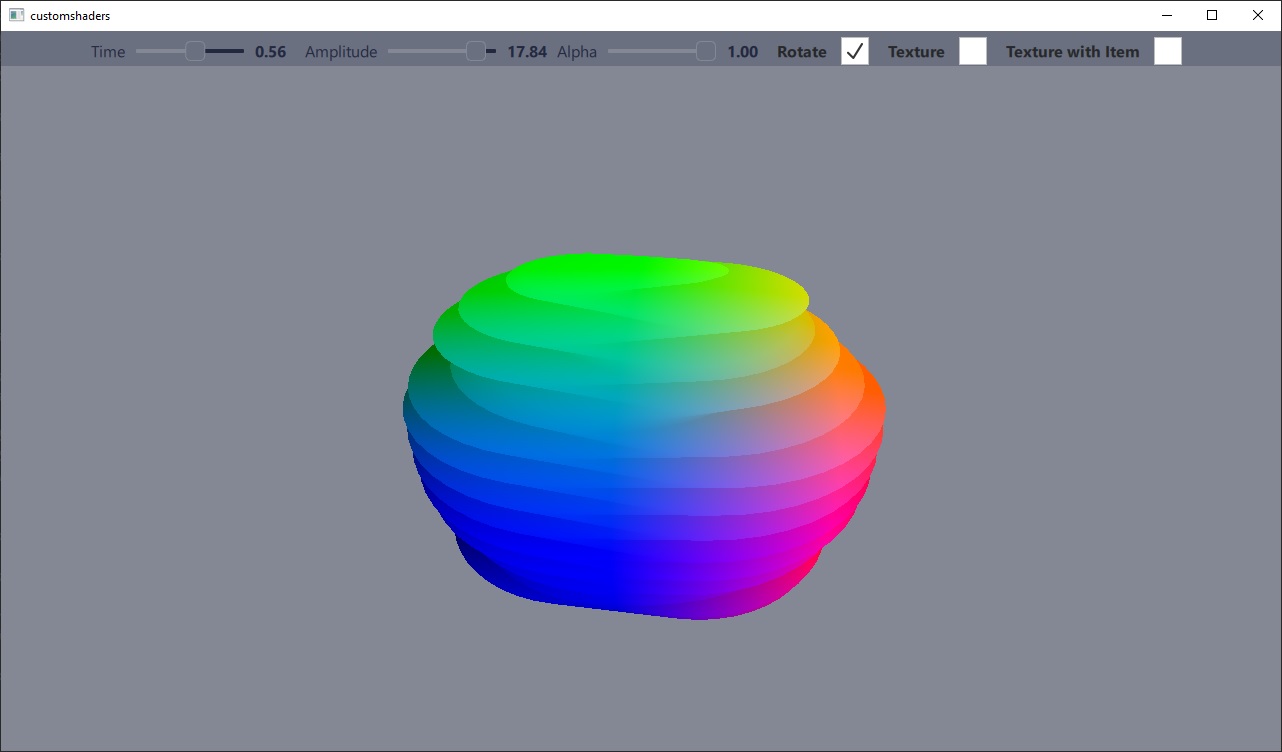
Qt Quick 3D - 커스텀 셰이더 예제
커스텀 버텍스 및 프래그먼트 셰이더를 사용하는 방법을 보여줍니다.
이 예제에서는 완전히 커스텀 버텍스 및 조각 셰이더 코드가 포함된 머티리얼을 사용하는 방법을 보여줍니다.

이 예제는 커스텀 머 티리얼의 다른 그룹인 shaded 머티리얼을 셰이더 코드 스니펫이 대체하지 않고 PrincipledMaterial 를 보강하는 커스텀 머티리얼 예제에 대응하는 예제입니다.
커스텀 머티리얼 구현하기
이 예제에서는 사인 함수에 따라 버텍스 셰이더에 의해 메시가 변형됩니다. 최종 결과는 사인 함수의 시간 및 진폭 값에 해당하는 두 개의 슬라이더로 제어됩니다.
조각 셰이더는 정점의 위치 값에 따라 메시의 색상을 지정하는 데 사용됩니다. 텍스처링이 있는 버전과 없는 버전의 두 가지 프래그먼트 셰이더가 포함되어 있습니다. 텍스처 버전은 이미지 파일 또는 라이브 Qt Quick 레이어에서 소스인 텍스처를 샘플링합니다.
이 머티리얼은 기본 조명 또는 그림자 시스템에 참여하지 않으므로 shadingMode 속성이 CustomMaterial.Unshaded 으로 설정되어 있습니다.
커스텀 머티리얼 기능에 대한 자세한 설명은 CustomMaterial 을 참조하세요.
CustomMaterial {
    id: root
    property real time: 0.0
    property real amplitude: 5.0
    property real alpha: 1.0

    property bool texturing: false
    property bool textureFromItem: false
    property Item texSrc
    Texture {
        id: texFromFile
        source: "qt_logo.png"
    }
    Texture {
        id: texFromItem
        sourceItem: root.texSrc
    }
    property TextureInput tex: TextureInput {
        enabled: root.texturing
        texture: root.textureFromItem ? texFromItem : texFromFile
    }

    shadingMode: CustomMaterial.Unshaded
    sourceBlend: root.alpha < 1.0 ? CustomMaterial.SrcAlpha : CustomMaterial.NoBlend
    destinationBlend: root.alpha < 1.0 ? CustomMaterial.OneMinusSrcAlpha : CustomMaterial.NoBlend
    cullMode: CustomMaterial.BackFaceCulling

    vertexShader: "example.vert"
    fragmentShader: root.texturing ? "example_tex.frag" : "example.frag"
}
사용자 정의 재질 사용
사용자 지정 셰이더를 사용하는 사용자 지정 머티리얼은 다른 머티리얼과 동일한 방식으로 사용됩니다. 셰이더의 유니폼은 QML 속성 바인딩을 통해 쉽게 업데이트할 수 있습니다.
Model {
    position: Qt.vector3d(0, 0, 0)
    NumberAnimation on eulerRotation.y {
        from: 0
        to: 360
        duration: 3000
        loops: -1
        running: control.animateRotation
    }
    scale: Qt.vector3d(2, 2, 2)
    source: "#Sphere"
    materials: [
        ExampleMaterial {
            id: exampleMaterial
            time: control.time
            amplitude: control.amplitude
            alpha: control.alpha
            texturing: control.texturing
            textureFromItem: control.textureFromItem
            texSrc: Rectangle {
                layer.enabled: true
                layer.textureMirroring: ShaderEffectSource.NoMirroring
                visible: false
                SequentialAnimation on color {
                    ColorAnimation { from: "black"; to: "yellow"; duration: 2000 }
                    ColorAnimation { from: "yellow"; to: "cyan"; duration: 1000 }
                    ColorAnimation { from: "cyan"; to: "black"; duration: 500 }
                    loops: -1
                }
                width: 512
                height: 512
                Image {
                    source: "qt_logo.png"
                    anchors.centerIn: parent
                }
            }
        }
    ]
}
© 2025 The Qt Company Ltd. Documentation contributions included herein are the copyrights of their respective owners. The documentation provided herein is licensed under the terms of the GNU Free Documentation License version 1.3 as published by the Free Software Foundation. Qt and respective logos are trademarks of The Qt Company Ltd. in Finland and/or other countries worldwide. All other trademarks are property of their respective owners.

