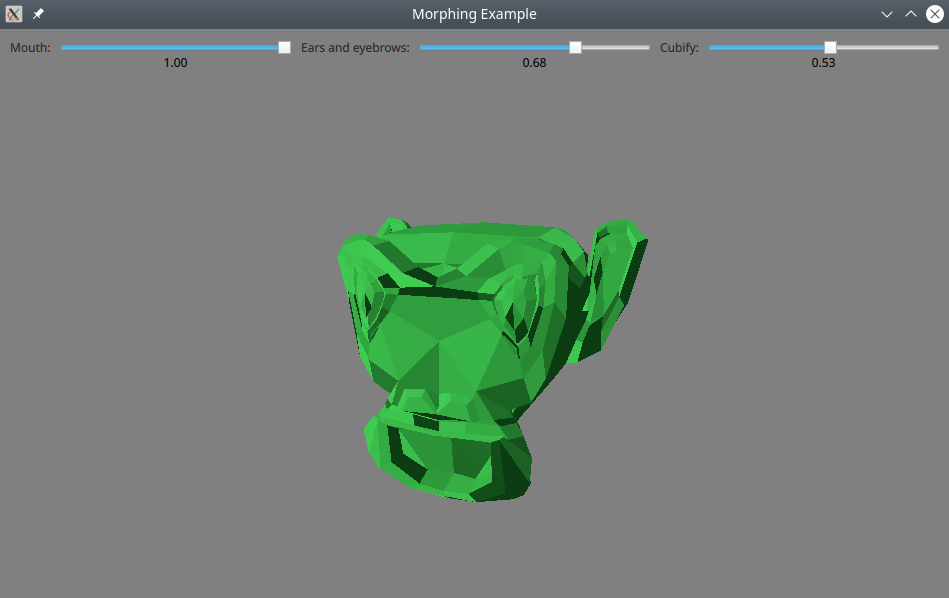
Qt Quick 3D - 모핑 예제
Qt Quick 3D 에서 모핑 애니메이션을 제어하는 방법을 보여줍니다.

이 예제는 외부 툴에서 임포트한 모델에서 모핑 애니메이션을 제어하는 방법을 보여줍니다.
메시 만들기
모델의 메쉬는 Blender 3D 모델링 도구를 사용하여 만들었습니다. 메시에는 기본 모양 외에도 세 개의 모프 타깃(Blender에서는 모양 키라고 함)이 포함되어 있습니다.

블렌더에서 glTF 파일로 내보낸 후 발삼을 사용하여 임포트했습니다.
모프 타깃 제어하기
일반적으로 모핑은 타임라인 애니메이션 또는 프로퍼티 애니메이션으로 제어합니다. 이 예제에서는 슬라이더를 사용하여 다양한 가중치 조합을 자유롭게 실험할 수 있도록 했습니다:
            Label { text: "Mouth:"; }
            RealSlider {
                id: mouthSlider
                from: 0.0
                to: 1.0
            }
            Label { text: "Ears and eyebrows:" }
            RealSlider {
                id: earSlider
                from: 0.0
                to: 1.0
            }
            Label { text: "Cubify:" }
            RealSlider {
                id: cubeSlider
                from: 0.0
                to: 1.0
            }
(RealSlider 는 부동 소수점 값을 제공하는 간단한 슬라이더입니다. 효과 예제에서 차용한 것입니다.)
메시의 각 타깃에 대해 MorphTarget 을 정의합니다. 모프 타깃은 모핑을 제어하기 위해 바인딩하는 오브젝트입니다. 일반적으로 애니메이션이 적용되지만 이 예제에서는 슬라이더 값에 바인딩합니다:
        MorphTarget {
            id: morphtarget0
            weight: mouthSlider.value
            attributes: MorphTarget.Position | MorphTarget.Normal
        }
        MorphTarget {
            id: morphtarget1
            weight: earSlider.value
            attributes: MorphTarget.Position | MorphTarget.Normal
        }
        MorphTarget {
            id: morphtarget2
            weight: cubeSlider.value
            attributes: MorphTarget.Position | MorphTarget.Normal
        }
마지막으로 모델을 생성하고 모프 타깃을 메시의 타깃에 바인딩합니다:
        Model {
            source: "suzanne.mesh"
            morphTargets: [
                morphtarget0,
                morphtarget1,
                morphtarget2
            ]
            materials: PrincipledMaterial {
                baseColor: "#41cd52"
                roughness: 0.1
            }
            SequentialAnimation on eulerRotation.y {
                NumberAnimation { from: -45; to: 45; duration: 10000 }
                NumberAnimation { from: 45; to: -45; duration: 10000 }
                loops: Animation.Infinite
            }
        }
타깃은 목록에서 위치에 따라 일치하며 이름은 중요하지 않습니다.
© 2025 The Qt Company Ltd. Documentation contributions included herein are the copyrights of their respective owners. The documentation provided herein is licensed under the terms of the GNU Free Documentation License version 1.3 as published by the Free Software Foundation. Qt and respective logos are trademarks of The Qt Company Ltd. in Finland and/or other countries worldwide. All other trademarks are property of their respective owners.

