Qt Quick 3D - 简单换肤示例
演示如何在Qt Quick 3D 中渲染简单的换肤动画。
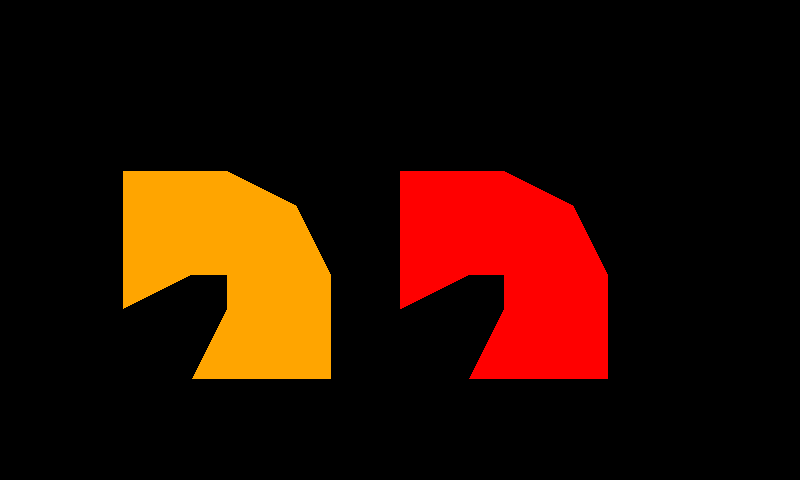
一般来说,大多数皮肤动画都是由建模工具设计的,Quick3D 还可通过Balsam 导入器支持 glTF 格式的皮肤动画。 Qt Design Studio.本示例展示了如何在 Quick3D 中使用皮肤动画的各个属性。
注: 本例中的所有数据均来自gfTF-Tutorial Skins。
制作蒙皮几何体。
为使用自定义几何体数据,我们将定义一个包含位置、关节、权重和索引的几何体。
Q_OBJECT
QML_NAMED_ELEMENT(SkinGeometry)
Q_PROPERTY(QList<QVector3D> positions READ positions WRITE setPositions NOTIFY positionsChanged)
Q_PROPERTY(QList<qint32> joints READ joints WRITE setJoints NOTIFY jointsChanged)
Q_PROPERTY(QList<float> weights READ weights WRITE setWeights NOTIFY weightsChanged)
Q_PROPERTY(QList<quint32> indexes READ indexes WRITE setIndexes NOTIFY indexesChanged)
每个位置是一个顶点位置,每个顶点有 4 个关节的索引和相应权重。
在 QML 中设置蒙皮数据
位置数据和索引
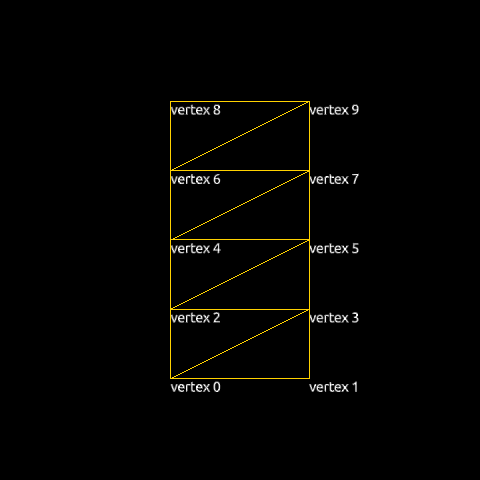
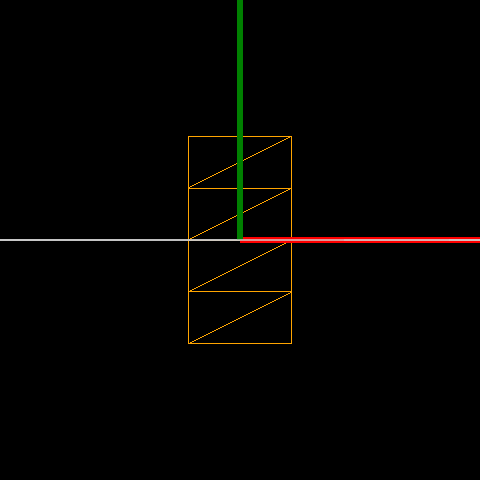
我们将绘制有 10 个顶点的 8 个三角形。下表显示了 QML 代码和顶点的可视化。
| QML 代码 | 可视化 |
|---|---|
positions: [ Qt.vector3d(0.0, 0.0, 0.0), // vertex 0 Qt.vector3d(1.0, 0.0, 0.0), // vertex 1 Qt.vector3d(0.0, 0.5, 0.0), // vertex 2 Qt.vector3d(1.0, 0.5, 0.0), // vertex 3 Qt.vector3d(0.0, 1.0, 0.0), // vertex 4 Qt.vector3d(1.0, 1.0, 0.0), // vertex 5 Qt.vector3d(0.0, 1.5, 0.0), // vertex 6 Qt.vector3d(1.0, 1.5, 0.0), // vertex 7 Qt.vector3d(0.0, 2.0, 0.0), // vertex 8 Qt.vector3d(1.0, 2.0, 0.0) // vertex 9 ] indexes: [ 0, 1, 3, // triangle 0 0, 3, 2, // triangle 1 2, 3, 5, // triangle 2 2, 5, 4, // triangle 3 4, 5, 7, // triangle 4 4, 7, 6, // triangle 5 6, 7, 9, // triangle 6 6, 9, 8 // triangle 7 ] |
|
关节和权重数据
在剥皮过程中,每个顶点都需要指定对其有影响的关节的索引。对于每个顶点,我们将这些索引存储为 4D 向量(Qt 将可能影响顶点的关节数限制为 4)。我们的几何体将只有两个关节节点(0 和 1),但由于我们使用的是 4D 向量,因此我们将其余两个关节索引及其权重设置为 0。
joints: [
    0, 1, 0, 0, // vertex 0
    0, 1, 0, 0, // vertex 1
    0, 1, 0, 0, // vertex 2
    0, 1, 0, 0, // vertex 3
    0, 1, 0, 0, // vertex 4
    0, 1, 0, 0, // vertex 5
    0, 1, 0, 0, // vertex 6
    0, 1, 0, 0, // vertex 7
    0, 1, 0, 0, // vertex 8
    0, 1, 0, 0  // vertex 9
]
相应的权重值如下。
weights: [
    1.00, 0.00, 0.0, 0.0, // vertex 0
    1.00, 0.00, 0.0, 0.0, // vertex 1
    0.75, 0.25, 0.0, 0.0, // vertex 2
    0.75, 0.25, 0.0, 0.0, // vertex 3
    0.50, 0.50, 0.0, 0.0, // vertex 4
    0.50, 0.50, 0.0, 0.0, // vertex 5
    0.25, 0.75, 0.0, 0.0, // vertex 6
    0.25, 0.75, 0.0, 0.0, // vertex 7
    0.00, 1.00, 0.0, 0.0, // vertex 8
    0.00, 1.00, 0.0, 0.0  // vertex 9
]
骨架和关节层次结构
为了剥皮,我们在Model 中添加了骨架属性:
skeleton: qmlskeleton
Skeleton {
    id: qmlskeleton
    Joint {
        id: joint0
        index: 0
        skeletonRoot: qmlskeleton
        Joint {
            id: joint1
            index: 1
            skeletonRoot: qmlskeleton
            eulerRotation.z: 45
        }
    }
}
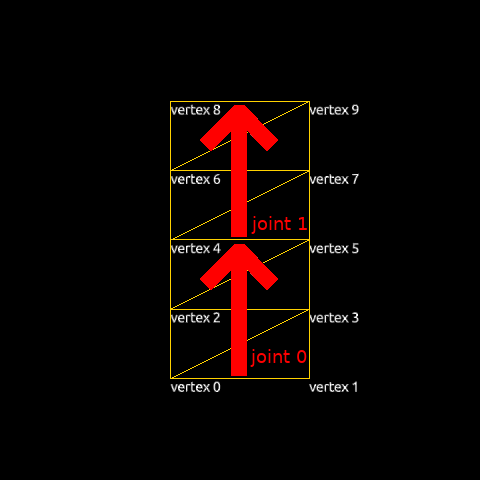
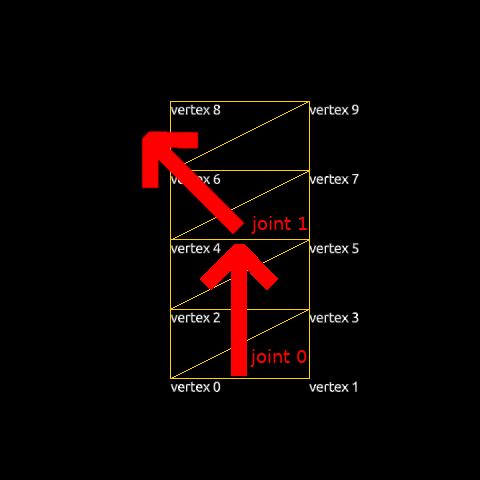
两个Joint在Skeleton 中连接。我们将把joint1 绕 Z 轴旋转 45 度。下面的图片显示了几何体中关节的位置以及初始骨骼的方向。
| 几何体中的关节 | 初始骨架 |
|---|---|
|
|
使用逆绑定姿势放置模型
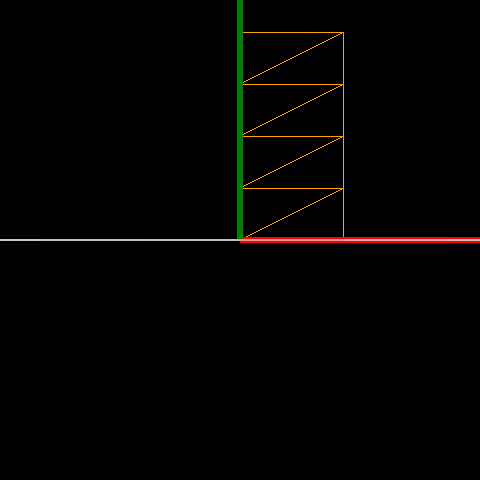
一旦模型有了有效的skeleton ,就有必要定义骨架的初始姿态。这定义了骨骼动画的基线:从初始位置移动关节会导致模型顶点根据joints 和weights 表移动。每个节点的几何形状都是以一种特殊的方式指定的:Model.inverseBindPoses 设置为将关节变换到初始位置的矩阵的逆矩阵。为了将其移动到中心,我们只需为两个关节设置相同的变换:矩阵沿 x 轴平移 -0.5,沿 y 轴平移 -1.0。
| QML 代码 | 初始位置 | 结果 |
|---|---|---|
inverseBindPoses: [ Qt.matrix4x4(1, 0, 0, -0.5, 0, 1, 0, -1, 0, 0, 1, 0, 0, 0, 0, 1), Qt.matrix4x4(1, 0, 0, -0.5, 0, 1, 0, -1, 0, 0, 1, 0, 0, 0, 0, 1) ] |
|
|
使用关节节点制作动画
现在我们已经准备好一个蒙皮对象,可以通过更改Joints 的属性(尤其是eulerRotation)来制作动画。
Timeline {
    id: timeline0
    startFrame: 0
    endFrame: 1000
    currentFrame: 0
    enabled: true
    animations: [
        TimelineAnimation {
            duration: 5000
            from: 0
            to: 1000
            running: true
        }
    ]

    KeyframeGroup {
        target: joint1
        property: "eulerRotation.z"

        Keyframe {
            frame: 0
            value: 0
        }
        Keyframe {
            frame: 250
            value: 90
        }
        Keyframe {
            frame: 750
            value: -90
        }
        Keyframe {
            frame: 1000
            value: 0
        }
    }
}
更完整的蒙皮方法
骨架是一种资源,但它的层次结构和位置用于模型的转换。
我们可以使用资源类型Skin 来代替Skeleton 节点。由于Skin 类型不是场景中的空间节点,因此其位置不会影响模型。一个最小的工作 Skin 节点通常包括一个节点列表、关节和一个可选的反向绑定矩阵 inverseBindPoses。
使用Skin 项,前面的示例可以这样编写:
skin: Skin {
    id: skin0
    joints: [
        joint0,
        joint1
    ]
    inverseBindPoses: [
        Qt.matrix4x4(1, 0, 0, -0.5,
                     0, 1, 0, -1,
                     0, 0, 1, 0,
                     0, 0, 0, 1),
        Qt.matrix4x4(1, 0, 0, -0.5,
                     0, 1, 0, -1,
                     0, 0, 1, 0,
                     0, 0, 0, 1)
    ]
}
从代码片段中我们可以看到,Skin 只有两个列表,一个关节和一个 inverseBindPoses,这与Skeleton 的方法不同,因为它没有任何层次结构,只是使用现有节点的层次结构。
© 2025 The Qt Company Ltd. Documentation contributions included herein are the copyrights of their respective owners. The documentation provided herein is licensed under the terms of the GNU Free Documentation License version 1.3 as published by the Free Software Foundation. Qt and respective logos are trademarks of The Qt Company Ltd. in Finland and/or other countries worldwide. All other trademarks are property of their respective owners.

