C
Materials and Shaders
Materials and shaders define how object surfaces are rendered in Studio and Viewer.
Note: Basic materials are using the .materialdef file extension, while shaders are using the .shader file extension. For backward compatibility, also the .material file extension is valid for shaders.
Materials
There are three different types of materials:
Basic Material
The basic material is used for materials without any property animations. You can create your own basic materials, save them in your project, and assign them to objects. Basic materials are saved as .materialdef files in the materials folder of your project.

Animatable Material
The animatable material is used when you want to animate any property of the material. Such property can be i.e. colors, opacity, or specularity. Animatable materials are not saved in your project. To edit an animatable material, you need to edit it on an object where it is assigned or referenced.
Referenced Material
The referenced material is used when you want to use the same animatable material in more than one material slot.
Read more about animatable and referenced materials in the animatable materials section.
Material Slots
By default, a 3D model in Studio has at least one material slot assigned to it. This is true for all the basic objects and all imported objects that have been exported with none or one material slot.

If an imported 3D model has been exported with many material slots, these will be imported to Studio.
However, no material will be assigned to the material slots by default. You will have to create a material, and then assign it to the desired material slot.

Create a Basic Material
To create a new basic material, do one of the following:
- Right-click the materials folder in the project palette and select Create > Basic Material from the context menu.
- A new material is now created in the materials folder. In the inspector palette you will see all the properties of the material. Changes to properties are immediate, you do not need to save. For a full description on all material properties, see the Material Properties documentation.
- In the scene graph, select a material slot.
- In the inspector palette, click the New button. This will create a new material and assign it to the selected material slot immediately.
Note: Instead of clicking the New button, you can click the Duplicate button. This will create a new material with the properties of the current material.
Apply a Material to an Object
To apply a material to an object, do one of the following:
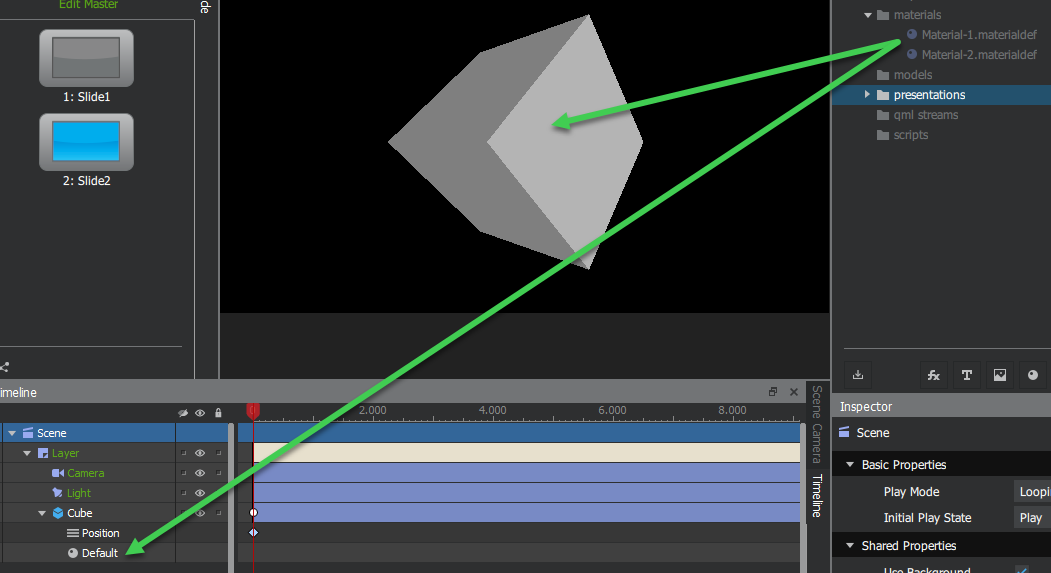
- Drag a material from the project palette to either an object in the scene view, or to a material slot in the scene graph.
Note: Dropping the material on an object with more than one material slot will assign the material to the top-most material slot.
- First, select the material slot in the scene graph. Then, in the inspector palette, set desired material as the Source Material property.

Edit a Material
To edit a material, do one of the following:
- Double-click the material in the project palette.
- Right-click the material in the project palette and select Edit.
- Select a material slot in the scene graph, where the material is applied.
Now, edit the desired properties in the inspector palette. For a description of all material properties, see the inspector palette section. Changes to the properties are immediate, you do not need to save.
Working with Texture Maps
You can apply texture maps for a material by setting an image as the desired map property in the inspector palette.
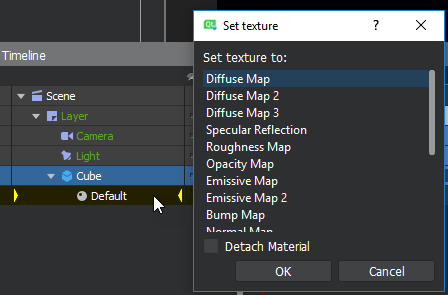
Additionally, you can apply a texture map by dragging the image from the project palette to the material in the scene graph. When you drop the image on the material, you can select which type of map you want to apply the image as.
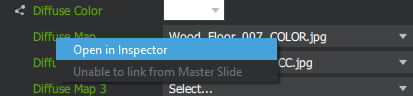
To edit a texture map, right-click the map property name in the inspector palette and select Open in Inspector from the context menu.
For a description of all image map properties, see the inspector palette section.
Animatable Materials
You can create keyframe animations to material properties. To do this, you need to use a material of animatable material type.
You cannot create and save animatable materials the way you can with basic materials. An animatable material is created directly under an object. To re-use the same material on another object, you need to reference the material.
Create an Animatable Material
To create an animatable material, do one of the following:
- In the scene graph, select the material slot of an object.
- In the inspector palette, set the Material Type to animatable material.
- Right-click a material slot in the scene graph and select Make Animatable from the context menu.
Note: If you already have a basic material assigned to the material slot, the properties from that material will be copied to the animatable material.
Now you can animate desired properties of the material.
Referenced Materials
To re-use an animatable material on another object, follow the steps below:
- In the scene graph, select the material slot of an object.
- In the inspector palette, set the Material Type to referenced material.
- Then set the Reference Material to the desired material. This drop-down list contains all animatable materials in your project.
To edit any property of an animatable material, you can edit it on any object where it is in use. Any edit will apply to all instances of the material.
Shaders
Shaders are arbitrary GLSL Shaders, wrapped in a file format providing an artist-friendly interface for adjusting properties in Studio.
Studio comes with a set of pre-defined shaders, you find these in the material library. You can also write your own shaders.
Import Shaders
To import a shader from the material library, follow the steps below:
- Click the material library icon
 in the bottom of the project palette.
 - Select the desired shader (
Ctrl + left mouse clickto multi-select), then press Ok. - Once imported, the shader will be located in the materials folder. Shaders are using the file extension
.shader.
Apply a Shader
To apply a shader to an object, follow the steps below:
- The shader needs to be applied to a material. Create a material for the shader.
- Set the desired shader as the Shader property for the material.

Edit a Shader
You cannot edit shader properties directly. Once you assign a shader to a material, the shader properties are copied to the material where you can edit them the same way you edit any material.
Write Your Own Shader
Read more about writing shaders in the Custom Materials and Effects section.
Available under certain Qt licenses.
Find out more.