
Qt 3D: 간단한 C++ 예제
Qt 3D 에서 장면을 렌더링하는 방법을 보여주는 C++ 애플리케이션입니다.
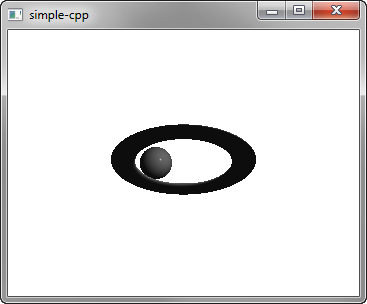
이간단한 예제는 Qt 3D 에서 장면을 렌더링하는 방법을 보여줍니다.
예제 실행
다음 위치에서 예제를 실행할 수 있습니다:
- Qt Creator
Welcome 모드를 열고 Examples 에서 예제를 선택하십시오. 자세한 내용은 Qt Creator: 튜토리얼: 빌드 및 실행을 참조하십시오.
- Qt Extension for Visual Studio Code
Command Palette 에서 Qt: Open Qt examples 명령을 실행한 후, 목록에서 예제를 선택합니다. 자세한 내용은 Qt Extension for Visual Studio Code: 튜토리얼: 빌드 및 실행을 참조하십시오.
씬 설정
main.cpp 파일에서 씬을 설정합니다.
Q3D Core, Q3D Render, Qt 3D Input 및 Qt 3D Extras 모듈의 클래스와 함수를 사용하려면 다음 클래스를 포함해야 합니다:
#include <Qt3DCore/QEntity>
#include <Qt3DRender/QCamera>
#include <Qt3DRender/QCameraLens>
#include <Qt3DCore/QTransform>
#include <Qt3DCore/QAspectEngine>

#include <Qt3DInput/QInputAspect>

#include <Qt3DRender/QRenderAspect>
#include <Qt3DRender/QGeometryRenderer>
#include <Qt3DExtras/QForwardRenderer>
#include <Qt3DExtras/QPhongMaterial>
#include <Qt3DExtras/QSphereMesh>
#include <Qt3DExtras/QTorusMesh>
먼저, 씬을 설정하고 루트 엔티티를 지정합니다:
Phong 렌더링에 사용할 머티리얼을 지정합니다:
Qt3DRender::QMaterial *material = new Qt3DExtras::QPhongMaterial(rootEntity);루트 엔티티는 단순히 빈 껍데기에 불과하며, 그 동작은 참조하는 컴포넌트에 의해 정의됩니다. 토러스 엔티티와 그 메쉬, 트랜스폼, 머티리얼 컴포넌트를 지정합니다:
    Qt3DCore::QEntity *torusEntity = new Qt3DCore::QEntity(rootEntity);
    Qt3DExtras::QTorusMesh *torusMesh = new Qt3DExtras::QTorusMesh;
    torusMesh->setRadius(5);
    torusMesh->setMinorRadius(1);
    torusMesh->setRings(100);
    torusMesh->setSlices(20);

    Qt3DCore::QTransform *torusTransform = new Qt3DCore::QTransform;
    torusTransform->setScale3D(QVector3D(1.5, 1, 0.5));
    torusTransform->setRotation(QQuaternion::fromAxisAndAngle(QVector3D(1, 0, 0), 45.0f));

    torusEntity->addComponent(torusMesh);
    torusEntity->addComponent(torusTransform);
    torusEntity->addComponent(material);
또한 구 엔티티와 그 컴포넌트도 지정합니다:
    Qt3DCore::QEntity *sphereEntity = new Qt3DCore::QEntity(rootEntity);
    Qt3DExtras::QSphereMesh *sphereMesh = new Qt3DExtras::QSphereMesh;
    sphereMesh->setRadius(3);
    sphereMesh->setGenerateTangents(true);

    Qt3DCore::QTransform *sphereTransform = new Qt3DCore::QTransform;
    OrbitTransformController *controller = new OrbitTransformController(sphereTransform);
    controller->setTarget(sphereTransform);
    controller->setRadius(20.0f);

    QPropertyAnimation *sphereRotateTransformAnimation = new QPropertyAnimation(sphereTransform);
    sphereRotateTransformAnimation->setTargetObject(controller);
    sphereRotateTransformAnimation->setPropertyName("angle");
    sphereRotateTransformAnimation->setStartValue(QVariant::fromValue(0));
    sphereRotateTransformAnimation->setEndValue(QVariant::fromValue(360));
    sphereRotateTransformAnimation->setDuration(10000);
    sphereRotateTransformAnimation->setLoopCount(-1);
    sphereRotateTransformAnimation->start();

    sphereEntity->addComponent(sphereMesh);
    sphereEntity->addComponent(sphereTransform);
    sphereEntity->addComponent(material);
속성 애니메이션을 사용하여 구의 변환을 애니메이션화합니다.
마지막으로, ` Qt 3D ` 창을 사용하는 ` Qt GUI ` 애플리케이션을 초기화합니다:
int main(int argc, char* argv[])
{
    QGuiApplication app(argc, argv);
    Qt3DExtras::Qt3DWindow view;

    Qt3DCore::QEntity *scene = createScene();

    // Camera
    Qt3DRender::QCamera *camera = view.camera();
    camera->lens()->setPerspectiveProjection(45.0f, 16.0f/9.0f, 0.1f, 1000.0f);
    camera->setPosition(QVector3D(0, 0, 40.0f));
    camera->setViewCenter(QVector3D(0, 0, 0));

    // For camera controls
    Qt3DExtras::QOrbitCameraController *camController = new Qt3DExtras::QOrbitCameraController(scene);
    camController->setLinearSpeed( 50.0f );
    camController->setLookSpeed( 180.0f );
    camController->setCamera(camera);

    view.setRootEntity(scene);
    view.show();

    return app.exec();
}© 2026 The Qt Company Ltd. Documentation contributions included herein are the copyrights of their respective owners. The documentation provided herein is licensed under the terms of the GNU Free Documentation License version 1.3 as published by the Free Software Foundation. Qt and respective logos are trademarks of The Qt Company Ltd. in Finland and/or other countries worldwide. All other trademarks are property of their respective owners.
