Qt Quick Particles 예제 - 시스템
QML 파티클 시스템에서 어펙터를 사용한 예제 모음입니다.
파티클 시스템에서 어펙터를 사용하는 것과 관련된 작은 QML 예제 모음입니다. 각 예제는 특정 유형이나 기능을 강조하는 작은 QML 파일입니다.
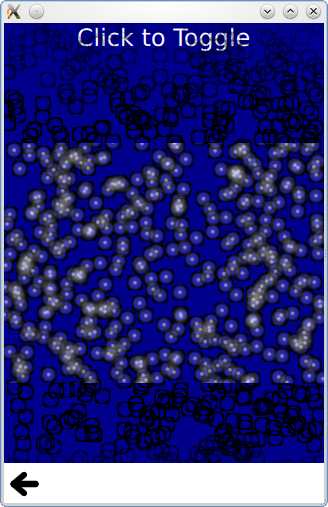
동적 비교에서는 파티클 시스템을 사용하는 것과 이미지 유형을 동적으로 인스턴스화하는 다음 코드를 사용하여 유사한 효과를 얻는 것을 비교합니다.
Item {
    id: fakeEmitter
    function burst(number) {
        while (number > 0) {
            let item = fakeParticle.createObject(root)
            item.lifeSpan = Math.random() * 5000 + 5000
            item.x = Math.random() * (root.width / 2) + (root.width / 2)
            item.y = 0
            number--
        }
    }

    Component {
        id: fakeParticle
        Image {
            id: container
            property int lifeSpan: 10000
            width: 32
            height: 32
            source: "qrc:///particleresources/glowdot.png"
            PropertyAnimation on y { from: -16; to: root.height - 16; duration: container.lifeSpan; running: true }
            SequentialAnimation on opacity {
                running: true
                NumberAnimation { from: 0; to: 1; duration: 500 }
                PauseAnimation { duration: container.lifeSpan - 1000 }
                NumberAnimation { from: 1; to: 0; duration: 500 }
                ScriptAction { script: container.destroy(); }
            }
        }
    }
}
이미지 객체의 색상을 임의로 지정할 수 없다는 점에 유의하세요.
시작 및 중지는 단순히 ParticleSystem 의 실행 및 일시 중지 상태를 설정합니다. 시스템이 중지 또는 일시 중지된 상태에서는 시뮬레이션을 수행하지 않지만 다시 시작하면 시뮬레이션이 처음부터 다시 시작되고 일시 중지를 해제하면 시뮬레이션이 중단된 지점부터 다시 시작됩니다.
시간 제한 그룹 변경은 ParticleGroup 유형을 강조하는 예시입니다. 일반적으로 문자열 이름으로 그룹을 참조하는 것으로 충분하지만, 그룹에 속성을 설정하여 추가 효과를 적용할 수 있습니다. 첫 번째 그룹에는 가변 기간이 있지만 항상 두 번째 그룹으로 전환됩니다.
ParticleGroup {
    name: "fire"
    duration: 2000
    durationVariation: 2000
    to: {"splode":1}
}
두 번째 그룹은 TrailEmitter, 세 번째 그룹은 고정된 지속 시간을 갖습니다. TrailEmitter 을 ParticleGroup 의 직접 자식으로 배치하면 자동으로 해당 그룹이 팔로우하도록 선택됩니다.
ParticleGroup {
    name: "splode"
    duration: 400
    to: {"dead":1}
    TrailEmitter {
        group: "works"
        emitRatePerParticle: 100
        lifeSpan: 1000
        maximumEmitted: 1200
        size: 8
        velocity: AngleDirection {angle: 270; angleVariation: 45; magnitude: 20; magnitudeVariation: 20;}
        acceleration: PointDirection {y:100; yVariation: 20}
    }
}
세 번째 그룹에는 어펙터가 직접 자식으로 있으므로 어펙터가 자동으로 이 그룹을 타겟팅하게 됩니다. 어펙터는 파티클이 이 그룹에 들어가자마자 이 파티클의 x, y 위치를 사용하여 다른 이미터에서 버스트 함수를 호출할 수 있음을 의미합니다.
ParticleGroup {
    name: "dead"
    duration: 1000
    Affector {
        once: true
        onAffected: (x, y)=> worksEmitter.burst(400,x,y)
    }
}
TrailEmitter 이 여러 이미터에 대한 요구 사항에 적합하지 않은 경우 동일한 ParticleSystem 및 이미지 파티클을 사용하면서 이미터를 동적으로 생성할 수도 있습니다.
for (var i = 0; i < 8; i++) {
    let obj = emitterComp.createObject(root)
    obj.x = x
    obj.y = y
    obj.targetX = Math.random() * 240 - 120 + obj.x
    obj.targetY = Math.random() * 240 - 120 + obj.y
    obj.life = Math.round(Math.random() * 2400) + 200
    obj.emitRate = Math.round(Math.random() * 32) + 32
    obj.go()
}
이 효과인 날아다니는 무지개 창은 TrailEmitter 을 사용하는 것이 더 좋습니다. 이 예제에서는 개념을 보다 간단하게 보여주기 위해 동적 이미터로만 처리했습니다.
다중 페인터는 개별 파티클의 페인트 순서를 제어하는 방법을 보여줍니다. 하나의 이미지페인터 내에서 파티클의 페인트 순서는 엄격하게 정의되어 있지 않지만, ImageParticle 오브젝트는 일반적인 Z 순서 규칙을 따릅니다. Qt Quick 항목에 대한 일반적인 Z 순서 규칙을 따릅니다. 이 예제에서는 동일한 논리적 파티클의 다른 부분을 각각 칠하는 한 쌍의 ImageParticles를 사용하여 검은색 테두리 위의 파티클 내부를 칠할 수 있습니다.
© 2026 The Qt Company Ltd. Documentation contributions included herein are the copyrights of their respective owners. The documentation provided herein is licensed under the terms of the GNU Free Documentation License version 1.3 as published by the Free Software Foundation. Qt and respective logos are trademarks of The Qt Company Ltd. in Finland and/or other countries worldwide. All other trademarks are property of their respective owners.
