Qt Quick 3D - 헬로큐브 예제
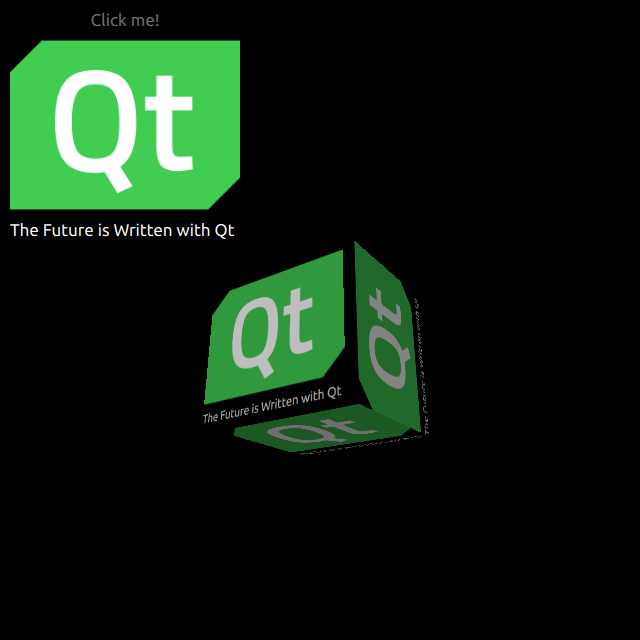
Qt Quick 3D 에서 2D와 3D 오브젝트를 함께 렌더링하는 방법을 보여줍니다.

HelloCube는 Qt Quick 3D 에서 2D 항목이 있는 3D 큐브를 렌더링하는 방법을 보여줍니다.
2D 항목 그리기
main.qml 파일에서 전체 장면을 설정합니다.
QtQuick3D 모듈의 유형을 사용하려면 이를 임포트해야 합니다:
import QtQuick3D
직사각형에 이미지와 텍스트가 있는 간단한 QtQuick 항목을 정의합니다.
Image {
    anchors.fill: parent
    source: "qt_logo.png"
}
Text {
    anchors.bottom: parent.bottom
    anchors.left: parent.left
    color: "white"
    font.pixelSize: 17
    text: qsTr("The Future is Written with Qt")
}
이 간단한 직사각형에는 수직으로 뒤집는 두 개의 애니메이션이 있습니다.
transform: Rotation {
    id: rotation
    origin.x: qt_logo.width / 2
    origin.y: qt_logo.height / 2
    axis { x: 1; y: 0; z: 0 }
}

PropertyAnimation {
    id: flip1
    target: rotation
    property: "angle"
    duration: 600
    to: 180
    from: 0
}
PropertyAnimation {
    id: flip2
    target: rotation
    property: "angle"
    duration: 600
    to: 360
    from: 180
}
3D 큐브 그리기
정육면체를 그리는 것은 매우 간단합니다. Camera 과 Light 을 정의한 후 Model 을 내장한 큐브를 만듭니다. 이 예제에서는 이 큐브 표면에서 이전 2D 직사각형을 디퓨즈 Texture 로 렌더링합니다. 직사각형에서 layer.enabled 을 true 으로 설정합니다.
layer.enabled: true
이 속성을 활성화하면 2D 항목이 화면 밖의 표면으로 렌더링되어 큐브의 텍스처로 사용됩니다.
id: cube
source: "#Cube"
materials: PrincipledMaterial {
    baseColorMap: Texture {
        sourceItem: qt_logo
    }
}
eulerRotation.y: 90
© 2025 The Qt Company Ltd. Documentation contributions included herein are the copyrights of their respective owners. The documentation provided herein is licensed under the terms of the GNU Free Documentation License version 1.3 as published by the Free Software Foundation. Qt and respective logos are trademarks of The Qt Company Ltd. in Finland and/or other countries worldwide. All other trademarks are property of their respective owners.

