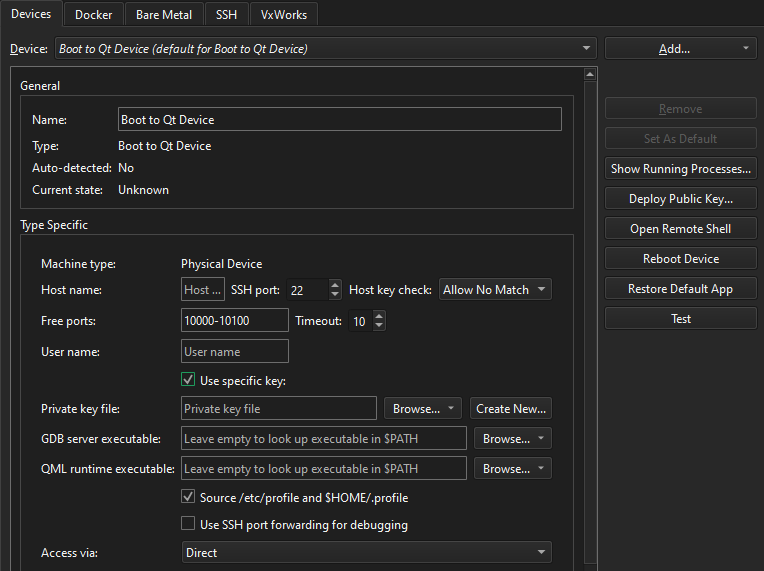
Boot to Qt デバイスを追加する
注: Boot to Qt プラグインを使用するには有効にしてください。
USBで接続したBoot to Qt デバイスがQt Creator で自動的に検出されない場合は、そのデバイスのクイックスタートガイドの指示に従ったかどうかを確認してください。
それでもデバイスのIPアドレスに到達できない場合は、そのデバイスへのネットワーク接続を作成します:
- 環境設定>Devices >Devices を選択します。

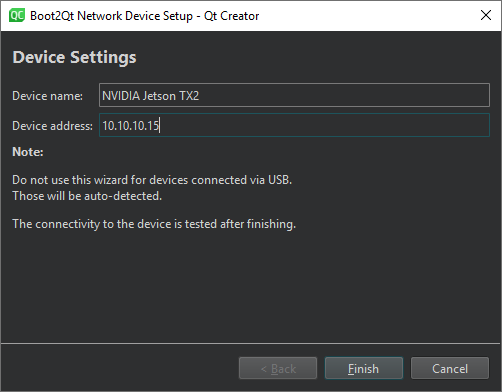
- Add >Boot2Qt Device を選択し、デバイスへのネットワーク接続を作成します。

- Device name に、接続の名前を入力します。
- Device address に、デバイスのホスト名または IP アドレスを入力します。この値が
%{Device:HostAddress}変数の値となります。 - Finish を選択して接続をテストし、デバイスを追加します。
ウィザードでは、SSH ポート番号のようなデフォルト値を持つパラメータは表示されません。これは、変数%{Device:SshPort} で利用可能です。
ウィザードを使用せずにデバイスを追加するには、Add ボタンのプルダウンメニューでBoot2Qt Device を選択します。
注: Ubuntu Linuxでは、開発ユーザー・アカウントがプラグインされたデバイスへのアクセス権を持っている必要があります。USB経由でデバイスへのアクセスを許可するには、Boot to Qt で説明されているように、新しい udev ルールを作成します:組み込みデバイスへのUSBアクセスを設定する。
デバイスの再起動
選択したデバイスを再起動するには、Reboot Device を選択します。
デフォルトアプリケーションの復元
デバイスにデフォルト・アプリケーションを復元するには、Restore Default App を選択します。
プラグインの有効化と無効化」、「How To: Develop forBoot to Qt 」、「Remote Debugging」、「Developing forBoot to Qt Devices」、「Boot to Qt: Setting Up USB Access to Embedded Devices」も参照してください 。
Copyright © The Qt Company Ltd. and other contributors. Documentation contributions included herein are the copyrights of their respective owners. The documentation provided herein is licensed under the terms of the GNU Free Documentation License version 1.3 as published by the Free Software Foundation. Qt and respective logos are trademarks of The Qt Company Ltd in Finland and/or other countries worldwide. All other trademarks are property of their respective owners.

