Tutorial: Qt Test application
This tutorial describes how to use Qt VS Tools with the Unit Test Explorer provided by Microsoft to visualize and run unit test cases. Write the test cases with the Qt Test framework.
Before you start
Before you start, you have to:
Create a Qt Test application
- Go to File > New > Project.
- Search for Qt Test Application.
- Select the project wizard, and then select Next.
- In Project name, enter QtTest, and then select OK.
- To acknowledge the Welcome dialog, select Next.
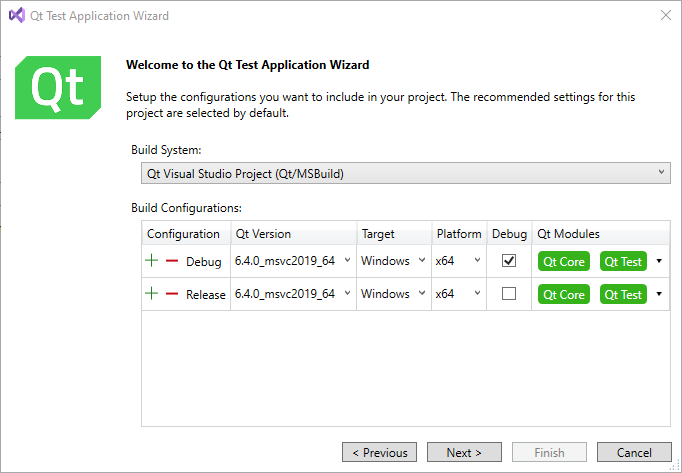
- Set up the Debug build configuration and select the modules to include in the project:

The modules that are typically needed in test application projects are selected by default.
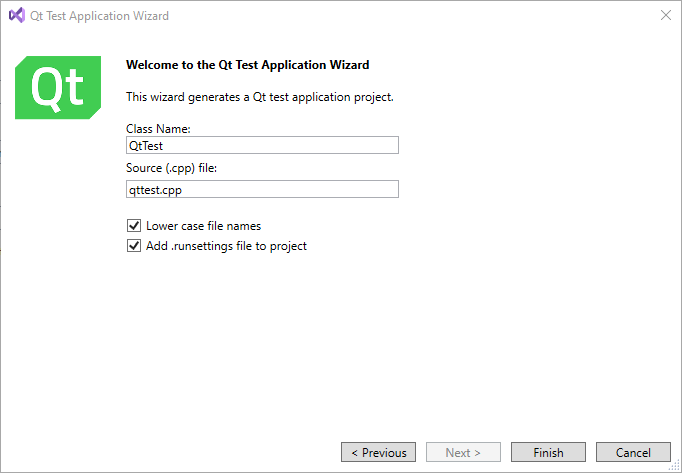
- Select Next to continue to the class creation page:

- Select Lower case filenames to only use lower case characters in the names of the generated files.
- Select Add .runsettings file to project to use a default .runsettings file for the application. To use a solution-wide .runsettings file, add a
QtTestrun configuration section, as instructed in Test Adapter settings. - Select Finish to create the project.
You now have a small working Qt Test application. Go to Test > Test Explorer (or press Ctrl+E, T) to open the Visual Studio Unit Test Explorer.
Write your test cases
Use functions and macros of the Qt Testing framework to define tests. The created test application provides a set of common functions, as well as one test function.
#include <QtTest>

class QtTest : public QObject
{
    Q_OBJECT

private slots:

    void initTestCase_data()
    {
        qDebug("Creates a global test data table.");
    }

    void initTestCase()
    {
        qDebug("Called before the first test function is executed.");
    }

    void init()
    {
        qDebug("Called before each test function is executed.");
    }

    void myTest()
    {
        QVERIFY(true); // check that a condition is satisfied
        QCOMPARE(1, 1); // compare two values
    }

    void cleanup()
    {
        qDebug("Called after every test function.");
    }

    void cleanupTestCase()
    {
        qDebug("Called after the last test function was executed.");
    }
};

QTEST_MAIN(QtTest)
#include "QtTest.moc"
Discover tests with Unit Test Explorer
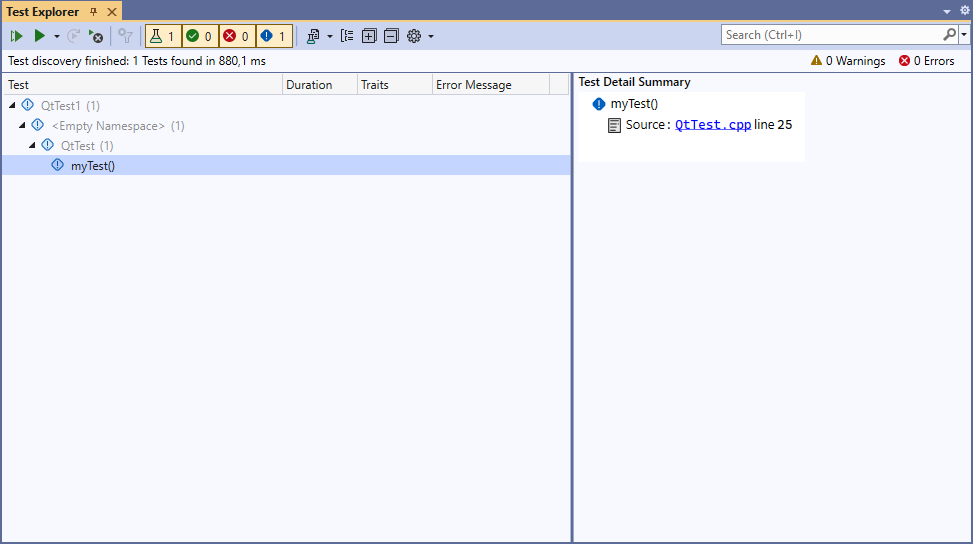
Now that you have test application project with test functions, use the Unit Test Explorer to discover and manage the test functions.
To build the solution, go to Build > Build Solution (or press Ctrl+Shift+B). This step is crucial as it compiles the test binaries that the Unit Test Explorer discovers.
The Unit Test Explorer automatically discovers tests after a successful build. If the tests do not appear, select Run All or Refresh on the Test Explorer toolbar to manually trigger test discovery.

Run and analyze tests with Unit Test Explorer
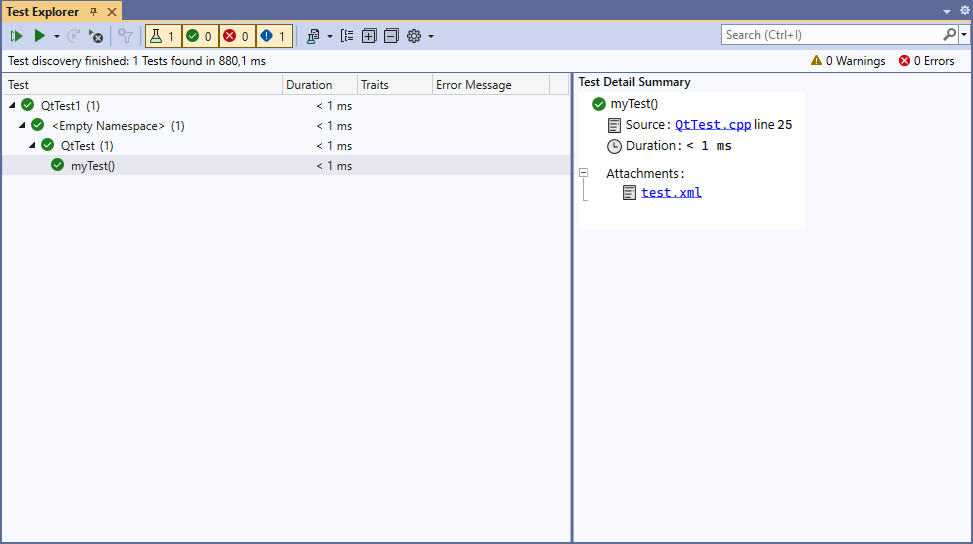
In the Unit Test Explorer, select Run All to run all tests. To run specific tests or test groups, select them from the list and select Run Selected Tests. Right-click on individual tests or test groups for more options, such as debugging specific tests.
The Unit Test Explorer displays the results of your tests, showing which tests passed or failed. For failed tests, select the test name to see detailed information, including error messages and stack traces. Use the filtering and grouping options in the Test Explorer to organize and manage your test results effectively.

Usually, Qt tests require a project-local or solution-wide.runsettings file for configuring various testing parameters and environments.
© 2025 The Qt Company Ltd. Documentation contributions included herein are the copyrights of their respective owners. The documentation provided herein is licensed under the terms of the GNU Free Documentation License version 1.3 as published by the Free Software Foundation. Qt and respective logos are trademarks of The Qt Company Ltd in Finland and/or other countries worldwide. All other trademarks are property of their respective owners.

