
5.3.4. Axivion Dashboard Server Access
5.3.4.1. Configuration
Connection to Axivion Dashboard Server
The first step after installing the plugin is to configure the access to the Axivion Dashboard Server
in the Eclipse preferences. To access the settings, use Window >
Preferences > Axivion Suite > Dashboard Server Settings.
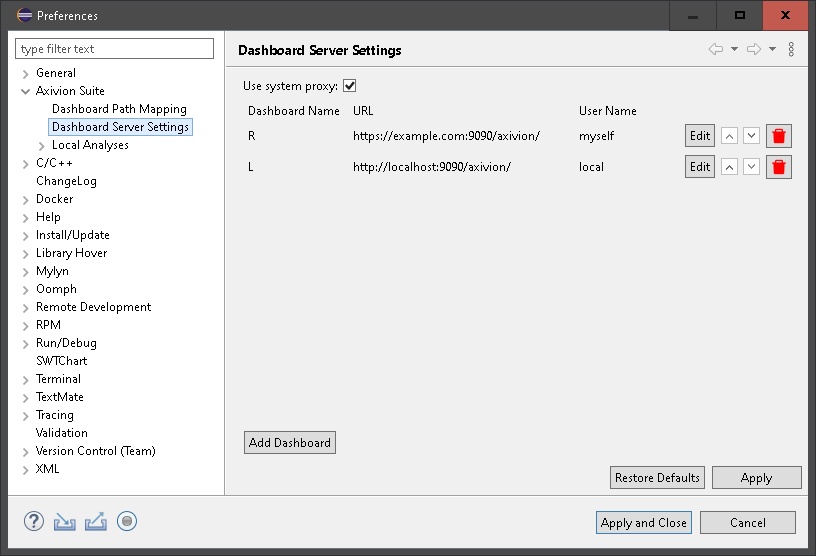
Axivion Dashboard Server preference page.
Here, the Axivion Dashboard Servers and users are configured. The credentials
are the same that you are using to access the Axivion Dashboard Server by way of your web browser.
You can add several Axivion Dashboard Servers. However, only one of the dashboards is used at any
given time. The button Add Dashboard is used to add another dashboard to
the list of configured dashboards. The button Edit allows to change the
dashboard configuration. The buttons up and down change the
order of the configurations in this list and in the dashboard dropdown list in the
Issues view. The delete button deletes the dashboard configuration in the
Axivion Eclipse Plugin.
Creating and editing an Axivion Dashboard Server is done in an extra dialog. The changes made in that dialog are not applied when the dialog is closed but when the preferences are applied.
The Dashboard Name can be chosen arbitrarily and is used in the
dropdown list to choose the current dashboard.
The currently stored credential for the username/Dashboard URL are shown in the Dashboard editing dialog. There, it can be deleted but not entered. The Dashboard password will be requested when the plugin opens an Axivion Dashboard Server connection. If the Axivion Dashboard Server supports ApiTokens, a given password will be used to automatically generate an ApiToken. In this case, only the ApiToken is stored - the given password is not stored or used anymore by the plugin after retrieving the ApiToken.
When the server returns with an error indicating that the used credential is wrong, the Axivion Eclipse Plugin invalidates a stored credential. This means that the password dialog will appear again. This prevents further Dashboard accesses to prevent account blocking (e.g. when LDAP is used and the account is blocked after 5 log-in tries with an invalid password).
Your settings will be stored permanently in the Eclipse preference store. The password or ApiToken is stored in the secure preferences store of Eclipse. Encryption is provided by Eclipse. When you have never entered a password before, depending on your platform, Eclipse may ask you for a master password to protect all stored passwords (cf. Fig. Secure storage setup in Eclipse.). In case it does and if you choose to provide a password hint, Eclipse will ask you two questions for which you need to provide the expected answers (cf. Fig. Password hints in Eclipse.).
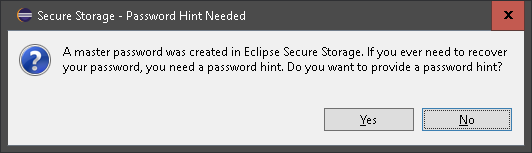
Secure storage setup in Eclipse.
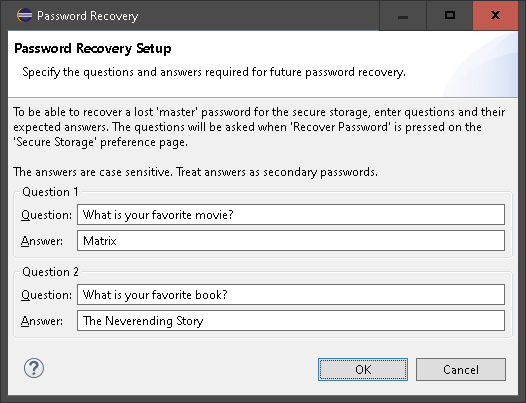
Password hints in Eclipse.
When you press the Apply button on the Axivion Eclipse Plugin preference page, your
preferences are stored and the Axivion Eclipse Plugin will try to connect to the Axivion Dashboard Server using
your settings.
However, in memory the credential (password or ApiToken) is stored unencrypted and may be written to disk due to swapping or hibernation.
The credential will be transmitted to the Axivion Dashboard Server. Use HTTPS to prevent it from being visible while it is being transmitted over the network.
Note
Window - Preferences - General -
Security - Secure Storagetab
Password- groupMaster password providerstab
Advanced
After the access to the Axivion Dashboard Server is configured, you can open the new Eclipse view
Issues through Window > Show View > Other > Axivion Suite >
Issues (cf. Fig. Selection of Axivion views in Eclipse.; see also
Section Issues View). You can select an analysis project using
the left-most combobox in the window and view the list of issues within that project.
See Section Issues View for more details on the
Issues view.
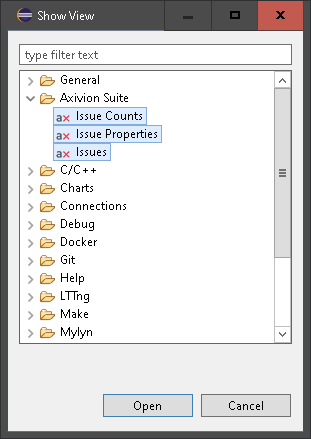
Selection of Axivion views in Eclipse.
Path Mapping
Issues found by the continuous integration process of the Axivion Suite reference files on the build machine where the analysis was performed. The Axivion Eclipse Plugin operates on your local file system on the computer running Eclipse. Thus, paths on the build server (called analysis paths in the following) may be different from paths on the local machine (called Eclipse paths in the following). Beyond paths, even the notion of projects may differ between the Axivion Dashboard Server and Eclipse. Each source file in your Eclipse workspace belongs to an Eclipse project. On the other hand, each file in the continuous integration process by the Axivion Suite may be part of one or more analysis projects and these analysis projects may not necessarily correspond directly to an Eclipse project. As a consequence, an Eclipse project and its relative path must be mapped onto an analysis project and its respective relative path and vice versa.
The path mapping in the Axivion Eclipse Plugin determines the mapping between Eclipse projects and
paths and analysis projects and paths. This allows the plugin to jump to the
corresponding local file when double-clicking on an issue in the Issues
view. The mapping works also in the opposite direction. When opening a local file in the
Axivion Eclipse Plugin, the path mapping is used to determine the corresponding analysis project and
file. The issues found in the latest analysis of that file are shown in the left margin
of the editor showing the file content if issue marking is turned on.
The path mapping configuration is stored in XML files named launcher.config in
your Eclipse workspace and in directory .bauhaus in your userprofile or home
directory. When a path mapping is searched, the configuration in your workspace has
precedence over the global configuration in your home directory. However, you can set
the default location for storing new mappings in the preferences page described below.
The default default location for storing is the file in your workspace. You should not
edit the launcher.config’s manually. Instead let the plugin automatically
generate the path mapping when necessary. In such a situation, the Axivion Eclipse Plugin will ask
you to select the local file in a file open dialog. When there is a need to manually
adapt the path mapping, open the preference page Window > Preferences >
Axivion Suite > Dashboard Pathmap Mapping to configure it. The opened
preference page will look like the one in Figure Path Mapping preferences..
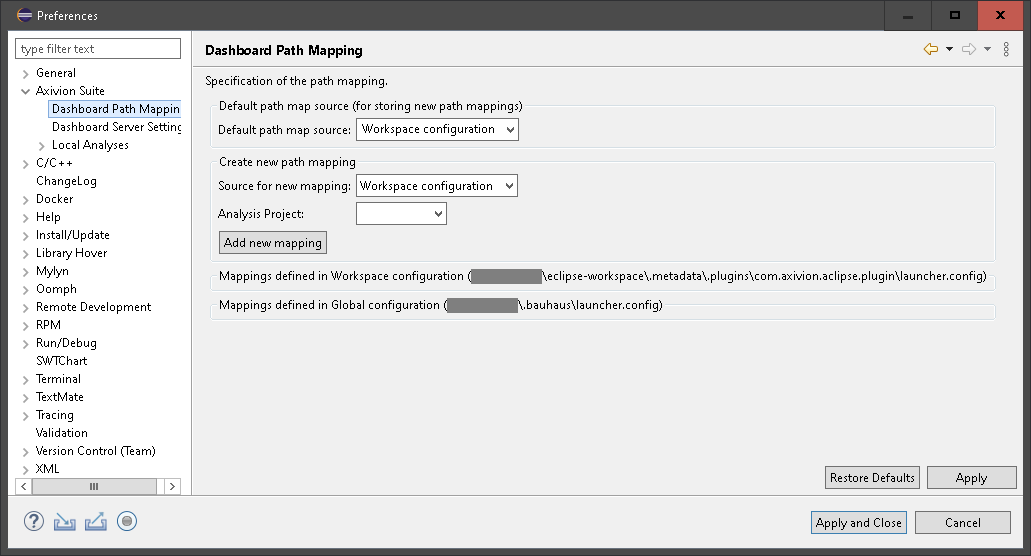
Path Mapping preferences.
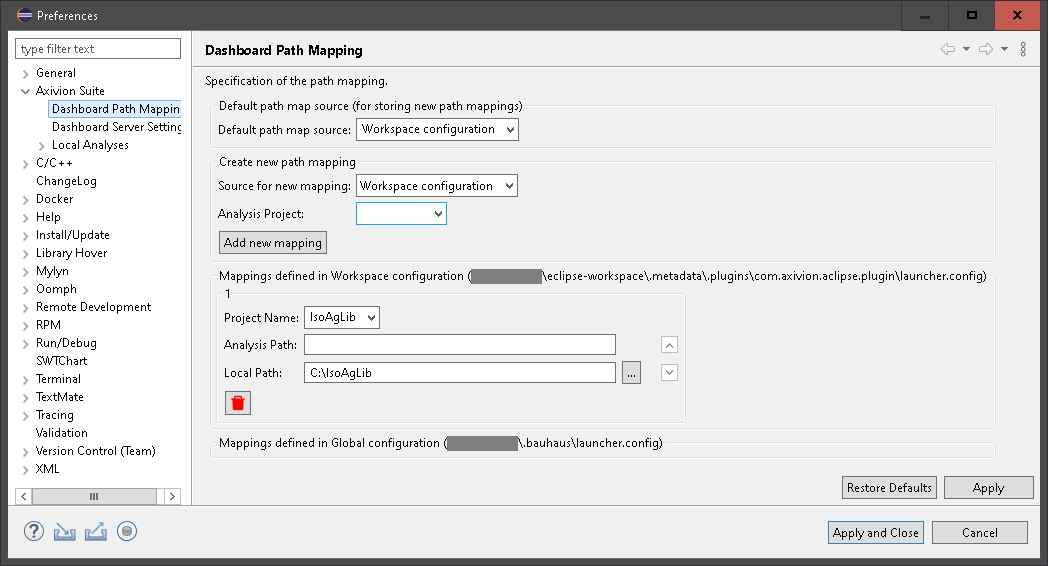
Select your analysis project in the combobox and push button Add new
mapping. This will add a configuration for the analysis project you just selected, as
illustrated in Figure Path Mapping preferences for an analysis project.. Here you can enter the
analysis path relating to the build server and your local path.
The analysis path is a relative path describing a directory within the analysis project (relative to the basepath of the analysis project). Usually this field is left empty, which means that the mapping entry refers to the basepath of the analysis project.
The local path denotes a directory, too, and corresponds to the specified analysis path.
That is, every path of an issue retrieved from the Axivion Dashboard Server that matches the analysis
path is re-directed to your local path. It is stored as an absolute path in your file
system. If you click on the button ... next to the local-path text field,
a directory chooser will open that allows you to select a directory from your local file
system. Please note that the selected directory should be part of an Eclipse project to
show the issue markers in the editor. Otherwise, Eclipse will fail to open an editor and
mark the issues of a file.
Path Mapping preferences for an analysis project.
Restore defaults resets the values to the currently saved
state in the files <home>/.bauhaus/launcher.config and
<workspace>/.metadata/.plugins/com.axivion.aclipse.plugin/launcher.config.A more elaborated example of a configuration can be found in the documentation of the Axivion Visual Studio Plugin in Section Example Configuration.
If your path mapping was done correctly, double clicking on issues will open an editor at the corresponding source location. The next chapter has more details on that.
Caution
Properties > Resource > Location.Activation on Startup
The plugin will be activated on Eclipse startup to show markers. This can be disabled in
the Startup and Shutdown preferences.
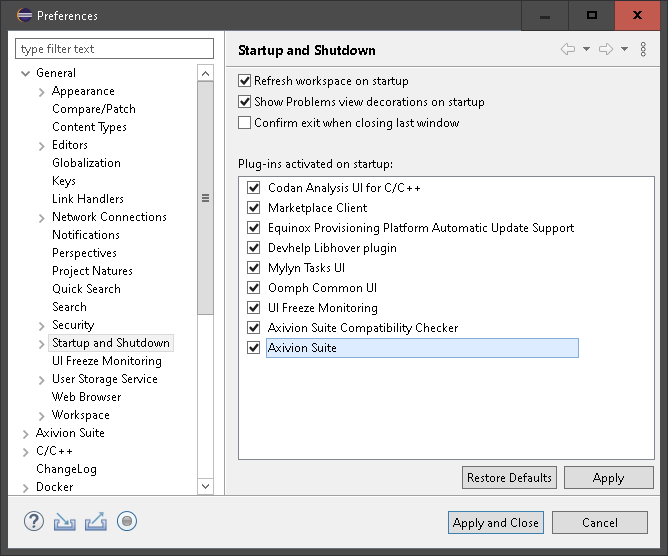
Eclipse Startup and Shutdown preferences with Axivion Eclipse Plugin.
Disabling the activation on startup for the Axivion Eclipse Plugin causes the markers to be loaded only when the plugin is activated at the runtime of Eclipse, e.g. by showing a view, preferences page, or properties page of the Axivion Eclipse Plugin.
Once the plugin is activated, it will not be deactivated when the view or page is closed.
5.3.4.2. Using the Axivion Eclipse Plugin as Dashboard Viewer
The Axivion Eclipse Plugin offers three Eclipse views:
Issues, which lists the issues available for a selected analysis project;Issue Properties, which gives details on a currently selected issue in theIssuesview.Issue Counts, which shows the number of issues in an open file.
These views can be opened through Window > Show View > Other > Axivion
Suite > ... (cf. Fig. Selection of Axivion views in Eclipse.).
Figure Axivion views in Eclipse. shows the two views.
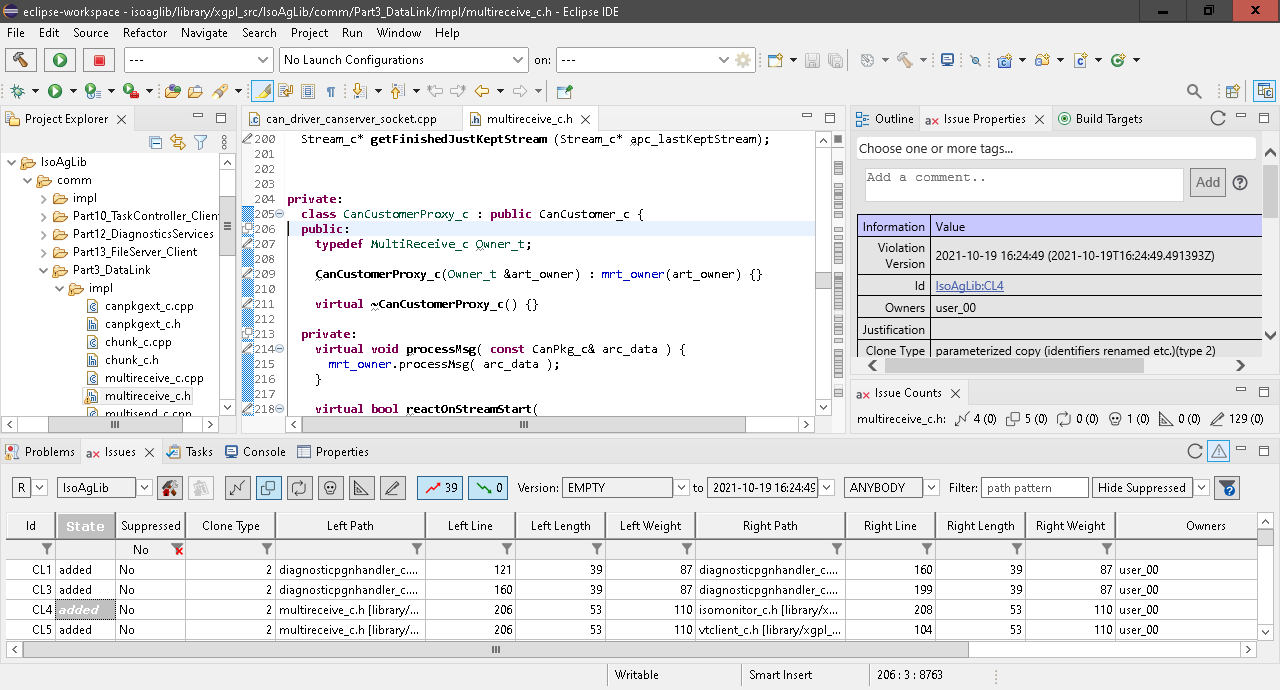
Axivion views in Eclipse.
The next sections describe these views in detail.
Issues View
The Issues view (cf. Fig. The Axivion Eclipse Plugin Issues view.) allows
querying new and resolved erosion issues. The user interface is very similar to the web
dashboard described in Section Issue Table and Issue Deltas and the Axivion Visual Studio Plugin.

The Axivion Eclipse Plugin Issues view.
The elements in the toolbar above the table select which issues to retrieve from the Axivion Dashboard Server. The following describes them from left to right, referring to the numbers in Figure The Axivion Eclipse Plugin Issues view.:
Dashboard selection: The dashboard selection dropdown allows to quickly change between several dashboards. It is displayed only when more than one dashboard is configured.Project: Allows you to select the analysis project whose issues are viewed. The combobox lists all projects available on the server, which the current user can access.
Start Local Build: Starts the local build. The results are stored in<home>/.bauhaus/localbuild.
View Local Build Results: Switches between the results of the dashboard (global analysis on CI server) and the results of the local build.Issue Kind: Selects which type of issue to display.
State: The two controls with the arrow symbols allow you to view only added issues, only removed issues, or both. The numbers indicate the number of added/removed issues in the current query result.Start Version: Like the web dashboard, the issue list shows the difference between two versions. Issues that exist in the start version but not in the end version are listed asremoved. Issues that exist in the end version but not in the start version are listed asadded. To see all issues, pickEMPTYasStart Version. This special version does not contain any issues, so the list will display all issues in the chosenEnd Version. When a new analysis is available on the Axivion Dashboard Server, the list of available versions in the plugin might not update immediately. In this case, you can right-click the toolbar at the top of theIssuesview and selectRefreshto force the plugin to download the current list of versions from the Axivion Dashboard Server.As an alternative to the menu, you can also use the refresh button in the views title bar or the keyboard shortcut F5 when the
Issues Viewhas focus to update the issue list.Details on how to pick a version are explained below.
End Version: The end version for which the issues are to be retrieved. In Local Build mode, the start and end version controls are replaced with a dropdown which allows to quickly select the two available versions or their difference:Reference version,Locally changed issues, andAll local issues.User: Specifies the user whose issues are to be shown:ANYBODY: shows all issues; that is, does not filter based on the user;NOBODY: shows only those issues that are not associated with any user,<user_name>: shows all erosion issues associated with the given user name.
As a normal user, you can see only your own user name as well as those of users marked with the public flag (see Section Users).
Filter: Allows one to specify a globbing pattern. Only the issues associated with a file that matches the specified globbing pattern are shown. For example, the path “src/main/io.c” can be matched by*.cas well as*/io.?. If left empty, all files are considered.Named Filter: Allows applying a Named Filter which overrides the currently set filters and column sorting. Named Filter management is possible in the Web UI. If a filter or sorting is changed, the dropdown switches to the last entry in the list[modified]which denotes the “unnamed filter” - meaning that the currently applied filters and sorting are not saved as a Named Filter.Private Names Filters are marked with the suffix
[^].For details on filtering, see Filtering.

Show filter help: Opens a browser and shows the filter help.
Refresh: Loads all data from server again. This is needed e.g. when a project is added to the dashboard or a new analysis ran while the plugin run.
Marking: This toggle button allows you to enable/disable the markers. If marking is turned on, the open editors will be decorated with issue markers at each line where an issue occurs similarly to compiler errors and warnings.
The Axivion Eclipse Plugin will automatically start a new query when any of the above options are changed. The results of the query are shown in the table below the controls of the query. The columns of the shown table (cf. Fig. The Axivion Eclipse Plugin Issues view.) depend upon the currently selected type of issues. The filter row in Figure The Axivion Eclipse Plugin Issues view.) shows active filters and will be explained in Section Filtering. The information of the matching issues is shown in the table in Figure The Axivion Eclipse Plugin Issues view.).
The currently selected start and end versions are shown in the toolbar (the two version chooser controls in Figure The Axivion Eclipse Plugin Issues view.). To change the selected version, click on the version text or the button right to it. In the appearing menu, you can choose the version with the slider or the version list. The list can be filtered by a substring filter.
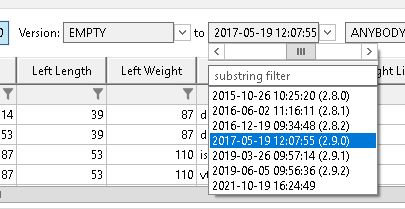
Version chooser dropdown menu.
The start version always must be earlier than the selected end version. So you cannot choose arbitrary version combinations. The “forbidden” versions cannot be selected. The slider always represents the whole version range but selecting a version outside of the allowed range will reset the slider to the nearest allowed version. In the version list, only allowed versions are displayed.
Caution
Issues View and select Refresh.
Another way is pressing F5 when the Issues View
has focus.Filtering
The issue list view supports filtering individual columns.
Just below the column headers (label 13 in Figure The Axivion Eclipse Plugin Issues view.) is a row in which you can add filtering criteria for each column (label 15). If you enter multiple criteria in several columns, all these filters must match an issue’s facets.

Local filtering in the issue list.
To remove a single filtering criterion, click on the red icon in the respective
filtering column. To remove all filtering criteria at once, you can right-click the
table header row and select Clear all filters from the contextual pop-up
menu or press the button labeled as 10 in Figure The Axivion Eclipse Plugin Issues view..
The filtering row can be hidden and made visible by pressing F3 when the table was selected.
Sorting
The issue list can be sorted by clicking on the column headers. A normal click sorts the list just by the one column. To sort by multiple columns, hold alt + shift while clicking on the row headers.
Table Operations
If you click on the column headers, you can sort all issues according to the selected column.
A single right-click with the mouse on any of the header columns in the issue tables brings up the menu shown in Figure Issue table menu. which offers the following operations:
Clear all filtersre-sets all column filters entered in the filtering row.Hide columnhides the currently selected columns.Show all columnsshows all hidden columns again.Select Columnsopens aColumn Chooser(cf. Fig:ref:figure-aclipse:table:column:chooser) in which columns can be selected to be hidden (listed on the left underAvailable Columns) or shown (listed on the right underSelected Columns); in addition to that, the order of the columns can be determined.
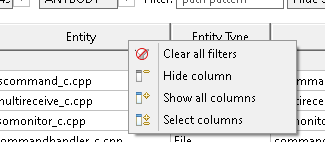
Issue table menu.
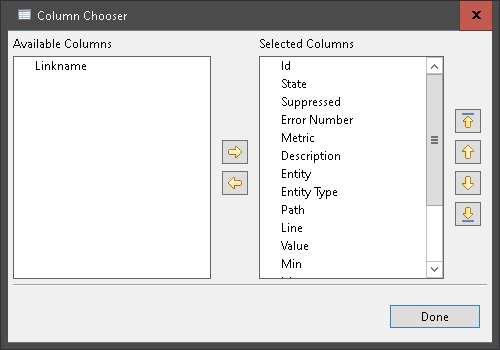
Issue table column chooser.
Go to Dashboard
Axivion Eclipse Plugin allows you to quickly jump into the dashboard to view an issue, view the issue table, or to get the dashboard link of an issue to share it with a colleague.
This is done by right-clicking the requested issue. In the opening context menu you can select the appropriate option.
This is not possible when local build is activated.
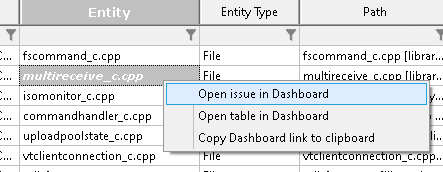
Open issue in dashboard context menu.
Note
When using the Open table in Dashboard entry while having a Named Filter
selected, you will be taken to an issue table with the Named Filter expanded, i.e. the
exact set of issues.
Viewing Issues
There are three different ways to open an issue. The simplest and standard way is to
double-click the entry in the issue table of the Issues view. Another way
is provided by the Issue Properties view and described in
Section Issue Properties View. The third option is to use the Eclipse
standard Problems view. This option will be described in
Section Code Editor: Issue Markers.
If the path mapping is configured correctly, double clicking the issue will open the source file and jump to the line containing the issue. If the issue has multiple source locations (e.g., clones, cycles, architecture violations), the plugin will prompt you to select which source location to open.
If the path mapping is not yet configured when you double-click on an issue to open an editor, you will be prompted for a file name by way of a file chooser (cf. Fig. File selector for files not covered by the file mapping., File chooser for files not covered by the file mapping.) that allows you to select the file in your file system. The titlebar of the dialog gives the detail information what the path mapping is looking for. If the path mapping is not configured correctly, an error message will be displayed that the file cannot be found.

File selector for files not covered by the file mapping.
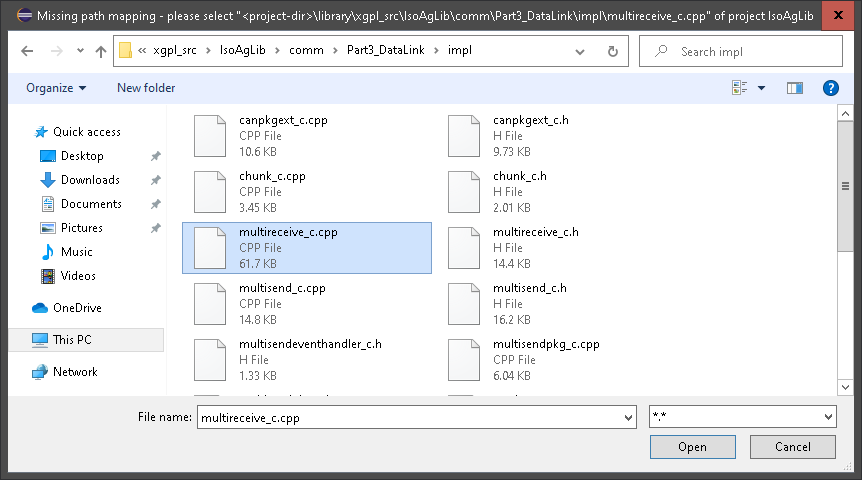
File chooser for files not covered by the file mapping.
Because the analyzed version of the code is not necessarily the same as the local code version, the line numbers of issues may have changed. For example, an issue that was on line 100 during the analysis may now be on line 120 if 20 lines of code were added at the beginning of the file. When opening an issue, the Axivion Eclipse Plugin will download the analyzed version of the file, and compute the new location of the issue using the diff between the analyzed file and the current editor contents.
Issue Properties View
The Issue Properties view shows details about a single issue currently
selected in the Issues view. To open this view, select Window
> Show View > Other…> Axivion Suite > Issue Properties.
Figure Issue Properties view showing issue details. shows an example of the Issue
Properties view. The details shown depend upon the issue type and may differ.
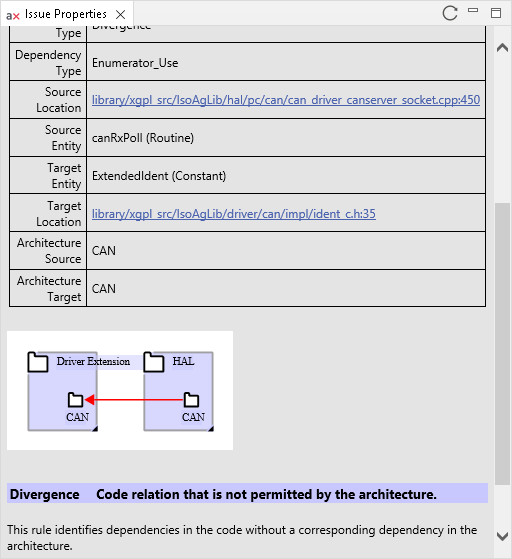
Issue Properties view showing issue details.
Issue Counts View
The Issue Counts view gives an overview of the number of issues in the selected file. For each issue kind the total number of issues and the number of new issues is shown.
These counts are calculated from the markers. So they are not available when the marking is disabled. Furthermore, as the marking does not show markers on changed lines (because likely the issues were fixed), these issues also do not add to the issue counts in this view.
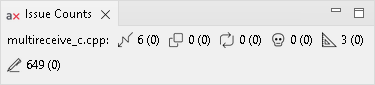
Issue Counts view showing number of issues in a file.
Code Editor: Issue Markers
If the path mapping is configured correctly (and markers are enabled), opening a source
code file in an Eclipse editor will display the issues found by the last analysis as
markers in the left editor margin. The opened file must be part of an Eclipse project in
your Eclipse workspace, otherwise the markers will not appear. To turn marking on and
off, you can use the button labeled as number 14 in
Figure The Axivion Eclipse Plugin Issues view. in the Issues view.
The Axivion issue markers behave as normal Eclipse markers. Hovering the mouse over a marker icon in the left editor margin will open a tool tip describing all issues in a particular line (cf. Fig. Issues in source-code editor.).
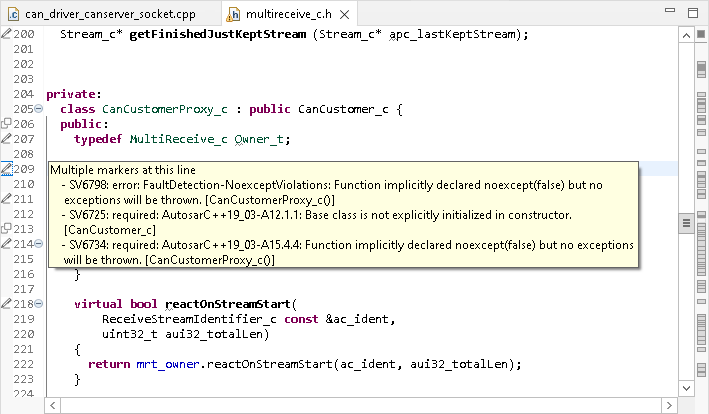
Issues in source-code editor.
Because the retrieval of markers from the Axivion Dashboard Server is expensive, the markers are only fetched for files in currently visible editors.
The erosion issues are normal Eclipse markers and, hence, are also shown in the standard
Eclipse view Problems. The Problems view is another way to
navigate to the issues. Axivion markers will be removed from it when an editor is
closed.
A common workflow is to get from the markers in the editors vertical ruler to the issue
details (see Section Issue Properties View). This can be done quickly by
right-clicking on the marker. In the opened context menu, select the submenu
Axivion Show Issue Details, and finally click on the desired issue.
The annotations (the in the editor visible part of the markers) can be configured in
Preferences > General > Editors > Text Editors > Annotations. A shorter
way is to right click on the overview ruler (directly right to the editors vertical
scroll bar) and choose Preferences... in the context menu. The visibility
of each issue kind in the vertical ruler (left to the line numbers) and the overview
ruler can be configured individually.
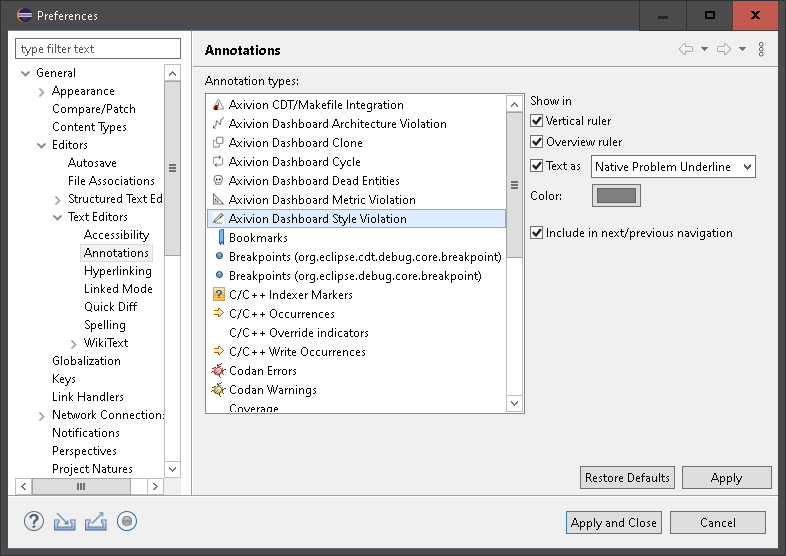
Eclipse annotation preferences.
5.3.4.3. Advanced Topics
Find the Used Java
Eclipse is a Java software and thus needs a Java Runtime. Eclipse can be bundled with its own Java Runtime.
Eclipse tells the location of the JRE it is currently using:
Help - About Eclipse -
Installation Details - Configuration, in the
section System Properties the entry
java.home (not to be confused with
JAVA_HOME).
There are several mechanisms to tell Eclipse where it can find the JRE to run:
https://wiki.eclipse.org/FAQ_How_do_I_run_Eclipse%3F#Find_the_JVM
Commandline argument: eclipse -vm C:\Program Files\Java\bin
eclipse.ini:
-vm
C:\\Program Files\\Java\\bin
Folder inside Eclipse installation directory:
jreEnvironment variable
PATH:javaw.exeorjava
Eclipse does not use the environment variable JAVA_HOME.
HTTPS connections
To communicate securely with the Axivion Dashboard Server, Eclipse/Java has to verify the servers identity by a trustchain of X.509 certificates. This chain needs a trusted trust anchor (the root certificate) stored (= trusted) in Java’s certificate store.
Some root certificates are shipped with Java. However, there are situations where the Axivion Dashboard Server uses certificates not trusted by the default Java installation (e.g. a company internal CA or a certificate generated by the Dashboard without involving a CA). In such a situation, the root (self-signed) certificate has to be added to Java’s certificate store so that Java (and thus Eclipse) trusts the certificate.
The first step is to find the Java installation Eclipse uses, see Find the Used Java.
The second step is to obtain the root certificate of the servers certificate, e.g. with a browser. If the Axivion Dashboard Server automatically created a certificate, the needed certificate is stored in the file <dashboard-config>\cert\auto.crt.
Note
The Dashboard’s certificate store (*.p12, *.pfx, or
*.jks) is neither the certificate in the required format nor
necessarily contains the needed root certificate.
To finally install the root certificate, the tool keystore can be used which is
shipped with Java and located in the bin directory of the Java installation.
keytool -importcert -cacerts -file "<path\to\certificate>" -alias <alias-name, e.g. "CA: domain">
If the installed Java is older and does not support the -cacerts, it can be
replaced by the option -keystore "<java-directory>\lib\security\cacerts".
The Java certificate store is protected by a password. The default password is
changeit.
The client has to verify the whole certificate chain. So it is recommended that the Axivion Dashboard Server is configured to provide the full chain (instead of only its server certificate) during the TLS handshake.
Note
If the Axivion Dashboard Server does not provide the certificate chain, the intermediate certificates have to be installed into the Java certificate store in addition to the root certificate.
Note
When there are certificate or TLS connection problems and you need support from Axivion, please send the following information with your support request e-mail:
The error message you are seeing and the log from Eclipse.
The output of the OpenSSL command described in testing the Dashboard certificate configuration.
Markers and updates
Caution
When a new analysis has been performed, you may have to to refresh via
F5 when the Issues View
has focus. or right click on the tool bar.
Caution
Markers for issues will be shown only for files that belong to an Eclipse project. If
your file is currently not part of an Eclipse project, you need to create a new
project—via File > New > Project—or import an existing one—via
Import and then following the instructions of the wizard—that contains
that file. You may also have to update your path mapping for this Eclipse project as
described in Section Path Mapping.
Secure Storage Caveats
To store passwords, the Eclipse secure storage is used. So Eclipse is responsible for securely (meaning encrypted) storing the password on disk. The Axivion Eclipse Plugin only uses the API provided by Eclipse so it cannot solve problems with the secure storage itself.
Experiences we made with the secure storage when using several Eclipse installations on the same machine:
The secure storage of a 32-bit Eclipse and the one of a 64-bit Eclipse are not really compatible. On Windows, both bitnesses of Eclipse, however, use the same path for the secure storage location on disk. https://bugs.eclipse.org/bugs/show_bug.cgi?id=355086 (Status: CLOSED WONTFIX)
Newer Eclipse and Java combinations can support more encryption schemes than older Eclipses/Javas.
Each Eclipse run, Eclipse loads the secure storage only once from disk. Further accesses are only served from an in-memory cache. Also, the secure storage is only written to disk seldom (only at Eclipse shutdown). To mitigate this a bit, the Axivion Eclipse Plugin calls the flush API of the secure storage after each change.
To mitigate problems caused by several Eclipse installations which interfere regarding
the secure storage, each Eclipse installation can be instructed to use its own storage
location on disk. This is done with the argument -eclipse.keyring <file path>
which can either be passed via commandline or the eclipse.ini.