
5.1.2.8. Atlassian JIRA integration
If you are using JIRA for issue tracking you may be interested in the JIRA integration that allows users of the dashboard as well as the IDE plugins to easily link findings of the continuous integration, i.e. issues with JIRA tickets.
Note, that a precondition for the use of this feature is that issue annotations are enabled. This setting is per project and enabled by default but can be deactivated on the project configuration page Section Projects. The Links to the JIRA tickets will be stored in the analysis database extension file with the suffix .dbx where Tags and Comments are stored as well. The feature itself, once configured will be accessible on the Issue Page when viewing an issue in the dashboard or in the Issue Properties pane when viewing an issue in one of the IDE plugins.
The integration is a one-way relation, where only the Dashboard uses JIRA Apis, i.e. JIRA has no special knowledge about the Axivion Dashboard.
The communication authentication is done via OAuth1.0a which requires creating an
incoming application link for the dashboard in JIRA,
see Figure JIRA Application Links Configuration Table.
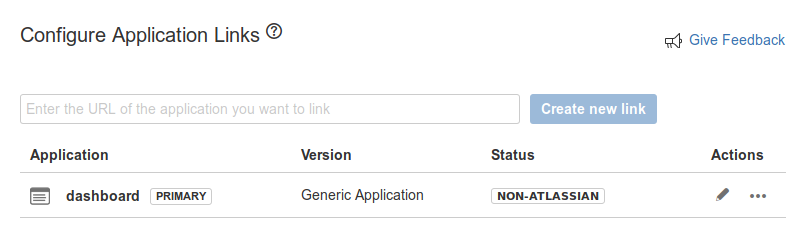
JIRA Application Links Configuration Table
When creating a new Application Link in JIRA be sure to tick the checkbox “Create incoming Link” in the “Link Applications” Dialog, see Figure Be sure to check “Create incoming Link” and leave all non-required fields empty. Afterwards you will only need to enter a “Consumer Key” a “Consumer Name” and a “Public Key”. The “Consumer” is an OAuth term for the client application which in this case is the Dashboard.
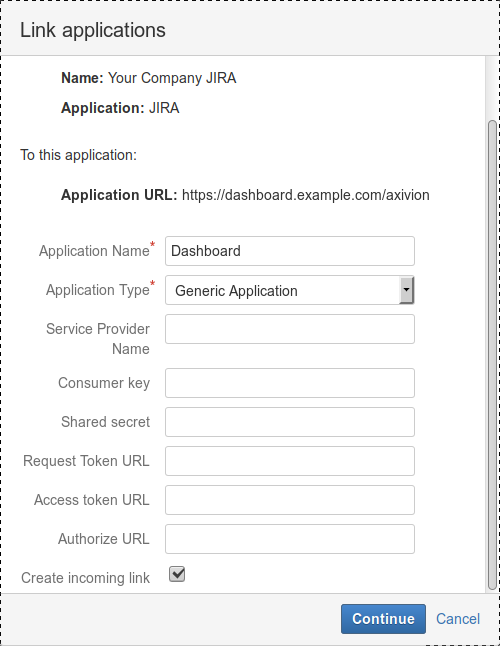
Be sure to check “Create incoming Link”
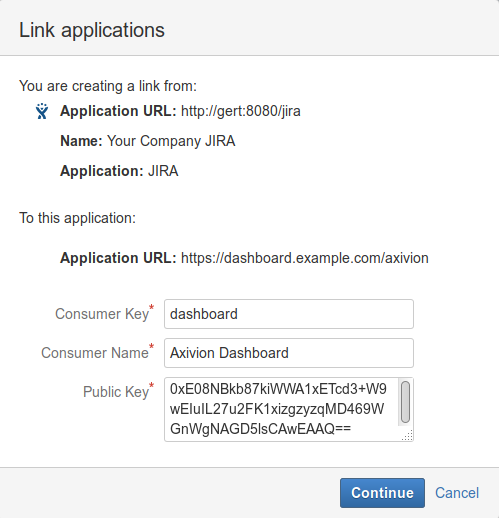
JIRA dialog to register the Dashboard
In order to fill out the remaining fields,
see Figure JIRA dialog to register the Dashboard in a new browser tab navigate
to the “Atlassian JIRA Integration” section on the General Settings Page in the
Dashboard, see Section General Settings, activate it and
hit the button Register. An RSA keypair will be generated for you while
you enter the necessary details. Be sure that the “Consumer Key” is the same on both
ends and the URLs are the respective applications main entry URLs.
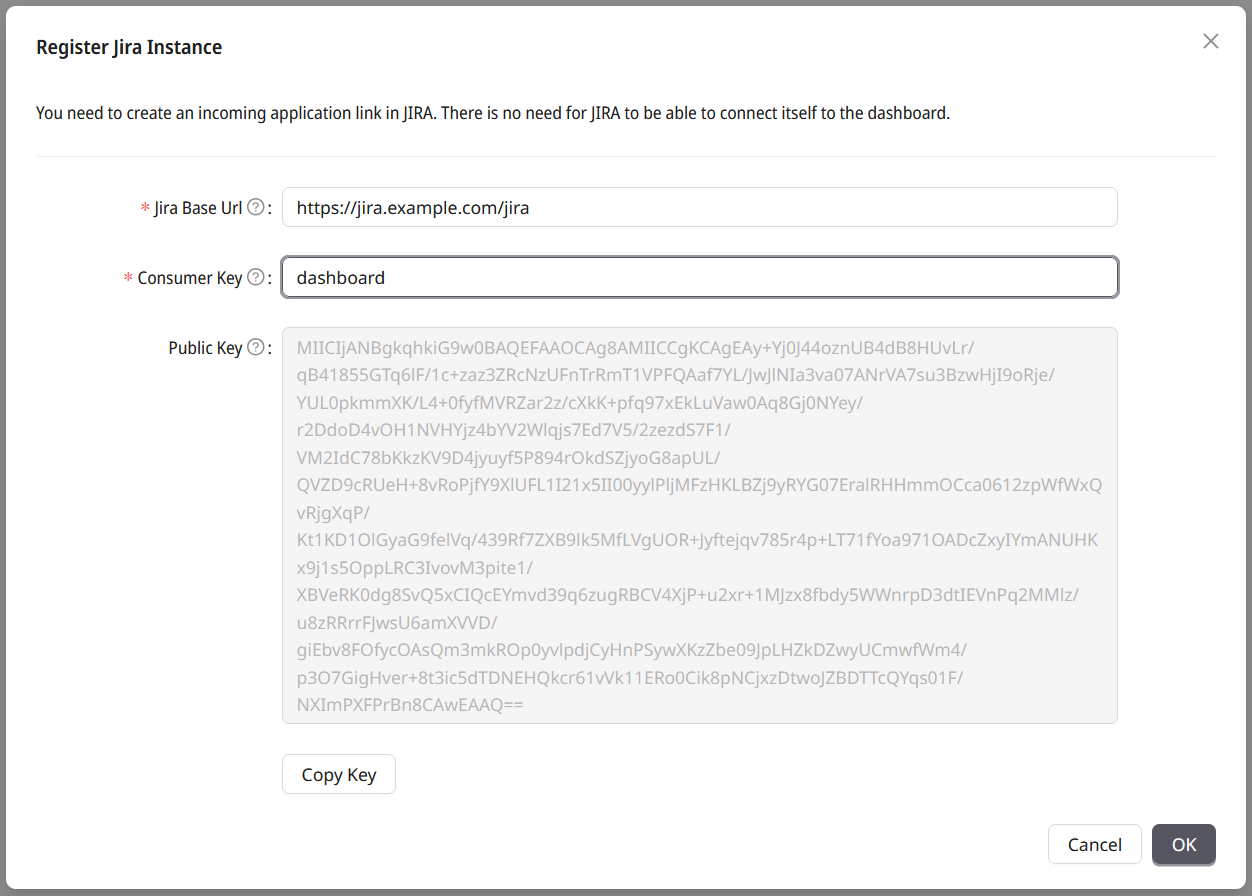
Dashboard dialog to register JIRA
When you have entered the details on both sides and most importantly copied the
Public Key from the Dashboard dialog into the JIRA dialog, then first
confirm the JIRA dialog and verify that the application link appears in the list of JIRA
application links as in Figure JIRA Application Links Configuration Table.
Afterwards you can finalize the registration on the Dashboard side. Note, that the
connections to JIRA are done from the java-process running the dashboard (and not from
inside the user’s browser as one might assume) which is important to know in case you
are using restrictive firewalls or your JIRA instance is using a certificate that is not
trusted by Java out-of-the-box.
When done with the initial registration you are left with 2 choices how the dashboard
should authenticate a concrete JIRA User in order to link/unlink tickets. By default
every Dashboard User will be asked (upon first use of the feature) to request his own
JIRA Access Token which then will be stored in the dashboard configuration database.
Alternatively you may prefer to have a single JIRA user token shared by all Dashboard
users. In that case, you will need to create that token by following the instructions in
the Atlassian JIRA Integration section on the General Settings Page.
Note, that the “Shared Access Token” only works for linking/unlinking, i.e. when creating
JIRA Issues, users will still need to be authenticated directly with JIRA using their proper
credentials.