
シンプルなHTTPサーバー
HTTPサーバーの設定方法の簡単な例。
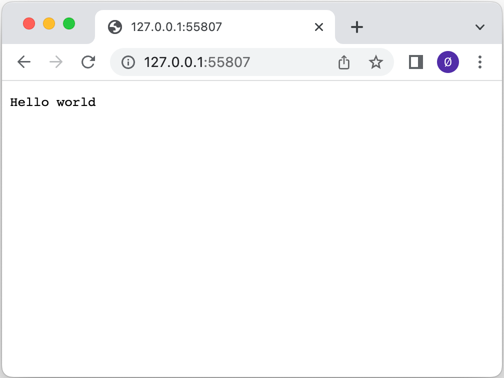
「簡易HTTPサーバー」では、QHttpServer クラスを使用してHTTPサーバーを設定する方法を示します。このサーバーは、1つのTCPソケットと1つのSSLソケットの計2つのソケットをリッスンします。route()関数の使用方法を示すために、さまざまなコールバックが設定されています。
QHttpServer オブジェクトが作成され、シンプルなroute()が、"/" というパスを処理してHello world を返します:
QCoreApplication app(argc, argv);

QHttpServer httpServer;
httpServer.route("/", []() {
    return "Hello world";
});
次に、サーバーのアセットをクライアントに配信するためのコールバックを登録します:
httpServer.route("/assets/<arg>", [] (const QUrl &url) {
    return QHttpServerResponse::fromFile(u":/assets/"_s + url.path());
});ここでは、QHttpServerRequest オブジェクトを使用して、クライアントのIPアドレスを取得します:
httpServer.route("/remote_address", [](const QHttpServerRequest &request) {
    return request.remoteAddress().toString();
});
パスの一つである `"/auth"` では、Basic HTTP 認証が使用されています:
httpServer.route("/auth", [](const QHttpServerRequest &request) {
    auto auth = request.value("authorization").simplified();

    if (auth.size() > 6 && auth.first(6).toLower() == "basic ") {
        auto token = auth.sliced(6);
        auto userPass = QByteArray::fromBase64(token);

        if (auto colon = userPass.indexOf(':'); colon > 0) {
            auto userId = userPass.first(colon);
            auto password = userPass.sliced(colon + 1);

            if (userId == "Aladdin" && password == "open sesame")
                return QHttpServerResponse("text/plain", "Success\n");
        }
    }
    QHttpServerResponse resp("text/plain", "Authentication required\n",
                             QHttpServerResponse::StatusCode::Unauthorized);
    auto h = resp.headers();
    h.append(QHttpHeaders::WellKnownHeader::WWWAuthenticate,
             R"(Basic realm="Simple example", charset="UTF-8")");
    resp.setHeaders(std::move(h));
    return std::move(resp);
});そこで、`route()` で登録されたコールバックによって処理された後の `QHttpServerResponse ` オブジェクトに対し、`addAfterRequestHandler()` 関数を使用してレスポンスに HTTP ヘッダーを追加します:
httpServer.addAfterRequestHandler(&httpServer, [](const QHttpServerRequest &, QHttpServerResponse &resp) {
    auto h = resp.headers();
    h.append(QHttpHeaders::WellKnownHeader::Server, "Qt HTTP Server");
    resp.setHeaders(std::move(h));
});ポートをリッスンしているQTcpServer は、bind()関数を使用してHTTPサーバーにバインドされます:
autotcpserver=std::make_unique<QTcpServer>();
if(!tcpserver->listen()|| !httpServer.bind(tcpserver.get())) {
    qWarning() << QCoreApplication::translate("QHttpServerExample",
                                             "サーバーがポートでのリスニングに失敗しました。");
    return-1;
}
quint16 port= tcpserver->serverPort();
tcpserver.release();そして、QSslConfiguration を使用して、QHttpServer が HTTPS トラフィックを処理するための SSL 設定を作成します:
QSslConfiguration conf=QSslConfiguration::defaultConfiguration();
const autosslCertificateChain=
        QSslCertificate::fromPath(QStringLiteral(":/assets/certificate.crt"));
if(sslCertificateChain.empty()) {
    qWarning() << QCoreApplication::translate("QHttpServerExample",
                                             "ファイルからSSL証明書を取得できませんでした。");
    return-1;
}
QFile privateKeyFile(QStringLiteral(":/assets/private.key"));
if(!privateKeyFile.open(QIODevice::ReadOnly)) {
    qWarning() << QCoreApplication::translate("QHttpServerExample",
                                             "ファイルを読み込むことができませんでした: %1")
                  .arg(privateKeyFile.errorString());
    return-1;
}

conf.setLocalCertificate(sslCertificateChain.front());
conf.setPrivateKey(QSslKey(&privateKeyFile,QSsl::Rsa));
conf.setAllowedNextProtocols({ QSslConfiguration::ALPNProtocolHTTP2 });// HTTP/2のサポートを追加

privateKeyFile.close();

autosslserver=std::make_unique<QSslServer>();
sslserver->setSslConfiguration(conf);
if(!sslserver->listen()|| !httpServer.bind(sslserver.get())) {
    qWarning() << QCoreApplication::translate("QHttpServerExample",
                                             "サーバーがポートでのリスニングに失敗しました。");
    return-1;
}
quint16 sslPort= sslserver->serverPort();
sslserver.release();
すべての設定が完了したら、あとは着信リクエストの処理を開始するだけです:
return app.exec();ファイル:
画像:
© 2026 The Qt Company Ltd. Documentation contributions included herein are the copyrights of their respective owners. The documentation provided herein is licensed under the terms of the GNU Free Documentation License version 1.3 as published by the Free Software Foundation. Qt and respective logos are trademarks of The Qt Company Ltd. in Finland and/or other countries worldwide. All other trademarks are property of their respective owners.

