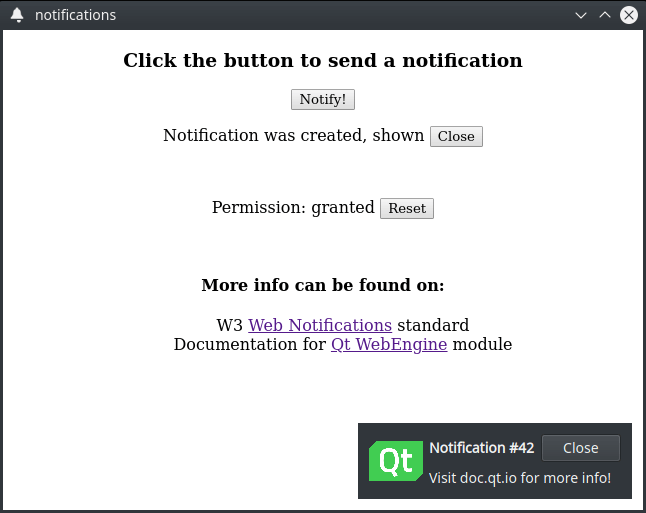
WebEngine 通知機能の例
HTML5 Web 通知をユーザに渡す方法を示します。

WebEngine Notificationsでは、QWebEngineProfile::setNotificationPresenter() メソッドとQWebEngineNotification クラスを使用して HTML5 Web 通知をユーザーに表示する方法を示します。
例の実行
から例を実行するには Qt Creatorからサンプルを実行するには、Welcome モードを開き、Examples からサンプルを選択します。詳細については、Qt Creator: チュートリアル を参照してください:ビルドと実行」を参照してください。
HTMLページ
この例では、リソース・コレクション・ファイル(.qrc)を介して追加される内部HTMLページを作成します。このページには、パーミッションをリクエストするためのボタンが表示され、このリクエストをトリガーするために必要なJavaScriptコードが含まれています:
            Notification.requestPermission().then(function (permission) {
                if (permission == 'granted')
                    createNotification()
            })
また、ページには通知を作成するためのボタンも含まれています。以下のJavaScriptは、pressイベントで実行されます:
    function createNotification() {
        let title = 'Notification #' + ++notificationsCreated
        let options = { body: 'Visit doc.qt.io for more info!', icon: 'icon.png', }

        let notification = new Notification(title, options)
    }
メイン関数
main 関数では、QWebEngineView をインスタンス化し、内部 HTML ページをロードし、通知処理に必要なコールバックをセットアップします。
機能パーミッションのリクエスト
次に、QWebEnginePage::permissionRequested ()コールを使用して、ユーザーのデバイスに通知を表示する許可を要求します。
    QObject::connect(view.page(), &QWebEnginePage::permissionRequested,
                     [&] (QWebEnginePermission permission) {
                         if (permission.permissionType() != QWebEnginePermission::PermissionType::Notifications)
                             return;
                         permission.grant();
                     });
新しい通知の処理
次に、HTMLウェブ通知のデータをカプセル化するNotificationPopup 。また、QWebEngineProfile::setNotificationPresenter ()コールを使用してハンドラを設定します。このハンドラは、popup と組み合わせて使用し、すべての新しい通知を処理します。
    auto popup = new NotificationPopup(&view);
    profile->setNotificationPresenter([&] (std::unique_ptr<QWebEngineNotification> notification)
                                      { popup->present(notification); });
ユーザーへの通知
この例のNotificationPopup クラスは、通知のタイトル、メッセージ、アイコンを表示するために複数のQLabel インスタンスを使用する、シンプルなQWidget ベースのクラスです。
class NotificationPopup : public QWidget
{
    Q_OBJECT

    QLabel m_icon, m_title, m_message;
    std::unique_ptr<QWebEngineNotification> notification;
通知の表示
present メソッドの内部では、まず、前の通知があれば、それを閉じてリリースし、それから、内部の通知インスタンスでstd::unique_ptr::swap メソッドを呼び出して、新しい通知のオーナーシップを取得します。
    void present(std::unique_ptr<QWebEngineNotification> &newNotification)
    {
        if (notification) {
            notification->close();
            notification.reset();
        }

        notification.swap(newNotification);
それから、QWebEngineNotification::title(),QWebEngineNotification::message(),QWebEngineNotification::icon() を呼び出して、タイトル、メッセージ、アイコンを通知インスタンスに問い合わせ、ポップアップに適切なラベルを設定します。
        m_title.setText("<b>" + notification->title() + "</b>");
        m_message.setText(notification->message());
        m_icon.setPixmap(QPixmap::fromImage(notification->icon()).scaledToHeight(m_icon.height()));
その後、QWidget::show() メソッドを呼び出して、ユーザに通知を表示する準備ができました。このステップでは、QWebEngineNotification::show() メソッドも呼び出して、JavaScript コードに表示イベントを通知します。
        show();
notification->show();最後に、QWebEngineNotification::closed() シグナルに接続して、JavaScript 側からのクローズ・イベントを処理するコールバックをセットアップします。また、タイマーイベントをスケジュールして、アクティブな通知を自動的に閉じます。
        connect(notification.get(), &QWebEngineNotification::closed, this, &NotificationPopup::onClosed);
        QTimer::singleShot(10000, notification.get(), [&] () { onClosed(); });

    }
アクティブ通知を閉じる
タイムアウトか、JavaScript イベントを処理することで、現在アクティブな通知を閉じるステップを実行します。まず、QWidget::hide ()を呼び出して、ポップアップ・ウィジェット自体を隠します。次に、QWebEngineNotification::close() メソッドを呼び出して、JavaScript コードに通知します。最後に、std::unique_ptr::reset() メソッドで通知オブジェクトを破棄します。
    void onClosed()
    {
        hide();
        notification->close();
        notification.reset();
    }
ユーザーインタラクションの実装
通知のクリック・ステップを実装するために、QWidget::mouseReleaseEvent ()を通してマウスのインタラクションを処理します。このイベントでは、QWebEngineNotification::click ()メソッドを呼び出すことで、JavaScript コードが通知されます。そして、notificationが完全に処理され、もう必要ないとみなされるため、自動的にcloseステップを実行し、破棄することができます。
    void mouseReleaseEvent(QMouseEvent *event) override
    {
        QWidget::mouseReleaseEvent(event);
        if (notification && event->button() == Qt::LeftButton) {
            notification->click();
            onClosed();
        }
    }
© 2025 The Qt Company Ltd. Documentation contributions included herein are the copyrights of their respective owners. The documentation provided herein is licensed under the terms of the GNU Free Documentation License version 1.3 as published by the Free Software Foundation. Qt and respective logos are trademarks of The Qt Company Ltd. in Finland and/or other countries worldwide. All other trademarks are property of their respective owners.

