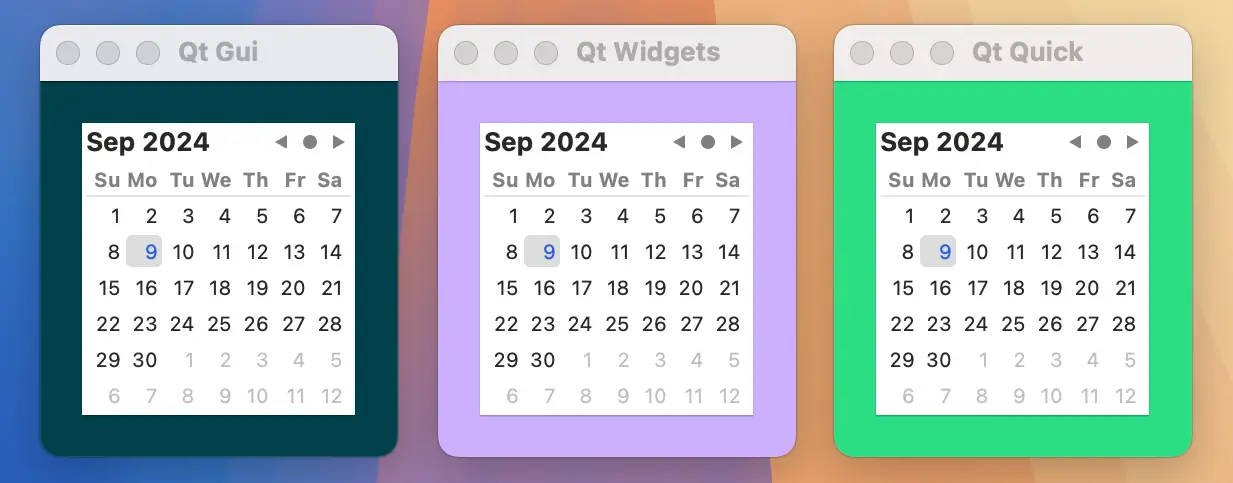
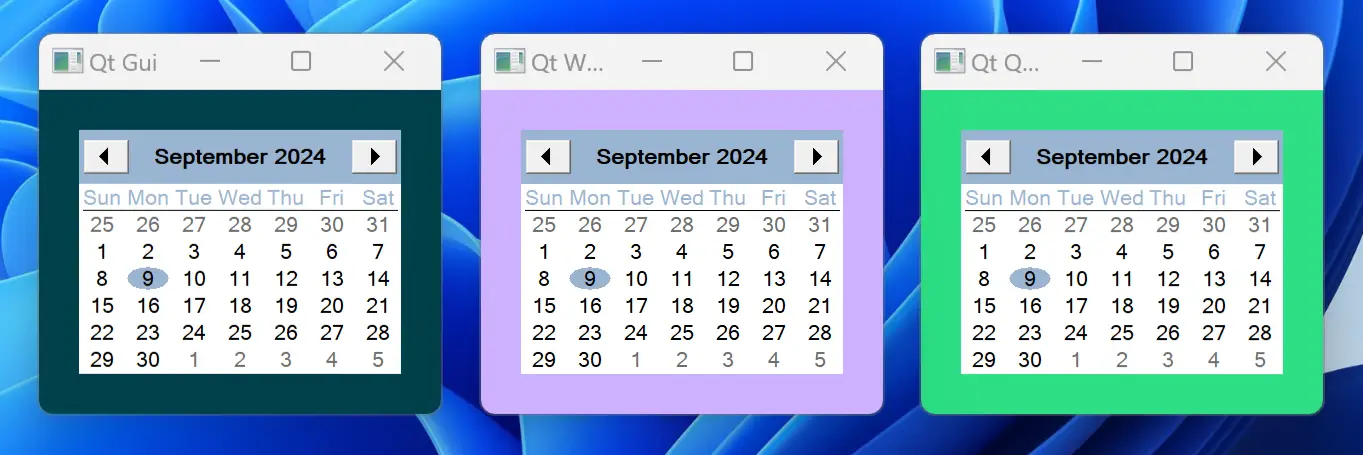
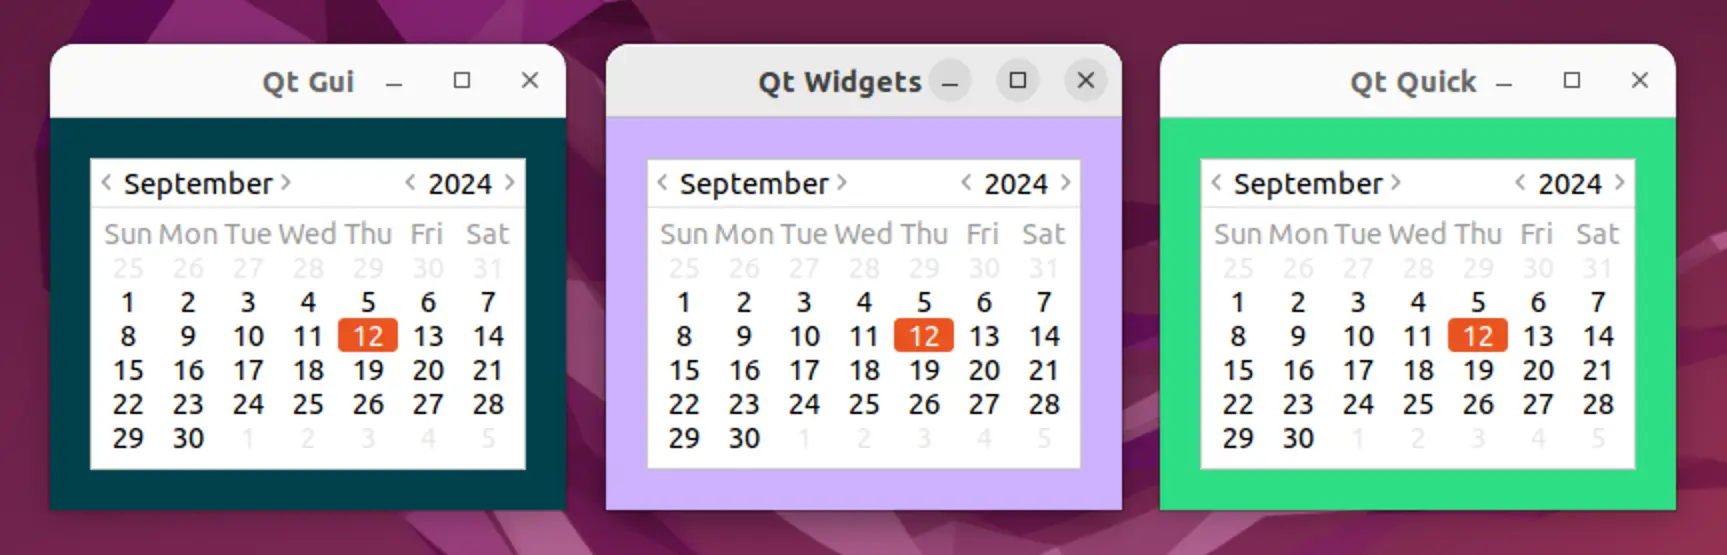
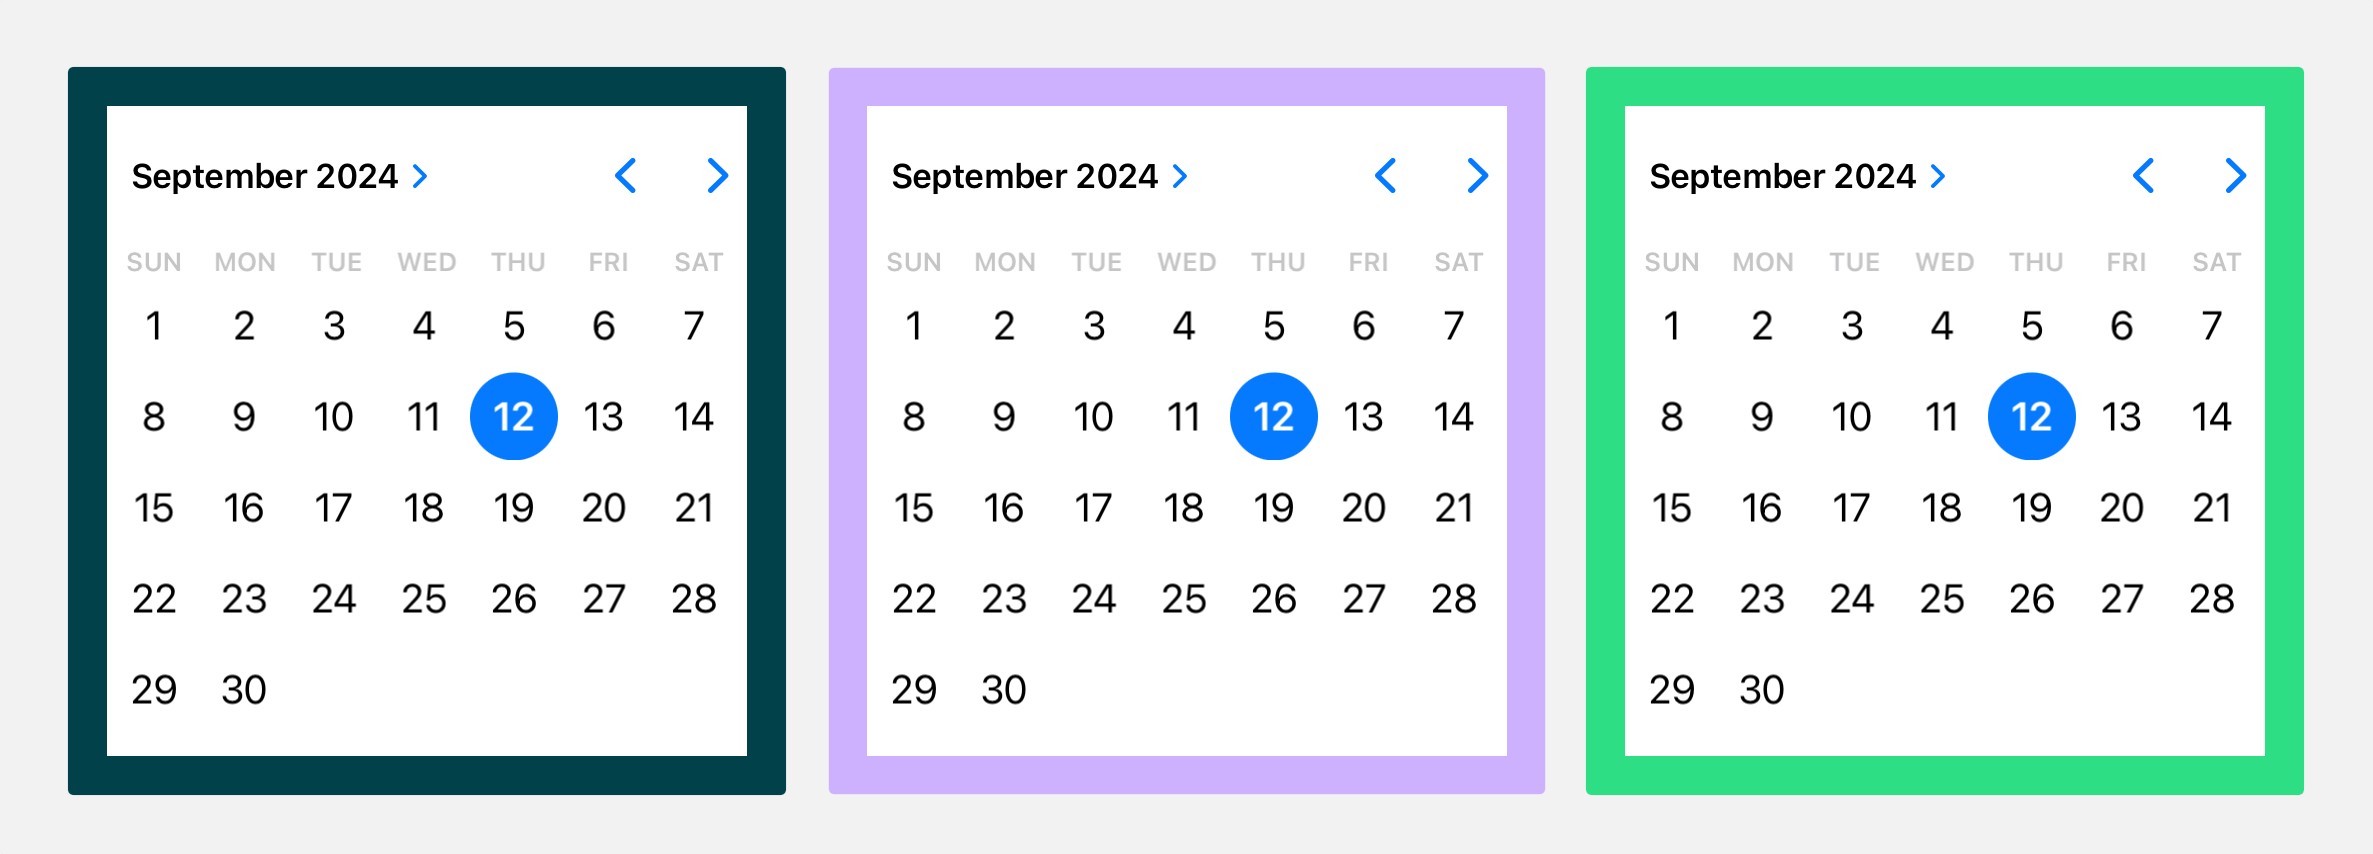
ウィンドウの埋め込み例
Qt アプリケーションに Qt 以外の UI 要素を埋め込む方法のデモです。
Qt は Qt Widget とQt Quick ベースのアプリケーションの両方に幅広い UI コントロールを提供していますが、プラットフォームのネイティブ UI ツールキットなど、他の UI ツールキットのコントロールを使用することが望ましい場合もあります。
QWindow これらのコントロールを統合するために、ネイティブ UI コントロールのQWindow 表現を作成し、Qt UI 内に埋め込むことができます。このようにして作成されたウィンドウは、(Qtにとって)外来のUIツールキットによって作成されたコントロールを表すため、Qtでは外来ウィンドウとして知られています。
外部ウィンドウの作成
QWindow 表現を作成するには、QWindow::fromWinId() を使用し、不透明な WId 型で表されるネイティブ・ウィンドウ・ハンドルへの参照を渡します。
各プラットフォームでは、WId不透明型がどのネイティブ型にマッピングされるかを定義しています。
結果は、ネイティブ・ウィンドウ・ハンドルを表すQWindow です。
注意: Qt は、外部ウィンドウを作成する際にネイティブ・ウィンドウ・ハンドルの(排他的な)所有権を取らないため、アプリケーションは、外部ウィンドウQWindow の有効期間中、ネイティブ・ウィンドウを維持する責任を負います。
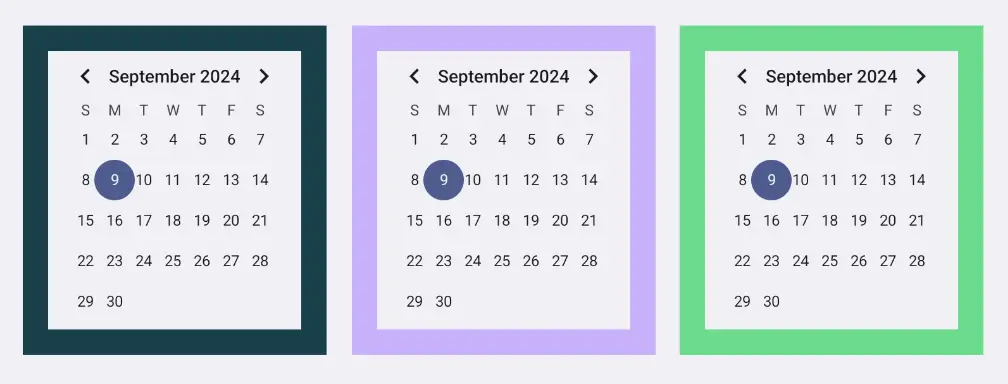
QWindow::fromWinId() を使ってQWindow を作成する前に、ネイティブ・ウィンドウ・ハンドルが必要です。この例では、月カレンダー・コントロールを埋め込みます。ほとんどのプラットフォームでは、ネイティブUIツールキットに月カレンダー・コントロールが含まれているか、すぐに利用できるからです。各プラットフォームでのカレンダーの作成方法の詳細は、以下のコード・スニペットに示されています。
アプリケーションの終了時に、ネイティブ・ハンドルが生き続けるだけでなく、適切にクリーンアップされるように、main() から戻る前に実行するクリーンアップ関数のリストを保持しています。
ネイティブ・ウィンドウ・ハンドルを作成し、それをQWindow に変換することに加え て、QWindow に最小サイズを設定します。これにより、Qtは埋め込まれた外部ウィンドウを適切にレイアウトすることができます。
#include <AppKit/NSDatePicker.h>
#include <AppKit/NSLayoutConstraint.h>

QWindow *createCalendarWindow()
{
    auto *datePicker = [NSDatePicker new];
    cleanupFunctions.push_back([=]{ [datePicker release]; });

    datePicker.datePickerStyle = NSDatePickerStyleClockAndCalendar;
    datePicker.datePickerElements = NSDatePickerElementFlagYearMonthDay;
    datePicker.drawsBackground = YES;
    datePicker.dateValue = [NSDate now];

    auto *calendarWindow = QWindow::fromWinId(WId(datePicker));
    calendarWindow->setMinimumSize(QSizeF::fromCGSize(datePicker.fittingSize).toSize());

    return calendarWindow;
}
#include <windows.h>
#include <commctrl.h>

QWindow *createCalendarWindow()
{
    static bool initializedDateControl = []{
        INITCOMMONCONTROLSEX icex;
        icex.dwSize = sizeof(icex);
        icex.dwICC = ICC_DATE_CLASSES;
        return InitCommonControlsEx(&icex);
    }();
    Q_ASSERT(initializedDateControl);

    HWND monthCalendar = CreateWindow(MONTHCAL_CLASSW,
        nullptr, MCS_NOTODAYCIRCLE | MCS_NOTODAY, 0, 0, 0, 0,
        nullptr, nullptr, GetModuleHandle(nullptr), nullptr);
    cleanupFunctions.push_back([=]{ DestroyWindow(monthCalendar); });

    auto *calendarWindow = QWindow::fromWinId(WId(monthCalendar));

    RECT minimumSize;
    MonthCal_GetMinReqRect(monthCalendar, &minimumSize);
    const auto dpr = calendarWindow->devicePixelRatio();
    calendarWindow->setMinimumSize(QSize(
        minimumSize.right / dpr,minimumSize.bottom / dpr));

    return calendarWindow;
}
#include <gtk/gtk.h>
#include <gtk/gtkx.h>

QWindow *createCalendarWindow()
{
    static bool initializedGTK = []{
        qputenv("GDK_BACKEND", "x11");
        return gtk_init_check(nullptr, nullptr);
    }();
    Q_ASSERT(initializedGTK);

    auto *plug = gtk_plug_new(0);
    g_signal_connect(GTK_WIDGET(plug), "delete-event", G_CALLBACK(+[]{
        return true; // Don't destroy on close
    }), nullptr);
    cleanupFunctions.push_back([=]{ gtk_widget_destroy(GTK_WIDGET(plug)); });

    auto *calendar = gtk_calendar_new();
    gtk_container_add(GTK_CONTAINER(plug), GTK_WIDGET(calendar));
    gtk_widget_show_all(plug);

    auto *calendarWindow = QWindow::fromWinId(gtk_plug_get_id(GTK_PLUG(plug)));

    GtkRequisition minimumSize;
    gtk_widget_get_preferred_size(calendar, &minimumSize, NULL);
    calendarWindow->setMinimumSize(QSize(minimumSize.width, minimumSize.height));

    return calendarWindow;
}
#include <UIKit/UIDatePicker.h>

QWindow *createCalendarWindow()
{
    auto *datePicker = [UIDatePicker new];
    cleanupFunctions.push_back([=]{ [datePicker release]; });

    datePicker.datePickerMode = UIDatePickerModeDate;
    datePicker.preferredDatePickerStyle = UIDatePickerStyleInline;
    datePicker.backgroundColor = UIColor.systemBackgroundColor;

    auto *calendarWindow = QWindow::fromWinId(WId(datePicker));
    calendarWindow->setMinimumSize(QSizeF::fromCGSize(datePicker.frame.size).toSize());

    return calendarWindow;
}
Q_DECLARE_JNI_CLASS(CalendarView, "android/widget/CalendarView")
Q_DECLARE_JNI_CLASS(Color, "android/graphics/Color")

QWindow *createCalendarWindow()
{
    using namespace QtJniTypes;
    using namespace QNativeInterface;

    auto *androidApp = qGuiApp->nativeInterface<QAndroidApplication>();
    Q_ASSERT(androidApp);

    auto *calendarView = new CalendarView(androidApp->context());
    cleanupFunctions.push_back([=]{ delete calendarView; });

    // Resolving Android default colors is not trivial, so let's ask Qt
    QColor paletteColor = qGuiApp->palette().color(QPalette::Window);
    int backgroundColor = Color::callStaticMethod<int>("rgb",
        paletteColor.red(), paletteColor.green(), paletteColor.blue());
    calendarView->callMethod<void>("setBackgroundColor", backgroundColor);

    auto *calendarWindow = QWindow::fromWinId(WId(calendarView->object()));
    calendarWindow->setMinimumSize(QSize(200, 220));

    return calendarWindow;
}
#include <emscripten.h>
#include <emscripten/val.h>
using emscripten::val;
using emscripten::EM_VAL;

EM_JS(EM_VAL, createCalendarElement, (), {
    var calendar = document.createElement("calendar-date");
    calendar.innerHTML = "<calendar-month></calendar-month>";
    return Emval.toHandle(calendar);
});

QWindow *createCalendarWindow()
{
    static bool initializedCalendarComponent = []{
        return EM_ASM_INT(
            var script = document.createElement('script');
            script.src = "https://unpkg.com/cally";
            script.type = "module";
            document.head.appendChild(script);
            return true;
        );
    }();
    Q_ASSERT(initializedCalendarComponent);

    val *calendarElement = new val(val::take_ownership(createCalendarElement()));
    cleanupFunctions.push_back([calendarElement]{ delete calendarElement; });

    QWindow *window = QWindow::fromWinId(WId(calendarElement));
    window->setMinimumSize(QSize(250, 300));
    return window;
}
外部ウィンドウの埋め込み
QWindow で、それを Qt UI に埋め込むことができます。以下に説明するように、いくつかのオプションがあります。
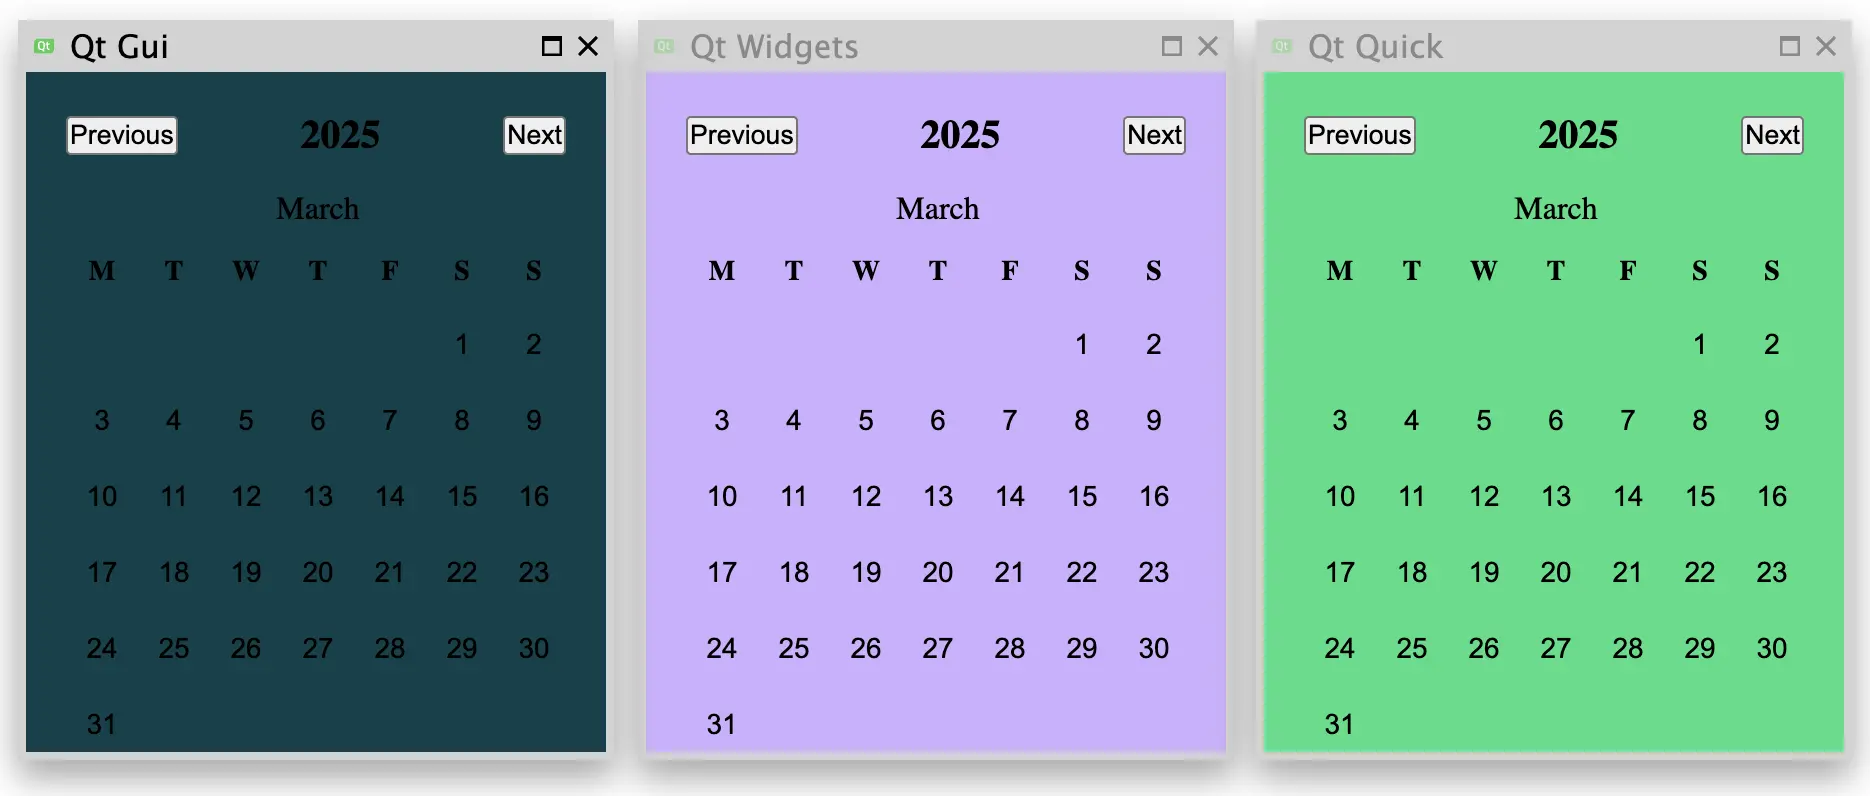
Qt GUIへの埋め込み
最も低いレベルでは、QWindow::setParent() を介して、別のQWindow に再ペアレントすることで、外部ウィンドウを埋め込むことができます。このアプローチでは、アプリケーション開発者に、埋め込まれた子ウィンドウの位置、サイズ変更、その他の管理を任せることになります。
この例では、まず最小限のコンテナウィンドウの実装を作成します。
class ContainerWindow : public QRasterWindow
{
protected:
    bool event(QEvent *event) override
    {
        if (event->type() == QEvent::ChildWindowAdded) {
            auto *childWindow = static_cast<QChildWindowEvent*>(event)->child();
            childWindow->resize(childWindow->minimumSize());
            setMinimumSize(childWindow->size().grownBy(contentsMargins));
            resize(minimumSize());
        }

        return QRasterWindow::event(event);
    }

    void showEvent(QShowEvent *) override
    {
        findChild<QWindow*>()->setVisible(true);
    }

    void resizeEvent(QResizeEvent *) override
    {
        auto *containedWindow = findChild<QWindow*>();
        containedWindow->setPosition(
            (width() / 2)  - containedWindow->width() / 2,
            (height() / 2) - containedWindow->height() / 2
        );
    }

    void paintEvent(QPaintEvent *) override
    {
        QPainter painter(this);
        painter.fillRect(0, 0, width(), height(), "#00414A");
    }
};
次に、このコンテナウィンドウに外部ウィンドウをリペアレントします。
ContainerWindow window;
window.setTitle("Qt Gui");

auto *calendarWindow = createCalendarWindow();
calendarWindow->setParent(&window);
組み込みQt Widgets
Qt Widgets UIスタック上に構築されたアプリケーションの場合は、QWindow::fromWinId ()と同じアプローチで、QWidget::createWindowContainer ()を介して、QWindow ()のQWidget 表現を作成します。
その後、QWidget::setParent()を使って、ウィジェットを別のウィジェットに再ペアレントすることができます。ただし、上記の Qt GUI の例と同じように、位置決めやサイズ変更などを手動で管理する必要があります。この例では、ウィンドウ・コンテナ・ウィジェットをQVBoxLayout に追加します。これにより、トップレベル・ウィジェットの内側に、外側のウィンドウを自動的にセンタリングできます。
QWidget widget;
widget.setPalette(QColor("#CDB0FF"));
widget.setWindowTitle("Qt Widgets");
widget.setLayout(new QVBoxLayout);
widget.layout()->setContentsMargins(contentsMargins);
widget.layout()->setAlignment(Qt::AlignCenter);

auto *calendarWidget = QWidget::createWindowContainer(createCalendarWindow());
widget.layout()->addWidget(calendarWidget);
埋め込みQt Quick
最後に、Qt Quick UI スタック上に構築されたアプリケーションでは、WindowContainer アイテムを使用して、外部ウィンドウを管理します。
Window {
    id: root
    title: "Qt Quick"
    color: "#2CDE85"

    property alias calendarWindow: calendar.window

    property int contentsMargins: 20

    minimumWidth: calendarWindow.minimumWidth + contentsMargins * 2
    minimumHeight: calendarWindow.minimumHeight + contentsMargins * 2

    WindowContainer {
        id: calendar
        width: window.minimumWidth
        height: window.minimumHeight
        anchors.centerIn: parent
    }
}
この例では、外部ウィンドウはコンテキストプロパティとしてQMLエンジンに公開されていますが、アプリケーションのニーズに応じて、さまざまな方法で解決することができます。
QQmlApplicationEngine engine;
engine.setInitialProperties({{ "calendarWindow", QVariant::fromValue(createCalendarWindow()) }});
engine.loadFromModule("windowembedding", "Main");
© 2026 The Qt Company Ltd. Documentation contributions included herein are the copyrights of their respective owners. The documentation provided herein is licensed under the terms of the GNU Free Documentation License version 1.3 as published by the Free Software Foundation. Qt and respective logos are trademarks of The Qt Company Ltd. in Finland and/or other countries worldwide. All other trademarks are property of their respective owners.
