センサー
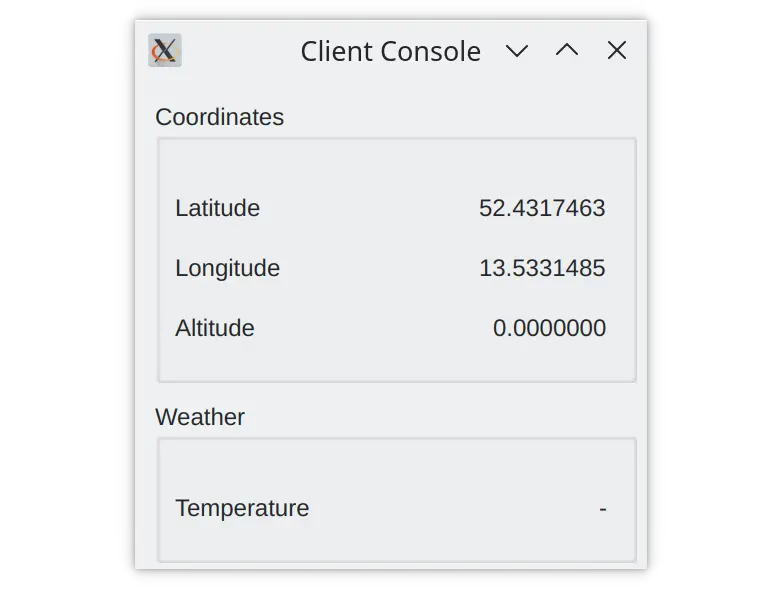
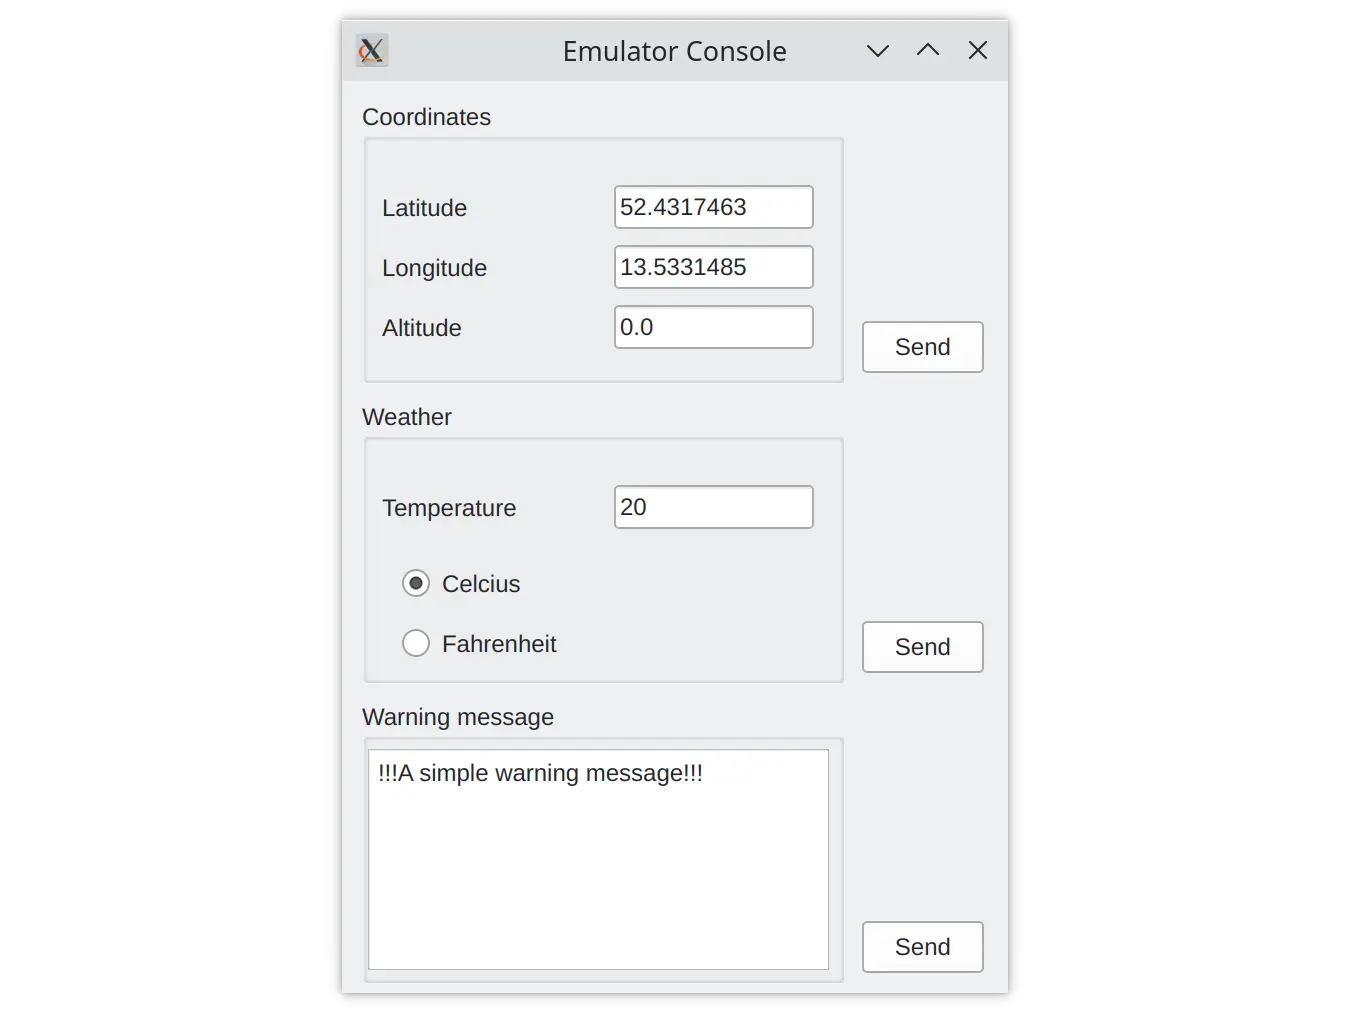
Sensorsの例では、UDPソケットを使ってprotobufメッセージを送信することで、2つのアプリケーションがどのように通信できるかを示している。
Sensorsのサンプルは以下のコンポーネントで構成されています:
protobuf_sensorsqt_add_protobuf呼び出しを使用して protobuf スキーマから生成するライブラリ。protobuf_sensor_emulator単純なセンサーの動作をエミュレートするアプリケーションprotobuf_sensors_clientUDP ソケットからのセンサーデータを表示するアプリケーション。
クライアントアプリケーションはlocalhost UDP ポート65500 にバインドし、エミュレータアプリケーションからのデータを待ちます。

エミュレータアプリケーションを使用してセンサーデータの値を変更し、クライアントの UDP ポートにデータを送信します。

アプリケーションはprotobuf_sensors ライブラリから生成されたメッセージを使用して通信します。ライブラリは.protoファイルに記述されたprotobufスキーマから生成されます。
qt_add_protobuf(protobuf_sensors
    PROTO_FILES
        sensors.proto
        tlv.proto
)
最初のファイルには Type-Length-Value メッセージが記述されており、センサーデータをラップしている:
package qt.examples.sensors.tlv;

enum MessageType {
    Coordinates = 0;
    Temperature = 1;
    WarningNotification = 2;
}

// Protobuf messages imply inline data size.
message TlvMessage {
    MessageType type = 1;
    bytes value = 2;
}
2番目の.protoファイルにはセンサーメッセージの記述がある:
package qt.examples.sensors;

message Coordinates {
    double longitude = 1;
    double latitude = 2;
    double altitude = 3;
}

message Temperature {
    enum Unit {
        Farenheit = 0;
        Celsius = 1;
    }
    sint32 value = 1;
    Unit units = 2;
}

message WarningNotification {
    string text = 1;
}メッセージはクライアントでインスタンス化したQProtobufSerializer を使ってシリアライズされる:
class SensorClient : public QObject
{
    Q_OBJECT
...
private:
    QUdpSocket m_client;
    QProtobufSerializer m_serializer;
};
そしてエミュレータ:
class SensorEmulator : public QObject
{
    Q_OBJECT
...
    QUdpSocket m_socket;
    QProtobufSerializer m_serializer;
};
エミュレータ・アプリケーションでSend ボタンをクリックすると、QLineEdit フィールドのデータが文字列フォーマットからメッセージ・フィールド固有のフォーマットに変換されます(例えば、座標メッセージのフィールドはダブル):
    QObject::connect(ui->sendCoordinates, &QPushButton::clicked, this, [this]() {
        qt::examples::sensors::Coordinates coord;
        coord.setLatitude(ui->latitudeValue->text().toDouble());
        coord.setLongitude(ui->longitudeValue->text().toDouble());
        coord.setAltitude(ui->altitudeValue->text().toDouble());
        emit coordinatesUpdated(coord);
    });
その後、すべてのフィールドを含むメッセージがシリアライズされ、Type-Length-Value メッセージでラップされます:
    Q_ASSERT(serializer != nullptr);
    tlv::TlvMessage msg;
    msg.setType(type);
    msg.setValue(data);
    return msg.serialize(serializer);
クライアントは受信したデータグラムに対して逆の操作を行う。まず Type-Length-Value メッセージがデータグラムデータからデシリアライズされる:
       const autodatagram=m_client.receiveDatagram(); qt::examples::sensors::tlv::TlvMessage msg; msg.deserialize(&m_serializer,datagram.data());if(m_serializer.lastError() != QAbstractProtobufSerializer::エラー::なし) {。            qWarning().nospace() << "Unable to deserialize datagram ("
                       <<qToUnderlying(m_serializer.lastError())<< ")"<<m_serializer.lastErrorString();continue; }
次に、Type-Length-Value メッセージがセンサーメッセージにデシリアライズされる:
            qt::examples::sensors::Coordinates coord;
            coord.deserialize(&m_serializer, msg.value());
            emit coordinatesUpdated(coord);
            break;
最後に、変換され、ユーザーに表示される:
    ui->latitudeValue->setText(QString::number(coord.latitude(), 'f', 7));
    ui->longitudeValue->setText(QString::number(coord.longitude(), 'f', 7));
    ui->altitudeValue->setText(QString::number(coord.altitude(), 'f', 7));
注意: この例を実行する前に、オペレーティング・システムがUDPポート65500 のバインドとUDP経由のデータ送信を許可していることを確認してください。
© 2025 The Qt Company Ltd. Documentation contributions included herein are the copyrights of their respective owners. The documentation provided herein is licensed under the terms of the GNU Free Documentation License version 1.3 as published by the Free Software Foundation. Qt and respective logos are trademarks of The Qt Company Ltd. in Finland and/or other countries worldwide. All other trademarks are property of their respective owners.

