
Qt Quick TableViews の例 - Pixelator
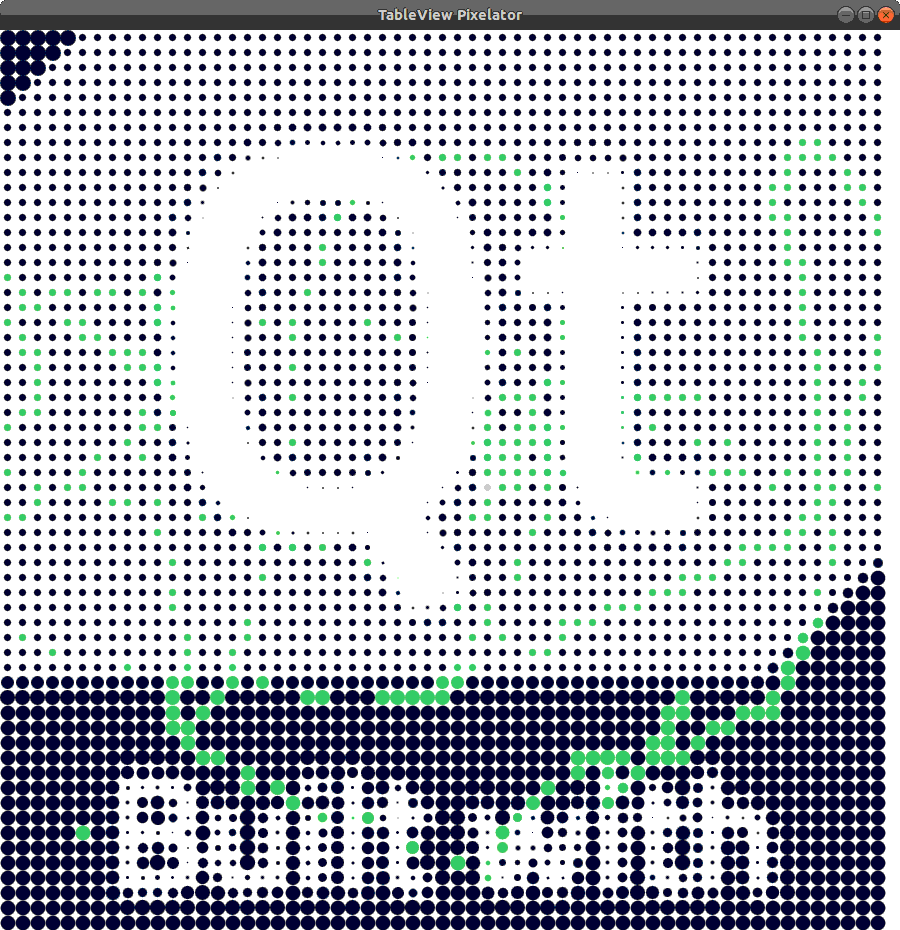
Pixelator のサンプルでは、QML の `TableView ` およびデリゲートを使用して、カスタムテーブルモデルを実装する方法を示しています。
例の動作確認
以下の手順でサンプルを実行できます:
- Qt Creator
Welcome モードを開き、Examples からこのサンプルを選択します。詳細については、Qt Creator の「チュートリアル: ビルドと実行」を参照してください。
- Qt Extension for Visual Studio Code
Command Palette から `Qt: Open Qt examples ` コマンドを実行し、リストからサンプルを選択します。詳細については、Qt Extension for Visual Studio Code の「チュートリアル: ビルドと実行」を参照してください。
class ImageModel : public QAbstractTableModel
{
    Q_OBJECT
    Q_PROPERTY(QString source READ source WRITE setSource NOTIFY sourceChanged)
    QML_ELEMENT
public:
    ImageModel(QObject *parent = nullptr);

    QString source() const;
    void setSource(const QString &source);

    int rowCount(const QModelIndex &parent = QModelIndex()) const override;
    int columnCount(const QModelIndex &parent = QModelIndex()) const override;

    QVariant data(const QModelIndex &index, int role = Qt::DisplayRole) const override;

    QVariant headerData(int /* section */, Qt::Orientation /* orientation */,
                        int role) const override;

signals:
    void sourceChanged();

private:
    QString m_source;
    QImage m_image;
};必要なのは、単純な読み取り専用のテーブルモデルだけです。したがって、画像の寸法を示し、TableView にデータを渡すための関数を実装する必要があります。Qt プロパティシステムと、画像のパスを設定するためのソースプロパティQString を使用します。また、モデルを QML から利用できるようにするために、QML_ELEMENT マクロを追加します。
void ImageModel::setSource(const QString &source)
{
    if (m_source == source)
        return;

    beginResetModel();
    m_source = source;
    m_image.load(m_source);
    endResetModel();
}ここでは、ソースパスが設定された時点で画像を読み込みます。ソースパスが変更された場合は、その前にbeginResetModel() を呼び出す必要があります。画像の読み込みが完了したら、endResetModel() を呼び出す必要があります。
int ImageModel::rowCount(const QModelIndex &parent) const
{
    if (parent.isValid())
        return 0;
    return m_image.height();
}

int ImageModel::columnCount(const QModelIndex &parent) const
{
    if (parent.isValid())
        return 0;
    return m_image.width();
}
行数と列数は、それぞれ画像の高さと幅に設定されます。
QVariant ImageModel::data(const QModelIndex &index, int role) const
{
    if (!index.isValid() || role != Qt::DisplayRole)
        return QVariant();
    return qGray(m_image.pixel(index.column(), index.row()));
}
このオーバーロードされた関数により、画像のピクセルデータにアクセスできます。この関数を `display` ロールで呼び出すと、ピクセルのグレースケール値が返されます。
Component {
    id: pixelDelegate

    Item {
        required property real display

        readonly property real gray: display / 255.0
        readonly property real size: 16

        implicitWidth: size
        implicitHeight: size
TableView 内の各ピクセルは、デリゲートコンポーネントを介して表示されます。これには、テーブルのセルサイズを定義する暗黙的な高さと幅を持つアイテムが含まれています。また、モデルから取得されたピクセルのグレー値を保持するプロパティも備えています。
Rectangle {
    id: rect
    anchors.centerIn: parent
    color: "#09102b"
    radius: parent.size - parent.gray * parent.size
    implicitWidth: radius
    implicitHeight: radius
Item の内部には、ピクセルのグレースケール値に基づいてサイズと半径が設定された、角が丸いRectangle があります。
MouseArea {
    anchors.fill: parent
    hoverEnabled: true
    onEntered: rect.color = "#cecfd5"
    onExited: colorAnimation.start()
}ちょっとしたインタラクションとして、Item 内にMouseArea を配置し、マウスオーバー時に の色を変更するようにしています。
ColorAnimation on color {
    id: colorAnimation
    running: false
    to: "#41cd52"
    duration: 1500
}また、Rectangle には、色が変更された際に色をフェードイン・フェードアウトさせる短いカラーアニメーションが設定されています。
TableView {
    id: tableView
    anchors.fill: parent
    model: ImageModel {
        source: ":/qt.png"
    }

    delegate: pixelDelegate
}
TableView はウィンドウ全体にまたがっており、カスタムImageModel のインスタンスが添付されています。
© 2026 The Qt Company Ltd. Documentation contributions included herein are the copyrights of their respective owners. The documentation provided herein is licensed under the terms of the GNU Free Documentation License version 1.3 as published by the Free Software Foundation. Qt and respective logos are trademarks of The Qt Company Ltd. in Finland and/or other countries worldwide. All other trademarks are property of their respective owners.
