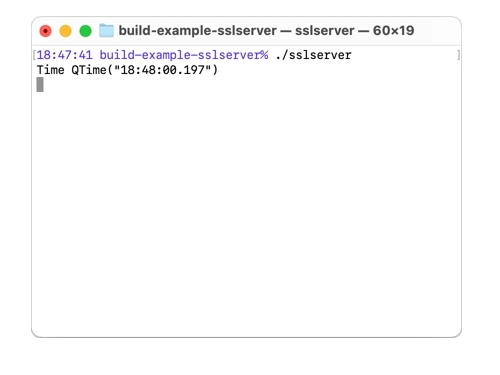
SSLサーバーとクライアント
QSslSocketsを使用した安全なリモートオブジェクトネットワークの設定。
通信を暗号化することは、完全に制御できないネットワークを通してデータを渡す必要がある場合に重要です。この例の2つのアプリケーションは、SSL接続を介してリモートオブジェクトを共有する方法と、それらにアクセスする方法を示しています。

sslserverと sslcppclientはどちらもカスタムルートCA証明書を使い、sslserver/certにあるお互いの証明書を検証します。
SSLサーバー
sslserverには証明書と秘密鍵が設定されています。
autoconfig=QSslConfiguration::defaultConfiguration(); config.setCaCertificates(QSslCertificate::fromPath(QStringLiteral(":/sslcert/rootCA.pem")));QFilecertificateFile(QStringLiteral(":/sslcert/server.crt"));if(certificateFile.open(QIODevice::ReadOnly|QIODevice::Text)) config.setLocalCertificate(QSslCertificate(certificateFile.readAll()、 QSsl::Pem));else    qFatal("Could not open certificate file");
QFilekeyFile(QStringLiteral(":/sslcert/server.key"));if(keyFile.open(QIODevice::読み取り専用QIODevice::Text)) { key(keyFile.readAll)    QSslKeykey(keyFile.readAll()、 QSsl::Rsa、 QSsl::Pem、 QSsl::PrivateKey);if(key.isNull())        qFatal("Key is not valid");
    config.setPrivateKey(key); }else{.    qFatal("Could not open key file");
} config.setPeerVerifyMode(QSslSocket::VerifyPeer);QSslConfiguration::setDefaultConfiguration(config);
次に、QRemoteObjectHost オブジェクトとQSslServer オブジェクトを作成する。QSslServer オブジェクトはポート65511でリッスンする。次に、QRemoteObjectHost オブジェクトに対して、QSslServer オブジェクトの URL を指定して setHostUrl を呼び出す。
QRemoteObjectHost host;
QSslServer server;
server.listen(QHostAddress::Any, 65511);
host.setHostUrl(server.serverAddress().toString(), QRemoteObjectHost::AllowExternalRegistration);
errorOccurredシグナルを処理するためにラムダが使用され、エラーがターミナルに出力される。2番目のラムダは、エラーハンドラを接続する pendingConnectionAvailable シグナルに接続され、受信ソケットを引数としてQRemoteObjectHost オブジェクト上で addHostSideConnection を呼び出し、ホストオブジェクトに通信用のソケットを使用させる。
QObject::connect(&server, &)QSslServer::errorOccurred, [](QSslSocket*ソケットQAbstractSocket::SocketError エラー) { 接続を確立する。                     Q_UNUSED(socket);
                     qDebug() << "QSslServer::errorOccurred" << error;
                 });QObject::connect(&server, &)QSslServer::pendingConnectionAvailable, [&server, &host](){。    qDebug() << "New connection available";
    QSslSocket*socket =  qobject_cast<QSslSocket*>(server.nextPendingConnection()); Q_ASSERT(socket);    QObject::connect(socket, &)QSslSocket::errorOccurred, [](QAbstractSocketエラー) {::SocketError                         qDebug() << "QSslSocket::error" << error;
                     }); host.addHostSideConnection(socket); });
最後に、MinuteTimerオブジェクトを作成し、そのMinuteTimerオブジェクトを引数としてQRemoteObjectHost 。
MinuteTimer timer;
host.enableRemoting(&timer);
SSLクライアント
sslcppclientはルートCA証明書を設定し、Testerオブジェクトを作成します。
int main(int argc, char *argv[])
{
    QCoreApplication a(argc, argv);

    auto config = QSslConfiguration::defaultConfiguration();
    config.setCaCertificates(QSslCertificate::fromPath(QStringLiteral(":/sslcert/rootCA.pem")));
    QSslConfiguration::setDefaultConfiguration(config);

    Tester t;
    return a.exec();
}
Tester コンストラクタで、一時的なQRemoteObjectNode オブジェクトが作成され、 setupConnection がQSslSocket オブジェクトの作成と設定に使われます。エラーハンドラが接続され、QRemoteObjectNode オブジェクトで addClientSideConnection を呼び出すことで、QSslSocket が使用される。
QRemoteObjectNodem_client;autosocket=setupConnection(); connect(socket, &::errorOccurred, ソケット, &::エラーハンドラ)QSslSocket::errorOccurred,socket, [](QAbstractSocket::SocketError エラー){。    qDebug() << "QSslSocket::error" << error;
}) ; m_client.addClientSideConnection(socket);
次に、Testerクラスのメンバーである3つのQScopedPointer 、QRemoteObjectNode オブジェクトのacquireを使用して、MinuteTimerの3つのレプリカに接続する。最後に、QTimer::singleShot 、遅延後にresetを4回呼び出す。
ptr1.reset(m_client.acquire< MinuteTimerReplica >());
ptr2.reset(m_client.acquire< MinuteTimerReplica >());
ptr3.reset(m_client.acquire< MinuteTimerReplica >());
QTimer::singleShot(0, this, &Tester::clear);
QTimer::singleShot(1, this, &Tester::clear);
QTimer::singleShot(10000, this, &Tester::clear);
QTimer::singleShot(11000, this, &Tester::clear);
Tester::clearが最初の3回呼び出されると、1つのポインタがバインドされていることがチェックされ、毎回異なるポインタがリセットされます。4回目に呼び出されると、アプリケーションが終了します。
voidclear() {static inti= 0;if(i== 0) { i++;if(ptr1.isNull())            qCritical() << "Pointer 1 was not set";
        ptr1.reset(); }else if(i== 1) { i++;if(ptr2.isNull())            qCritical() << "Pointer 2 was not set";
        ptr2.reset(); }else if(i== 2) { i++;if(ptr3.isNull())            qCritical() << "Pointer 3 was not set";
        ptr3.reset(); }else{ qApp->quit(); } }
© 2025 The Qt Company Ltd. Documentation contributions included herein are the copyrights of their respective owners. The documentation provided herein is licensed under the terms of the GNU Free Documentation License version 1.3 as published by the Free Software Foundation. Qt and respective logos are trademarks of The Qt Company Ltd. in Finland and/or other countries worldwide. All other trademarks are property of their respective owners.

