Annotate results
Annotations are a way to mark and comment on test results. You can filter tests by annotations, they are tracked in the statistical view of the History, and they can override results. Annotations are very versatile and customizable, so you have much freedom in how exactly you want to use them.
Define annotation types
Annotation types can be added and configured by admin users within the Annotations tab inside the global settings.
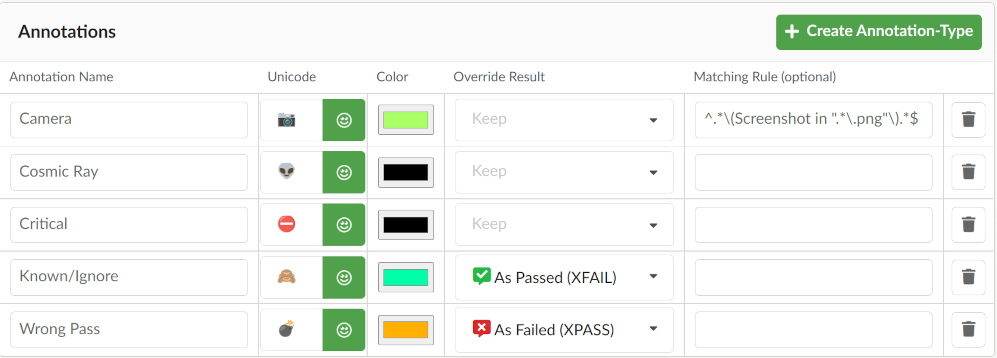
Annotation types in the global settings
An annotation type must have a name, a unicode character, and a color. The Unicode and Color fields define how an annotation is presented when an annotation of this type is added to a test or verification point. The Unicode field can be filled with any character, or by clicking the emoji icon and selecting an emoji from the Emoji Picker.
The Override Result setting can be used to specify whether the result of tests and events annotated with this annotation type should remain unchanged by selecting Keep, or whether the result should be overridden as passed by selecting As Passed (XFAIL), or whether the result should be overridden as failed by selecting As Failed (XPASS).
Finally, a regular expression can be entered for the Matching Rule, which will automatically add this annotation type to verification points if their text matches the regular expression. Automatic assigned annotations may be unset on the Verification pages.
Using annotations
Annotations may be added on the Explore, Verification, and History views using the  icon.
icon.
Annotations on tests
Use the Annotation icon icon next to Test names on the Explore, and History views to add an annotation. By clicking the icon, a dialog is shown to configure the annotation.
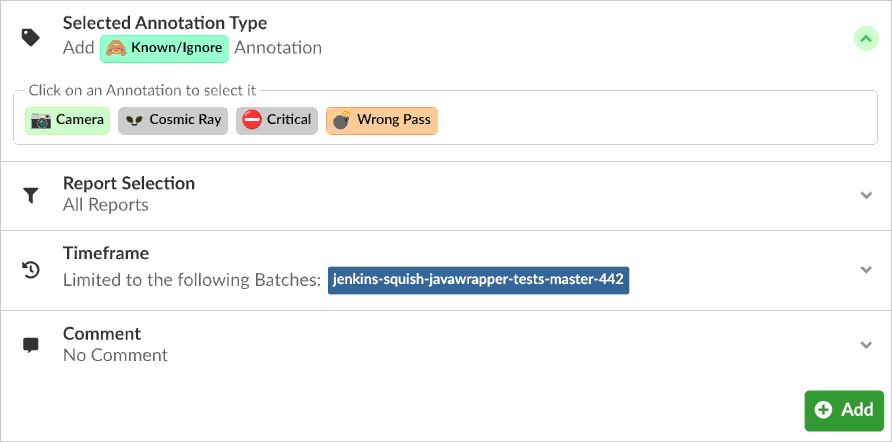
Configure new annotation dialog
These are the possible configuration options:
- Selected Annotation Type: Which Annotation type is to be added.
- Report Selection: By default, the Test is annotated across all reports of a batch. In this section, you can select which labels need to be assigned to a report in order for it to be annotated.
- Timeframe: By default, only the current batch (or latest batch if in History view) is annotated. You can also chose to annotate a test across all existing batches, or across a specific selection of recent batches, or within a specific time range. You can either select an open ended time frame with just a start time, or a well defined time frame with a start and end time.
- Comment: By default, an empty comment is created and linked to the new annotation. Any useful information can be entered here and will be included in the comment.
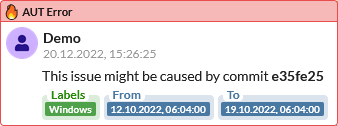
Added annotations are shown as badges within the test column on the right side of the test. The color, text, and icon defined in the annotation type settings are used for the displayed annotation badges. This in an example for an annotation badge: 
Clicking the X-button next to the annotation badge will open the annotation removal dialog. You can chose between removing the annotation or changing the annotation end time for time based annotations.
For tests that have annotations set on some child test, the annotation badge is rendered with a dotted border, and it is clickable. Clicking on a child annotation badge on the Explore view will drill down to the test the annotation applies to.
When using an annotation type with Override Result the test result will change from FAIL (  FAIL ) to a XFAIL (
  XFAIL ), or PASS (
  PASS ) to a XPASS (
  XPASS ).
By hovering over the annotation badge, a tooltip is shown with information about the annotation configuration.
Annotation Tooltip
All annotations set for a particular test are also listed on that test profile page, tab Annotations. The test profile page is reachable by clicking the test element its  icon.
icon.
Annotations on verification points
Verifications points on the Verifications view can be annotated by clicking the icon.
Configure annotations
In front of each annotation type name is a checkbox to set, or unset an annotation. This type of annotations only applies to the verification point on which it is set, even if a Matching Rule is set in the annotation type settings.
Annotations on verification points are shown on the Explore view with a VP sign. These annotations are clickable and navigate to the Verifications view, to the verification point at which the annotation is set. In case of multiple verification points with same annotation type exists, the icon  is visible. Clicking the icon, the next verification point with this annotation is navigated to.
Annotations history and statistics
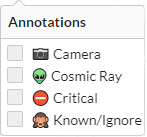
The History view lists all defined annotation types on the left filter pane. Selecting one or more annotation types, only shows batches within the history timelines that contain at least one of the selected annotation types.
By selecting Annotations in the Show dropdown above the timelines, annotation badges are shown within the batch items of the history timelines. Time based annotations are displayed as separate annotation items within the history timelines as shown in the example below.

History view with Annotations
The history Stats tabs shows a column for each annotation type in use, counting the number of annotations set per test or label.
© 2024 The Qt Company Ltd.
Documentation contributions included herein are the copyrights of
their respective owners.
The documentation provided herein is licensed under the terms of the GNU Free Documentation License version 1.3 as published by the Free Software Foundation.
Qt and respective logos are trademarks of The Qt Company Ltd. in Finland and/or other countries worldwide. All other trademarks are property
of their respective owners.
