Manual Testing
This is a step-by-step guide on how to create and execute manual tests in Test Center.
Create or select a project
If you already manage automated test results in Test Center, you can use the same project you use for your automated test results. Otherwise, create a new project.
Open the Tests view
To open this view, select the Tests view.
Creating Manual tests
If you don't already have manual tests, you can create them in the Test Management tab
Add a new Test Suite
Select the + button on the top of the Tests pane to add a new test suite.

Tests view - Test Management
And in the New Suite dialog, specify a name for the suite. Select Use BDD Test Structure (Behaviour Driven Testing) to create the following hierarchy: Suite > Feature > Scenario > Step. If you don't choose BDD, the hierarchy will be: Suite > Test Case > Step.
Note: You cannot change the type of the suite after it has been created. If you plan to import tests, keep in mind that the Xray and Zephyr imports only work with non-BDD suites, while the feature file import only works with BDD suites.
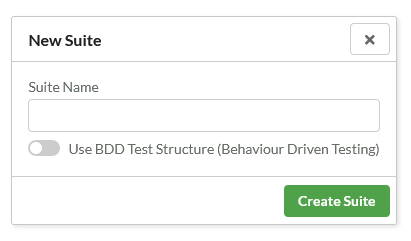
New Suite dialog
Click Create Suite to create the test suite and make it appear in the Tests pane.
Create Test Cases or scenarios
To create tests within a test suite, click + next to the test suite entry in the Tests pane, or select a test suite then click + Test Case in the details pane on the right.

Creation of test cases
Note: You still have the option to rename a Test Suite, a Test Suite, a Feature, or a Scenario after creating it, you just need to select it and click its name to edit it.
Test Case Description and Preconditions
Edit the contents of the Description and Precondition using markdown notation. The text editing options allow you to undo and redo changes, cancel editing, or save the changes. Changes are also saved automatically when the field loses focus. You can use the markdown button to open Markdown Help.
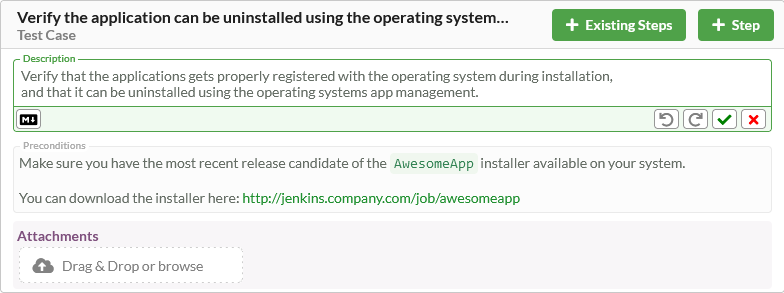
Test Description edit field
Uploading attachments
You can upload attachments for the selected test using the Upload Attachments To show attached images in the Description and Precondition fields, use the markdown notation , where filename.jpg is the full name of the attachment.
When you select a test case or scenario, the right-hand side pane shows the details of the selected item.
Add Steps to a Test
To add steps to a Test Case or Scenario 1. click the + Step button in the test details pane. 2. To reuse existing steps, click the + Existing Steps button to view all the previously created steps, search for the steps you want to reuse, select them, and click Confirm.
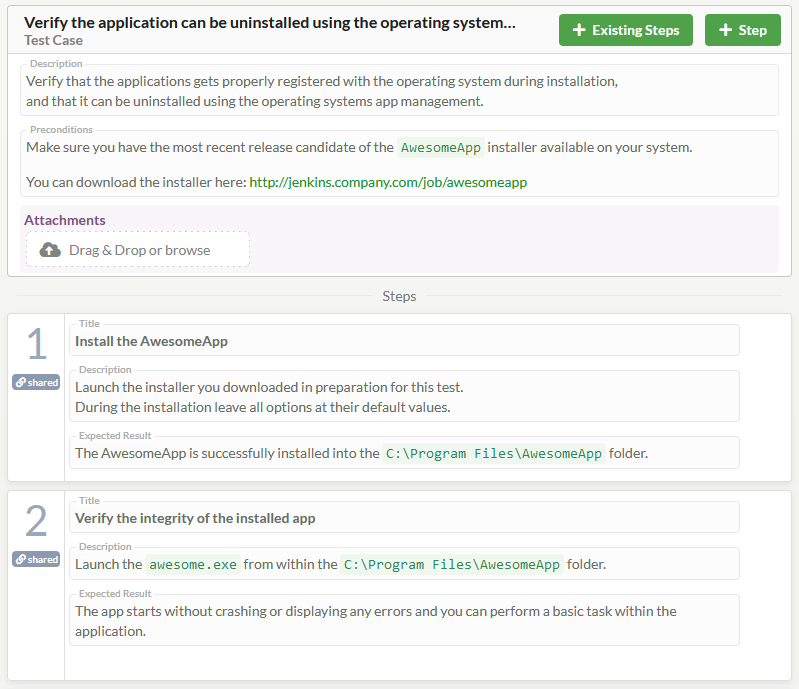
Manual Tests details pane
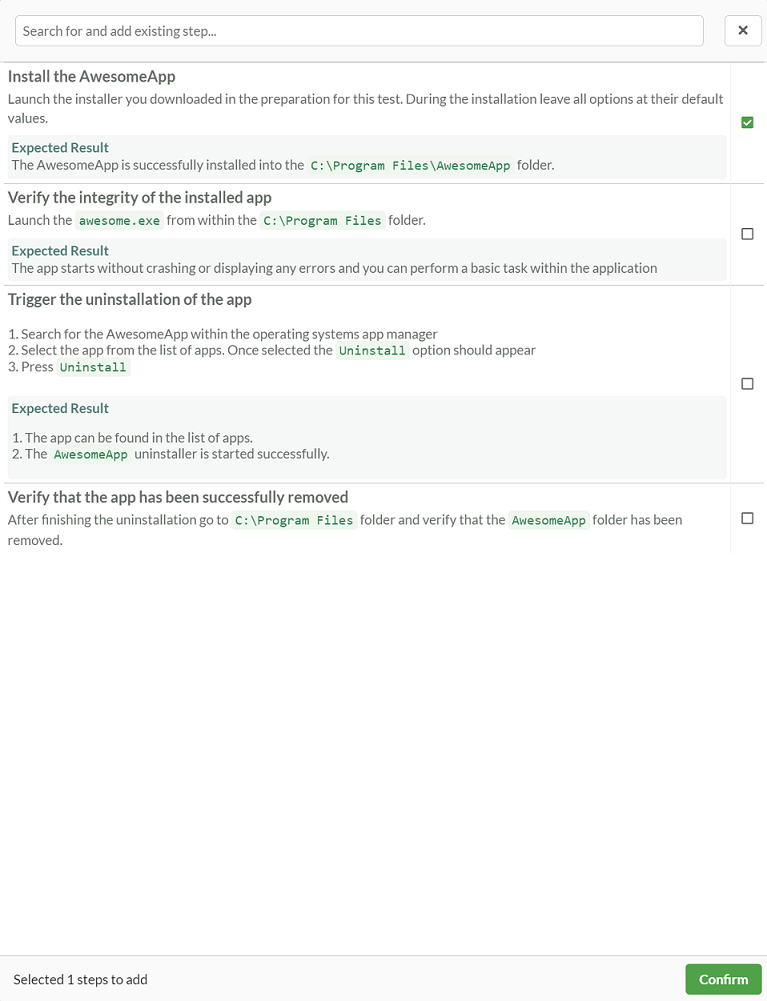
Add existing step dialog
The new step will be appended to the end of the list of steps.
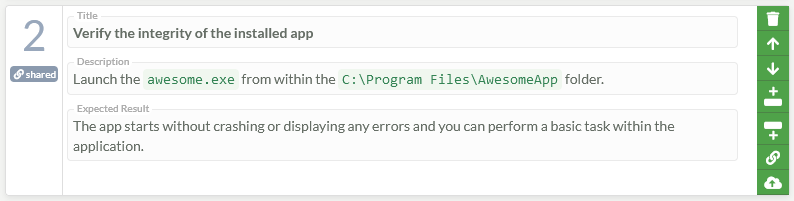
Configure Step details
Each step consists of a Title, Description, Expected Result, and Attachments.
The Title should be a short summary of what should be tested or done as part of the test step, as it will become part of the test hierarchy. The title will later be shown within the Explore and History views that are optimized to show short test hierarchy names.
The Description field contains a more detailed description of what needs to be tested and done as part of the test step. You can use markdown notation in the description to create lists, show links, highlight important details, or to display inline images.
The Expected Result field should describe the expected outcome of the described actions. It should contain all the information required for the tester to determine whether the step result should be considered a pass and whether it was executed successfully.
To add attachments to a step, select the  button in the step menu. Once you have added at least one attachment, you can use the Drag & Drop or browse button to add more attachments.
You can use markdown notation to include uploaded images in the Description or Expected Result fields. In addition to step attachments, you can reference the attachments of the test case or scenario.
If you hover over a step with your mouse to reveal the step menu, you can see the following actions you're allowed to do:
Step menu options
- Remove Steps - remove a step
- Move Up - move a step up
- Move Down - move a step down
- Add Step Above - insert a step above this one
- Add Step Below - insert a step below this one
- Replace Step - replace this step with another existing step. This removes the current step and inserts the selected existing step.
- Upload Attachments to a step
Adding Manual Tests to a Test Plan Template
After creating manual tests you can now plan their execution by adding the tests to a Test Plan Template. You can learn more about Test Plan Templates here. but for now, you just need to create a test plan and follow the guide.
Create a Test Plan Template
After switching to the Plan Templates tab, you need to click + Test Plan, which will create a new test plan.

Test Plan Templates view
Then you can configure the test plan in the Plan Template Details view
Test Plan Template details view.
After creating the test plan you can change its default name by clicking the  button, enter the new title, and click Ok.
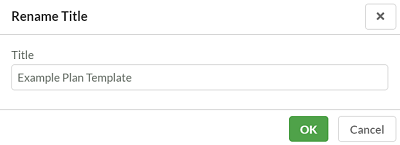
Rename test plan dialog
You can set or update the description of your test plan by editing the contents of the Description field. Simply click on the description field and enter the new description.
And to assign tags to your test plan, you can edit the 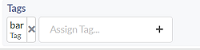 textbox
Add a test run to your Test Plan
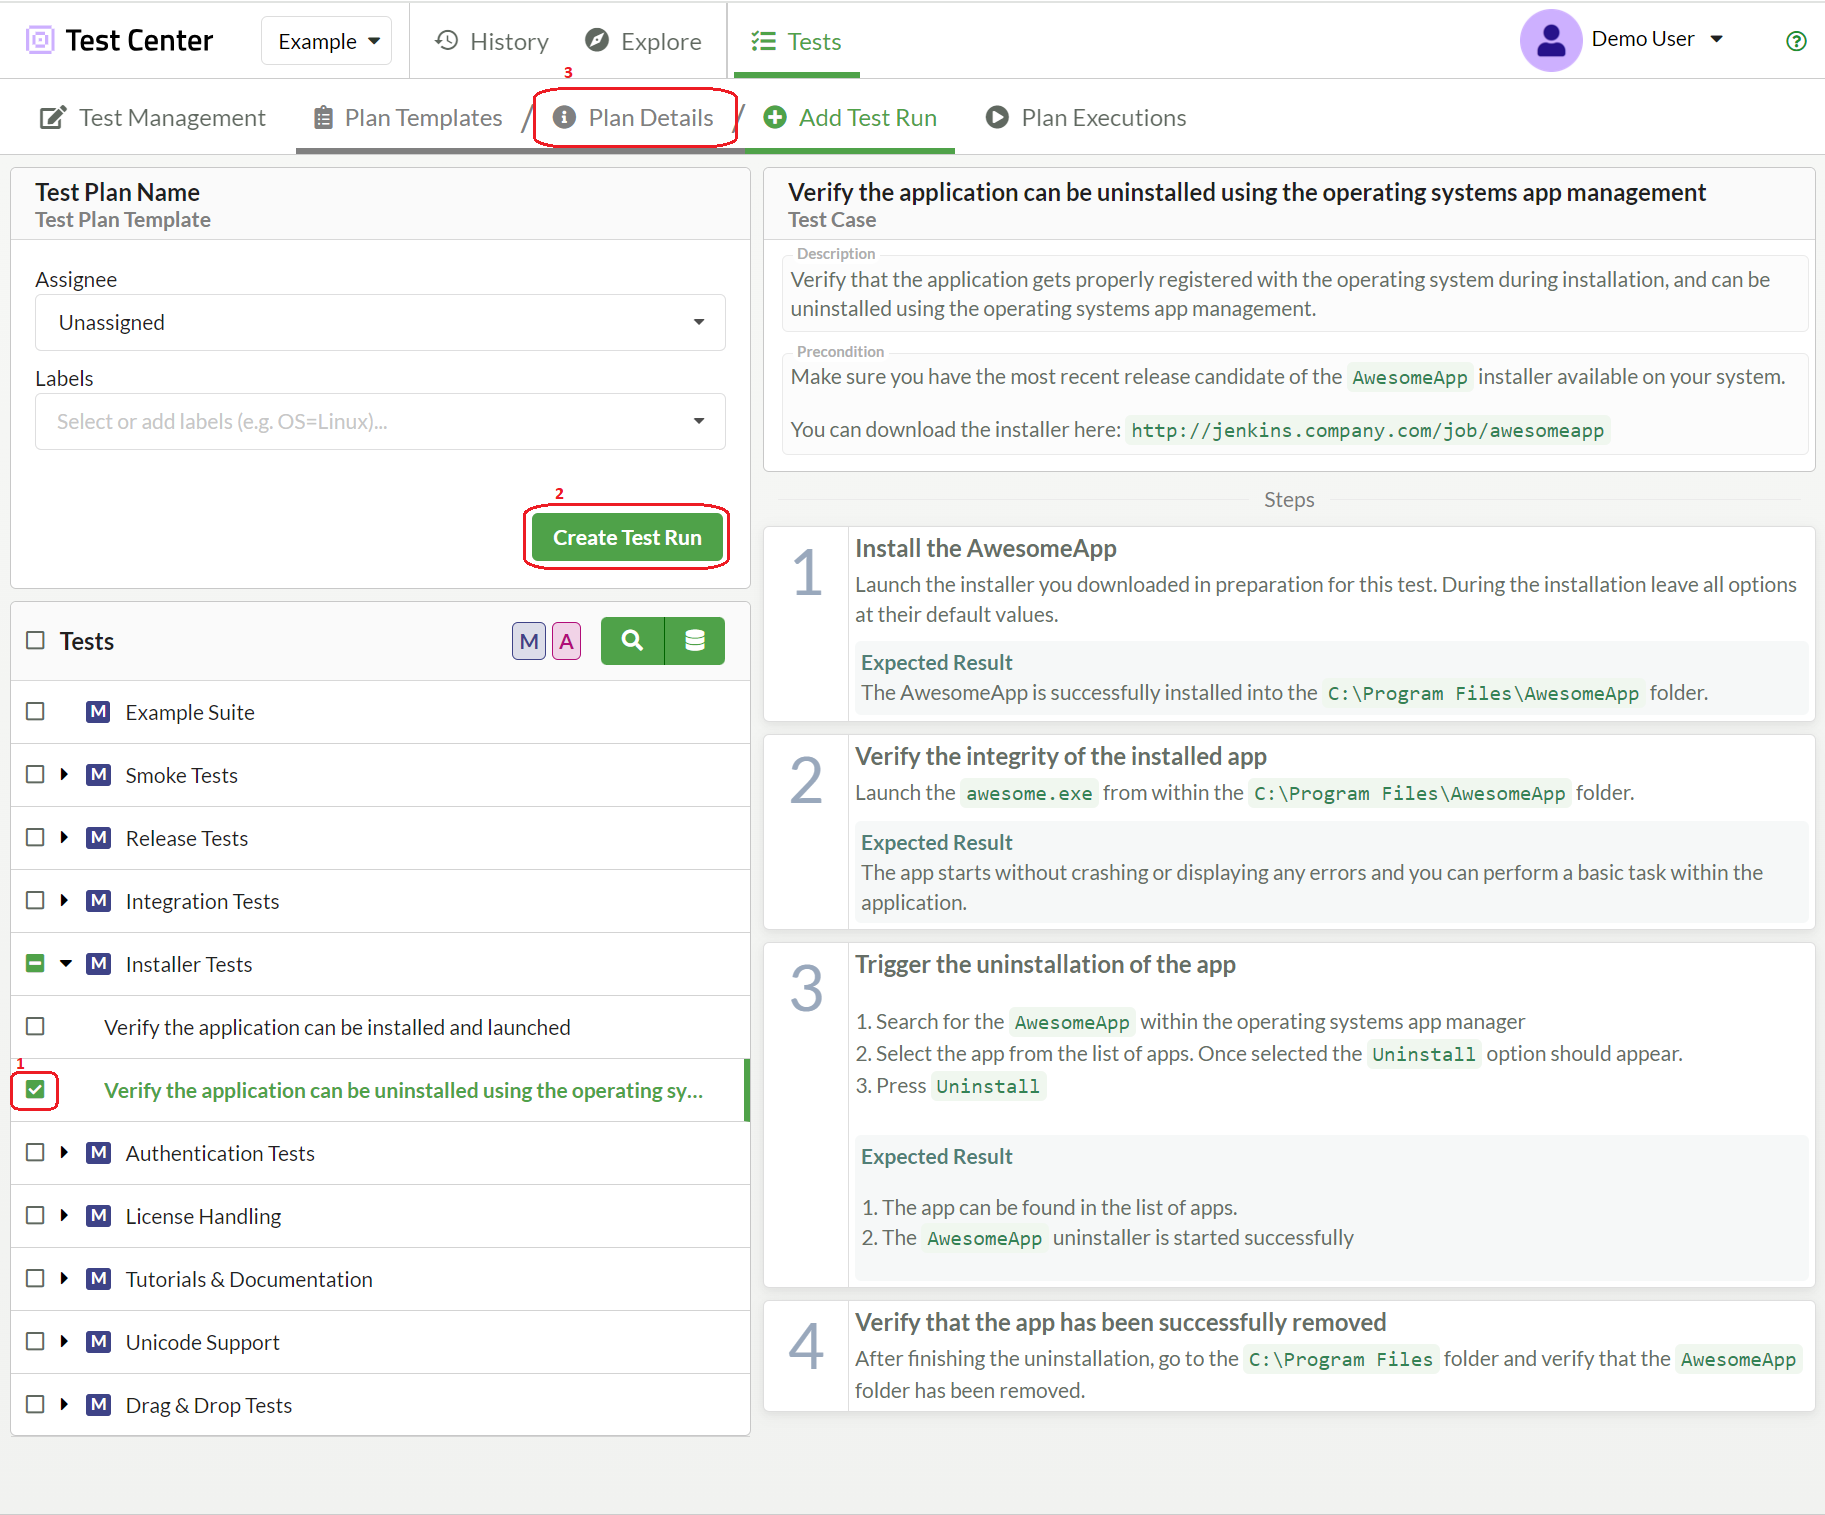
Click + Test Run button in the Plan Details view. and you will end up on the Add Test Run view, there you need to select the Test Center user who should perform the manual test using the Assignee dropdown menu. The selected user will be notified by email. You can also assign the user later on the Plan Details view.
Select the configuration for the manual test run from the Labels dropdown menu, where you can choose existing label value combinations or create new ones. Typically, you would specify the operating system, browser, or device that a manual test should be executed on. This mechanism works exactly like it does for automated test results. It is important to assign meaningful labels to be able to later analyze the results in the Explore and History views.
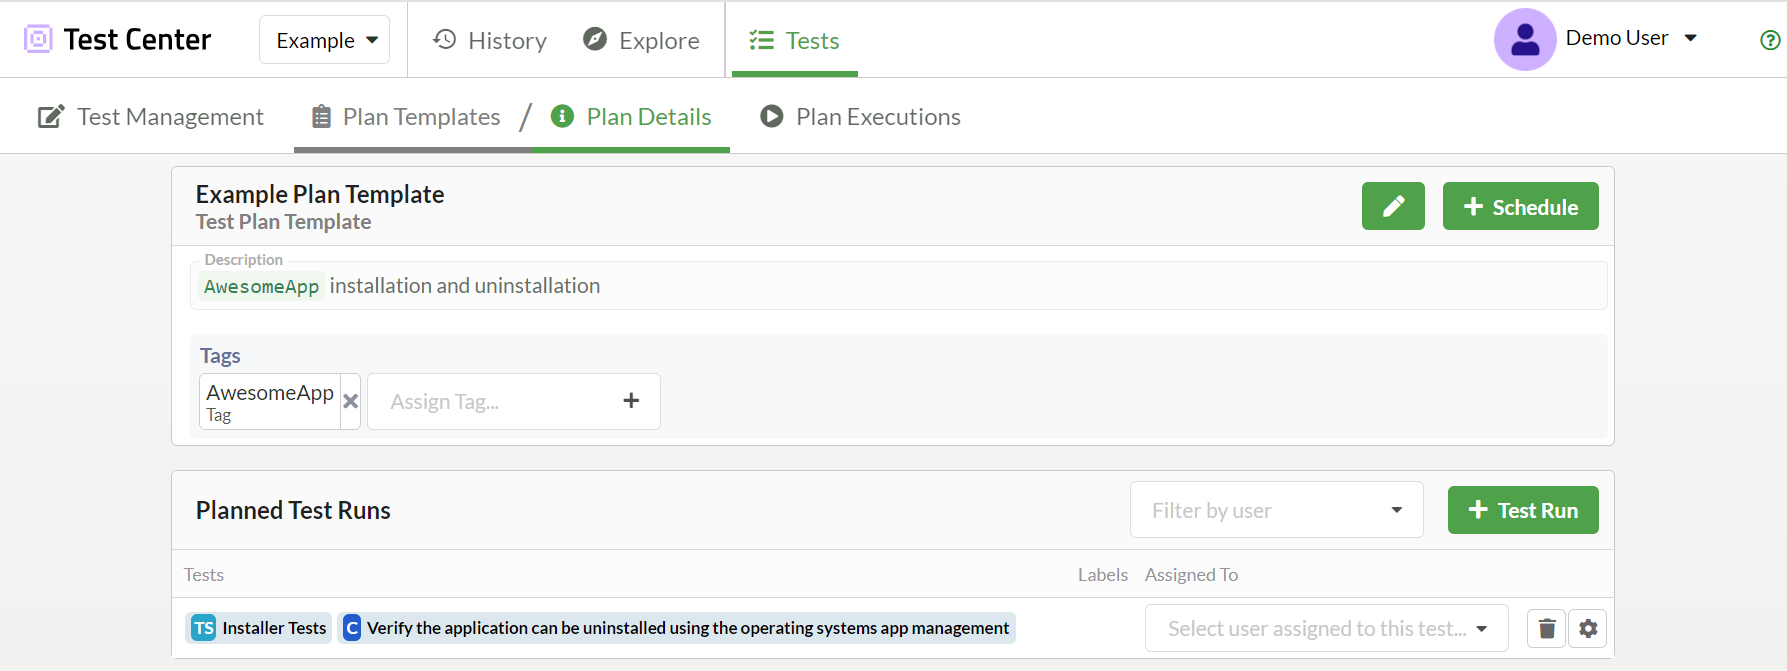
Planned Test Run
Selecting manual tests for executing test runs (See image above for steps)
1. Select the test suites, test cases, or scenarios for the test run. The test details pane on the right-hand side displays more information about the selected test and its steps.
2. Click the Create Test Run button to create the test run.
3. Navigate back to the Plan Details view.
Note: One manual test run can only contain a single suite. If you select multiple suites, the Create Test Run button automatically creates one test run per selected suite
Note: A manual test run is like a work item, and therefore it does not make sense to include every manual test in a single manual test run. Tests that are not directly related and could be worked on by multiple people should ideally become part of individual test runs.
Scheduling Test Plan Executions
When you have a test plan template, you can schedule its execution and create test plan executions in two ways:
- 1. Clicking on the + Schedule button in the Plan Details view
- 2. Clicking on the
 button next to the test plan template name in the Plan Templates view
In the Execute test plan dialog you need to fill in the mandatory fields: a unique test plan execution name and batch name, which is the results for the test runs of the test plan are stored. You'll also have the option to schedule automated tests, you can find out more about them in the Automated Test Execution section.

Scheduling dialog
Scheduling a test plan template will create a test plan execution and take you to the Plan Executions Details view. You can also find it on the Plan Executions tab where you can search or filter by tags to find the execution you created.

Plan Executions view
Click on your plan execution and you will end up on the Plan Executions Details view, here you can assign users and start working on manual tests. For more details on how to use this view check out the test plan executions documentation The Plan Details tab for the created Test Plan Execution displays all planned test runs, whether they are finished or in progress. The header of the Planned Test Runs table shows the overall completion and a link to the batch results.
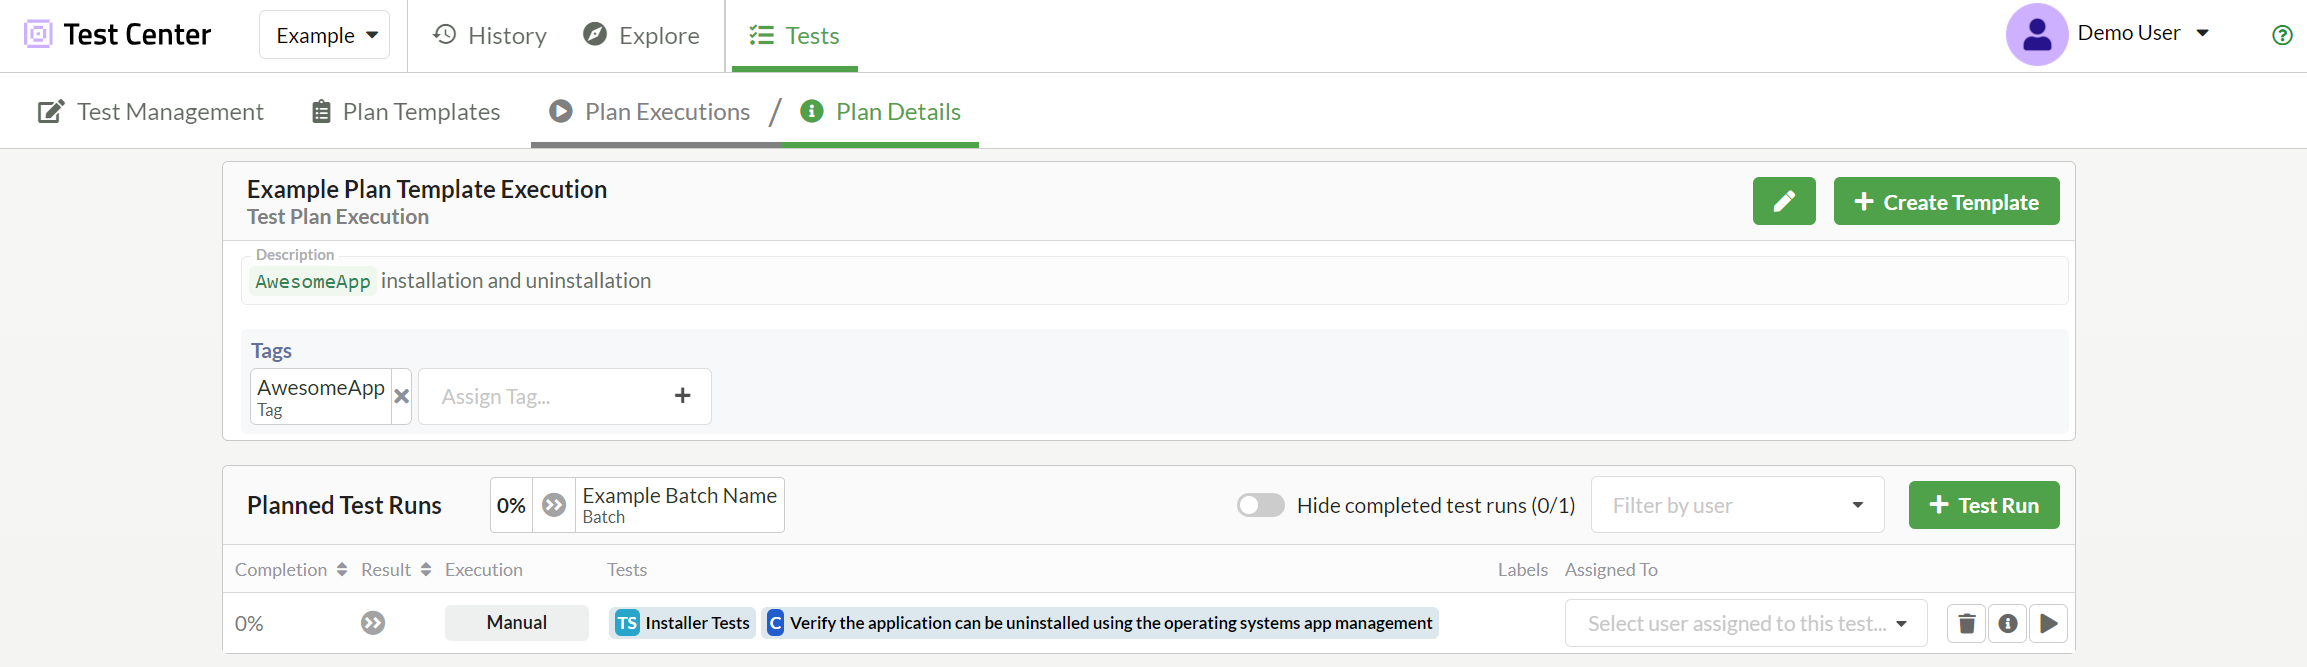
Plan Executions Details view
Working on manual test runs
To begin working on a manual test run, check the Assignee to see which test runs are already assigned to you or are currently unassigned. And to hide the already completed tests, toggle the Hide completed executions checkbox. To only show test runs that are assigned to you, select yourself in the Filter by user field.
Next, check which tests are to be executed on which configurations. By clicking the play button on the manual test you want to work on, you will end up in the Manual Test Run view where you can work through the individual steps of a manual test run.
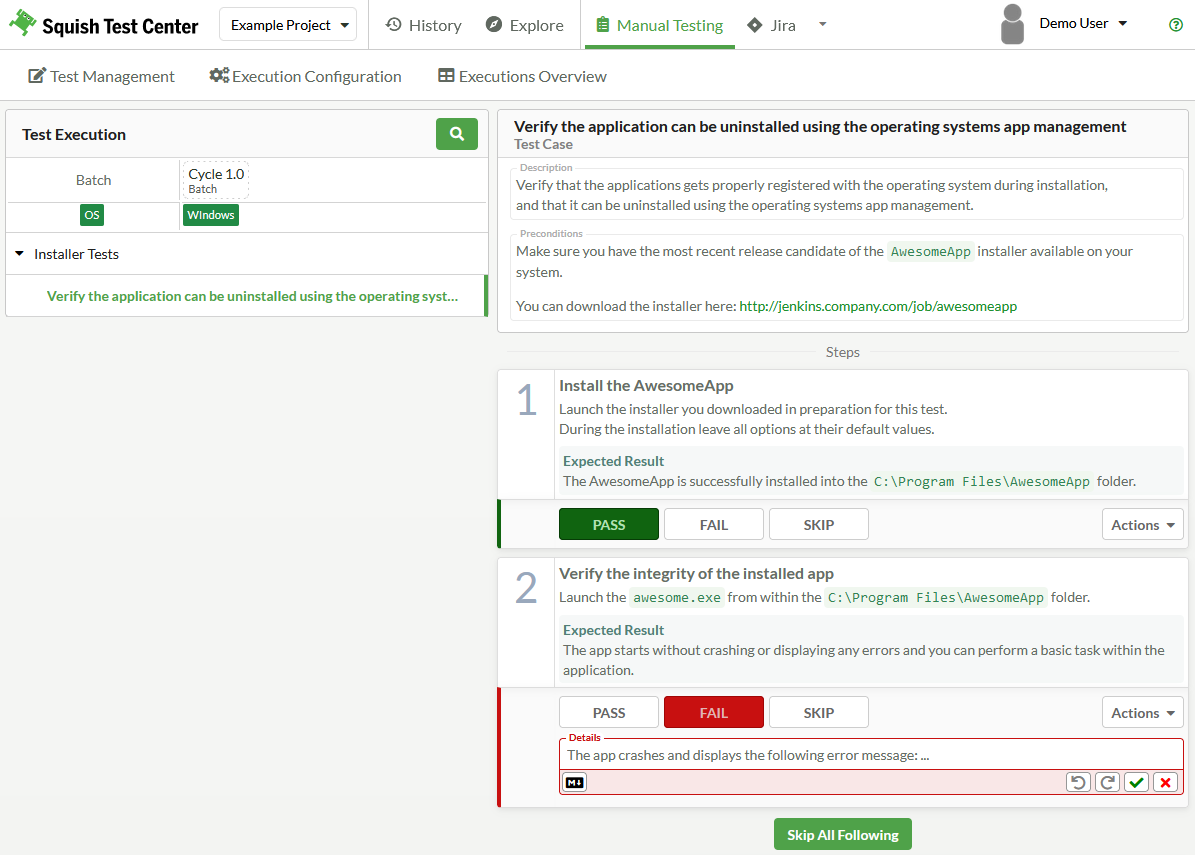
Manual test run
Note: If you are looking at a manual test run that is not assigned to you, you cannot change the step results and the PASS, FAIL, and SKIP buttons are disabled. However, you should see an info toast that contains a link for assigning the test run to yourself.

Self-assign toast
The Test Runs pane shows only the test cases and scenarios that are part of the currently selected manual test run. Use it to navigate between test cases and scenarios.
The test details pane on the right-hand side shows the test case or scenario descriptions and preconditions, as well as the list of steps that need to be worked through as part of the manual test run. For each step, you should follow the instructions given in the Title and Description of a test and compare the outcome to what is described in the Expected Result section and possibly to the references provided as Attachments.
Manual test step
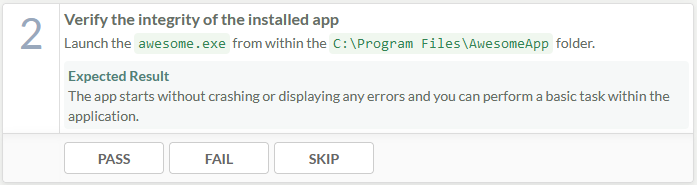
Manual test steps need to be performed in the correct order, and therefore they are rendered inactive and faded out until the previous step changes to the test status assigned.
Use the buttons below each active manual test step to track the outcome of a step execution. Select PASS if you could follow the instructions and the outcome matches the described Expected Result, FAIL if you could not follow the instructions or the described expected result deviates from what you observed, and SKIP if a previous step already failed. There might be additional cases where skipping a step might be necessary, so you should carefully decide on a case-by-case basis whether to skip a step.
Once you have passed, failed or skipped a step, select Actions > Add Details to describe your observations in the Details field.
Select Actions > Upload Attachment to upload files related to the run and show the Result Attachments section. There are no set rules for how to use the result details. Two typical use cases are providing reproductions for failures that occurred and archiving results produced by the AUT during the manual test step execution.
Create JIRA issues
When you have configured Test Center's JIRA integration (see Integration for Atlassian JIRA), the Actions dropdown menu contains the Create Jira Issue option. Select it to create JIRA issues for problems you have encountered during the manual test execution.
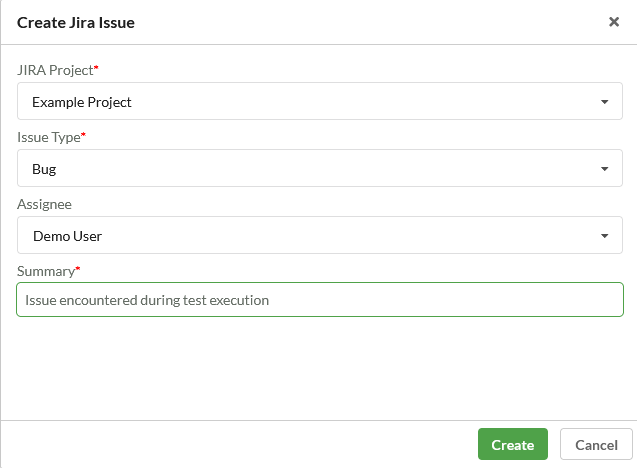
Create Jira Issue dialog
In the Create Jira Issue dialog, specify values for the mandatory fields.
After the JIRA issue has been created, it is linked to the manual test and the test results. You can view the JIRA issues linked to a manual test in Jira Associations. The listed associations are linked to your JIRA instance, so that you can easily jump back and forth between Test Center and JIRA.
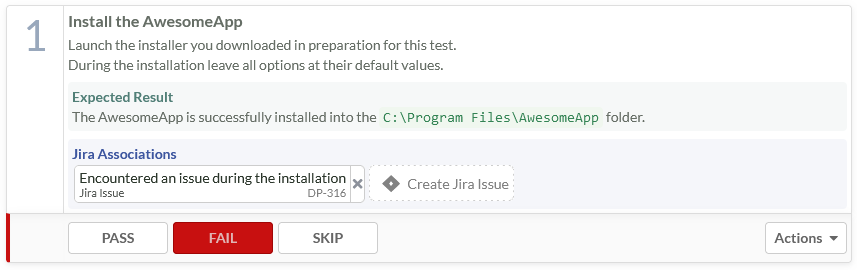
Linked JIRA issue
Click the x button to remove issue associations.
Once a manual test is finished, the issue associations are transferred to the manual test results. The next time the manual test is executed, you can use the Traceability view to update the associated JIRA issues with the most recent test results.
Skipping steps
At any point in time, if you encounter a failure or need to skip a step for some other reason, click the Skip All Following button below the step you just skipped or failed. The status of all following steps in the test case or scenario is set to skipped.
Finishing the test run
Once all steps of all test cases and scenarios of the current manual test run have been completed or assigned a status, select the finish button.
After you finish a manual test run execution, you can no longer change step status or any descriptions. The result is written into the result database and listed in the Explore and History views.
Click Back to Test Plan to return to the Plan Execution Details view. Click Go to Report to open the Single report view.
© 2024 The Qt Company Ltd.
Documentation contributions included herein are the copyrights of
their respective owners.
The documentation provided herein is licensed under the terms of the GNU Free Documentation License version 1.3 as published by the Free Software Foundation.
Qt and respective logos are trademarks of The Qt Company Ltd. in Finland and/or other countries worldwide. All other trademarks are property
of their respective owners.
