Server setup
To get started with Test Center, specify a SMTP server to use for sending emails, start Test Center server, and interactively add a first user:
- Unpack your Test Center binary package.
- Specify the SMTP server:
In the unarchived folder, navigate to and open the
application.inilocated in/testcenter/config. Withinapplication.ini, scroll to the##ActionMailer SMTPsection. Specify the connection's host name or IP address. For example:ActionMailer.smtp.HostName=smtp.yourHost.com
Also, give the connection's port number, as in:
ActionMailer.smtp.Port=25
- Start Test Center:
Open a command line or shell prompt, and change directories to the top-level directory of the unarchived package. Issue the following command in the prompt:
$ bin/testcenter start
When it is necessary to run Test Center as a foreground process, add the
--no-daemonoption to the command.$ bin/testcenter start --no-daemon
If starting the server was successful, you should see in the standard output:
Test Center started, listening on port 8800.In a web browser, open your server instance (
http://localhost:8800by default). Enter your Activation Code, previously received by email. - Interactively add the first user:
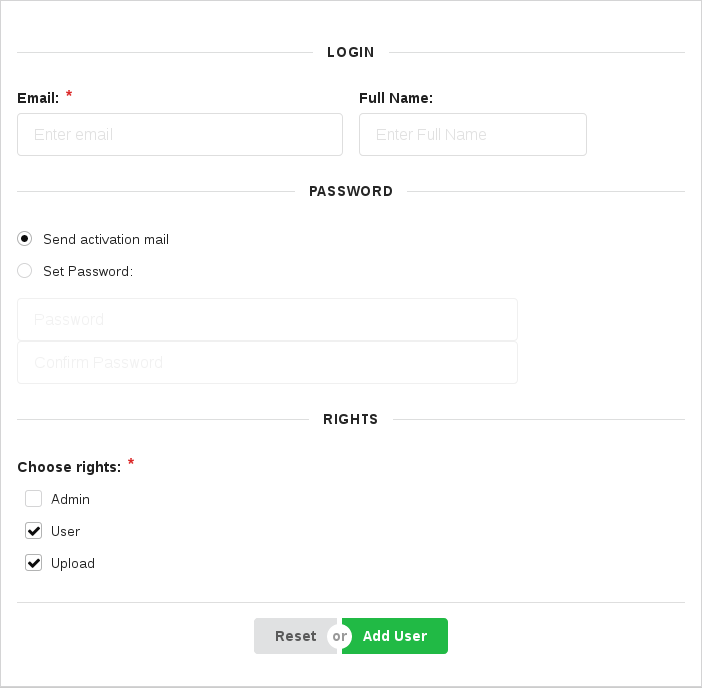
Add new account to Test Center
The Email address is the de-facto username.
The Full Name is the short name shown in the dashboard.
For Choose rights (required), the following values are possible:
- Admin: all privileges granted: user management, upload, viewing, modification
- User: view-only privileges
- Upload: the ability to push test results into Test Center
© 2024 The Qt Company Ltd.
Documentation contributions included herein are the copyrights of
their respective owners.
The documentation provided herein is licensed under the terms of the GNU Free Documentation License version 1.3 as published by the Free Software Foundation.
Qt and respective logos are trademarks of The Qt Company Ltd. in Finland and/or other countries worldwide. All other trademarks are property
of their respective owners.
