ダイナミック・ダウンロード・プロジェクトのビルドとフラッシュ
このチュートリアルでは、Windows 10ホスト上でQtサンプルアプリケーション用のINTEGRITYプロジェクトをビルドする方法を説明します。サポートされている Qt モジュールを使用する Qt サンプルアプリケーションを選択できます。
Qt アプリケーションのビルド環境の準備
INTEGRITY プロジェクトをビルドする前に、ビルド環境を準備する必要があります。Windows の CMD ターミナルからsetEnvironment.bat スクリプトを実行してください。スクリプトの詳細については、Windows 10 用バッチスクリプトの作成 を参照してください。
setEnvironment.bat
Qt アプリケーションのビルド例
CMake を使用して Qt 6 アプリケーションをビルドするには、Windows CMD ターミナルで以下のコマンドを実行します:
"Qt installation path>\bin\qt-cmake.bat" CMakeLists.txt -GNinja
-DCMAKE_PREFIX_PATH="C:\Users\user\targetbuild"
-DQt6_DIR="C:\Users\user\targetbuild\lib\cmake\Qt6"
-DQt6Core_DIR="C:\Users\user\targetbuild\lib\cmake\Qt6Core"
-DQt6Gui_DIR="C:\Users\user\targetbuild\lib\cmake\Qt6Gui"

 cmake --build .
ここで、qt-cmake は、適切なインクルード・パスでプロジェクトを構成するために CMake を呼び出すラッパースクリプトです。
MULTIでダイナミック・ダウンロード・プロジェクトを作成する
- MULTI Launcher を起動し、File >Create workspace を選択します。
- 作成ウィンドウモードでNew Project を選択し、OK をクリックします。
- NextダイアログProject Wizard で、新しいプロジェクトが作成されるパスを選択します (例:C: \Usersuser ŸDocuments ŸMy Projects ŸProject1 Ÿdefault.gpj)。
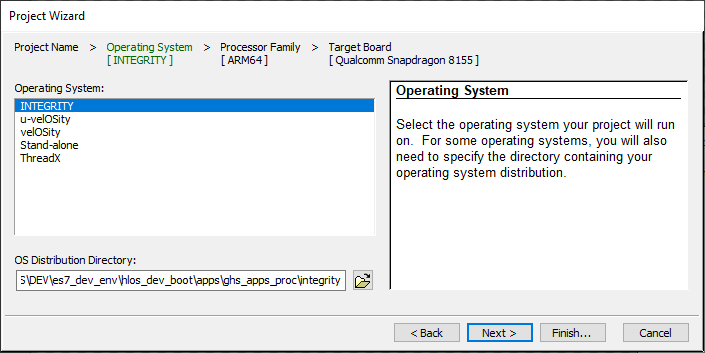
- Operating System ダイアログでINTEGRITYを選択し、Next をクリックする。

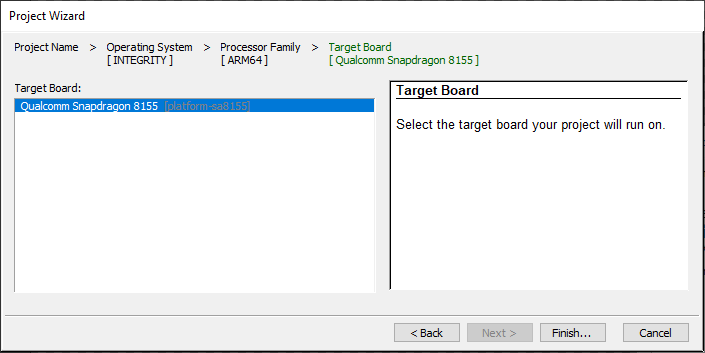
- Finish を選択する。

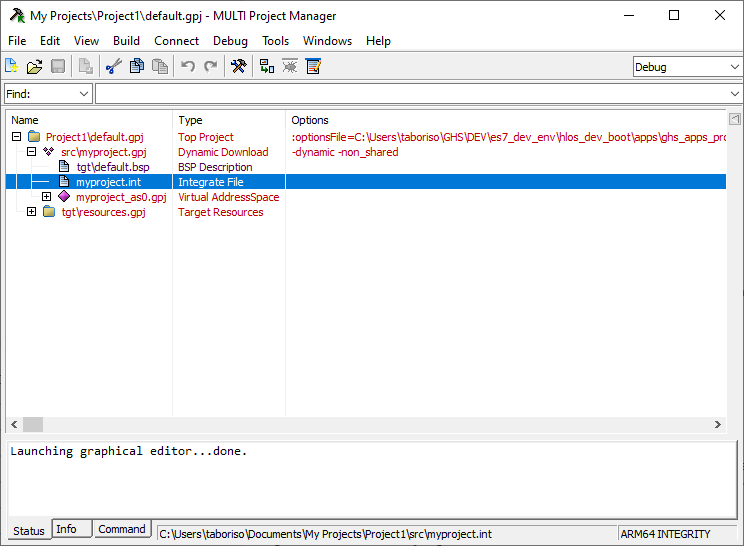
- Create New >Dynamic Download >Next を選択する。
- Settings For Dynamic Download >Finish を選択する。

ダイナミック・ダウンロード・プロジェクトの構築
- プロジェクト・ツリーのmyproject.intファイルを編集して保存する:
AddressSpace Name qtapp Filename C:\path\to\your\qt\app\binary MemoryPoolSize 0x2700000 Language C++ HeapSize 0x90000 Task Initial StackSize 0x90000 StartIt false EndTask Extendedmemorypoolsize 0x300000 EndAddressSpace - multi_commands'という新しいファイルを作成し、以下のコマンドを追加する:
switch -component "debugger.task.qtapp.Initial" route "debugger.task.qtapp.Initial" { __ntwcommand prepare_target } wait -load switch -component "debugger.task.qtapp.Initial" route "debugger.task.qtapp.Initial" { __ntwcommand resume } wait -time 240000 -stop switch -component "debugger.task.qtapp.Initial" unload myproject wait -time 8000 -stop savedebugpane cmd "autotestresult.txt" quitall - WindowsのCMDターミナルからビルドとロードのコマンドを実行する:
multi.exe "C:\Users\user\Documents\My Projects\Project1\default.gpj" -build myproject &
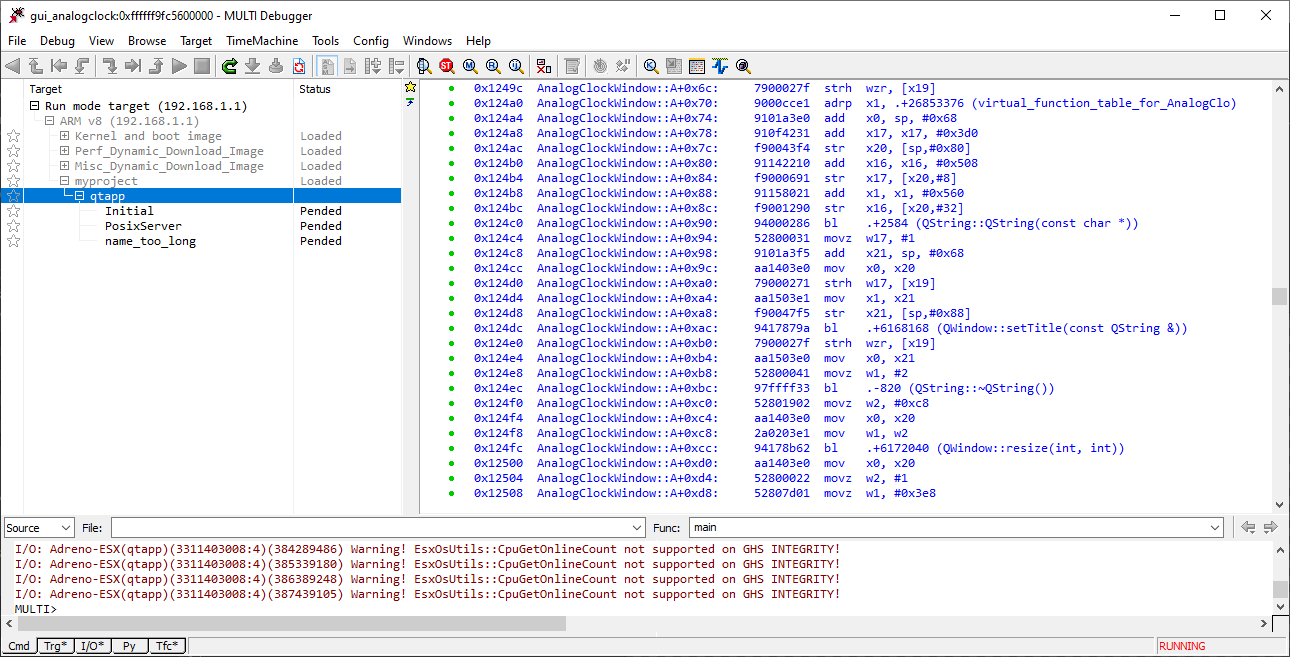
multi.exe "C:\Users\user\Documents\My Projects\Project1\dbg\bin\myproject" -connect="rtserv2 192.168.1.1" -p C:\Users\user\multi_commands &

注: "rtserv2 192.168.1.1 "はボードのIPアドレスである。Set up the wiringをチェックして、ボード・ネットワークを設定する。
注: Dynamic Downloadによるデプロイには数分かかります。
© 2025 The Qt Company Ltd. Documentation contributions included herein are the copyrights of their respective owners. The documentation provided herein is licensed under the terms of the GNU Free Documentation License version 1.3 as published by the Free Software Foundation. Qt and respective logos are trademarks of The Qt Company Ltd. in Finland and/or other countries worldwide. All other trademarks are property of their respective owners.

