
Qt 3D:C++の簡単な例
Qt 3D でシーンをレンダリングする方法を示すC++アプリケーションです。
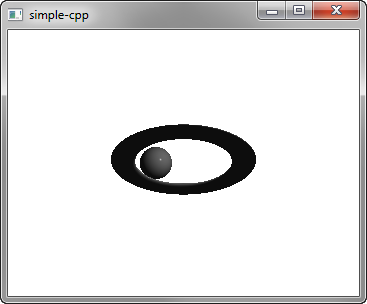
「Simple」は、Qt 3D でシーンをレンダリングする方法を示しています。
例の動作
以下の手順でサンプルを実行できます:
- Qt Creator
Welcome モードを開き、Examples からこのサンプルを選択します。詳細については、Qt Creator :チュートリアル「ビルドと実行」を参照してください。
- Qt Extension for Visual Studio Code
Command Palette からQt: Open Qt examples コマンドを実行し、リストからこの例を選択します。詳細については、Qt Extension for Visual Studio Code の「チュートリアル:ビルドと実行」を参照してください。
シーンの設定
シーンの設定はmain.cppファイルで行います。
Q3D Core、Q3D Render、Qt 3D Input、およびQt 3D Extras モジュールのクラスや関数を使用するには、以下のクラスをインクルードする必要があります:
#include <Qt3DCore/QEntity>
#include <Qt3DRender/QCamera>
#include <Qt3DRender/QCameraLens>
#include <Qt3DCore/QTransform>
#include <Qt3DCore/QAspectEngine>

#include <Qt3DInput/QInputAspect>

#include <Qt3DRender/QRenderAspect>
#include <Qt3DRender/QGeometryRenderer>
#include <Qt3DExtras/QForwardRenderer>
#include <Qt3DExtras/QPhongMaterial>
#include <Qt3DExtras/QSphereMesh>
#include <Qt3DExtras/QTorusMesh>
まず、シーンを設定し、そのルートエンティティを指定します:
Phongレンダリングに使用するマテリアルを指定します:
Qt3DRender::QMaterial *material = new Qt3DExtras::QPhongMaterial(rootEntity);ルートエンティティは単なる空のシェルであり、その挙動は参照するコンポーネントによって定義されます。トーラスエンティティとそのメッシュ、トランスフォーム、マテリアルコンポーネントを指定します:
    Qt3DCore::QEntity *torusEntity = new Qt3DCore::QEntity(rootEntity);
    Qt3DExtras::QTorusMesh *torusMesh = new Qt3DExtras::QTorusMesh;
    torusMesh->setRadius(5);
    torusMesh->setMinorRadius(1);
    torusMesh->setRings(100);
    torusMesh->setSlices(20);

    Qt3DCore::QTransform *torusTransform = new Qt3DCore::QTransform;
    torusTransform->setScale3D(QVector3D(1.5, 1, 0.5));
    torusTransform->setRotation(QQuaternion::fromAxisAndAngle(QVector3D(1, 0, 0), 45.0f));

    torusEntity->addComponent(torusMesh);
    torusEntity->addComponent(torusTransform);
    torusEntity->addComponent(material);
また、sphereエンティティとそのコンポーネントも指定します:
    Qt3DCore::QEntity *sphereEntity = new Qt3DCore::QEntity(rootEntity);
    Qt3DExtras::QSphereMesh *sphereMesh = new Qt3DExtras::QSphereMesh;
    sphereMesh->setRadius(3);
    sphereMesh->setGenerateTangents(true);

    Qt3DCore::QTransform *sphereTransform = new Qt3DCore::QTransform;
    OrbitTransformController *controller = new OrbitTransformController(sphereTransform);
    controller->setTarget(sphereTransform);
    controller->setRadius(20.0f);

    QPropertyAnimation *sphereRotateTransformAnimation = new QPropertyAnimation(sphereTransform);
    sphereRotateTransformAnimation->setTargetObject(controller);
    sphereRotateTransformAnimation->setPropertyName("angle");
    sphereRotateTransformAnimation->setStartValue(QVariant::fromValue(0));
    sphereRotateTransformAnimation->setEndValue(QVariant::fromValue(360));
    sphereRotateTransformAnimation->setDuration(10000);
    sphereRotateTransformAnimation->setLoopCount(-1);
    sphereRotateTransformAnimation->start();

    sphereEntity->addComponent(sphereMesh);
    sphereEntity->addComponent(sphereTransform);
    sphereEntity->addComponent(material);
プロパティアニメーションを使用して、球体のトランスフォームをアニメーション化します。
最後に、Qt 3D ウィンドウを使用するQt GUI アプリケーションを初期化します:
int main(int argc, char* argv[])
{
    QGuiApplication app(argc, argv);
    Qt3DExtras::Qt3DWindow view;

    Qt3DCore::QEntity *scene = createScene();

    // Camera
    Qt3DRender::QCamera *camera = view.camera();
    camera->lens()->setPerspectiveProjection(45.0f, 16.0f/9.0f, 0.1f, 1000.0f);
    camera->setPosition(QVector3D(0, 0, 40.0f));
    camera->setViewCenter(QVector3D(0, 0, 0));

    // For camera controls
    Qt3DExtras::QOrbitCameraController *camController = new Qt3DExtras::QOrbitCameraController(scene);
    camController->setLinearSpeed( 50.0f );
    camController->setLookSpeed( 180.0f );
    camController->setCamera(camera);

    view.setRootEntity(scene);
    view.show();

    return app.exec();
}© 2026 The Qt Company Ltd. Documentation contributions included herein are the copyrights of their respective owners. The documentation provided herein is licensed under the terms of the GNU Free Documentation License version 1.3 as published by the Free Software Foundation. Qt and respective logos are trademarks of The Qt Company Ltd. in Finland and/or other countries worldwide. All other trademarks are property of their respective owners.
