
Qt Quick 3D - 照明の例
さまざまなライトタイプの使用例を示します。
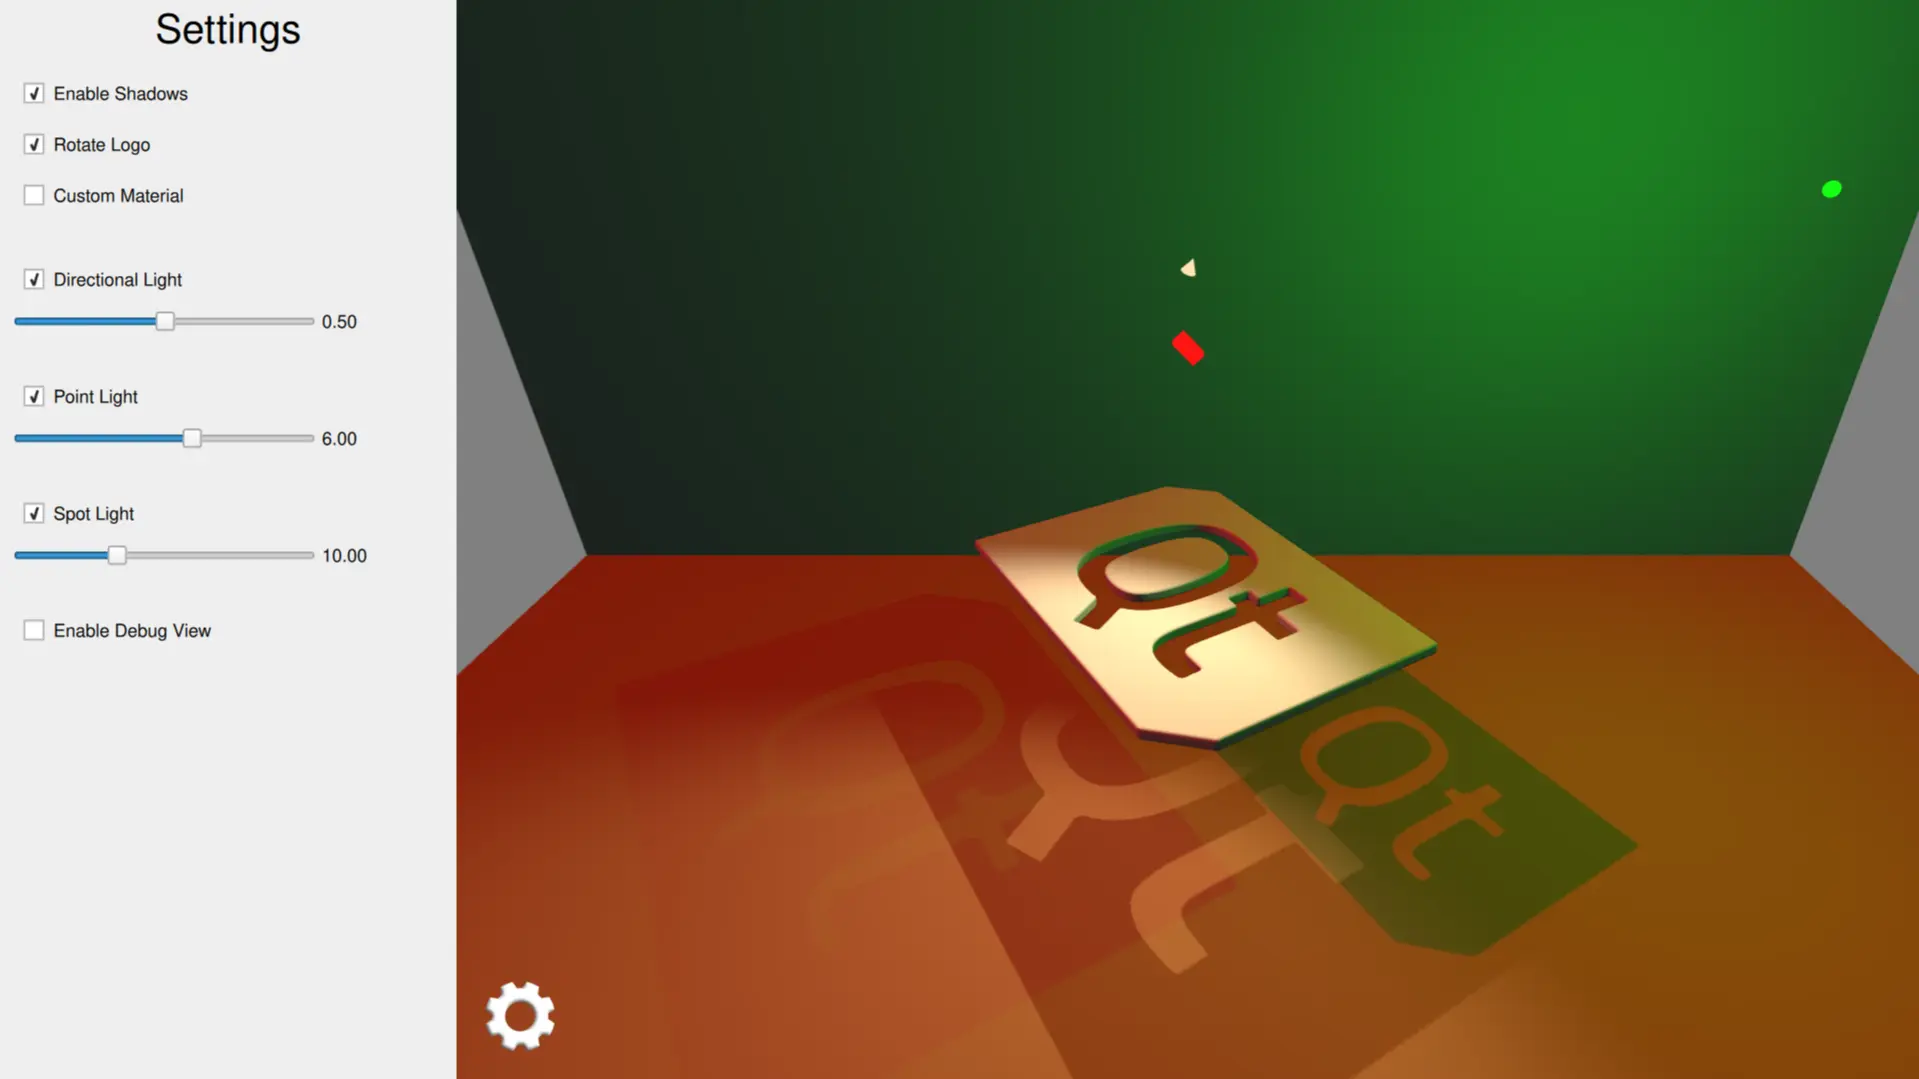
この例では、アプリケーション内で3種類の異なるライトを使用する方法を示しています。
シーンのライトの設定
指向性ライト
指向性ライトは、無限に遠くにある特定できない光源から一方向に光を放射します。これは、現実の世界における太陽光の働きに似ています。指向性ライトの照射範囲は無限であり、光量は減衰しません。
赤色の光を放射するように指向性ライトを設定し、x軸周りの回転をアニメーション化します。
DirectionalLight {
    id: light1
    color: Qt.rgba(1.0, 0.1, 0.1, 1.0)
    ambientColor: Qt.rgba(0.1, 0.1, 0.1, 1.0)
    position: Qt.vector3d(0, 200, 0)
    rotation: Quaternion.fromEulerAngles(-135, -90, 0)
    shadowMapQuality: Light.ShadowMapQualityVeryHigh
    pcfFactor: 1
    visible: directionalLightCheckBox.checked
    castsShadow: checkBoxShadows.checked
    brightness: directionalLightSlider.value
    SequentialAnimation on rotation {
        loops: Animation.Infinite
        QuaternionAnimation {
            to: Quaternion.fromEulerAngles(-45, -90, 0)
            duration: 2000
            easing.type: Easing.InOutQuad
        }
        QuaternionAnimation {
            to: Quaternion.fromEulerAngles(-135, -90, 0)
            duration: 2000
            easing.type: Easing.InOutQuad
        }
    }
}
ポイントライト
ポイントライトは、光源の中心から全方向に等しい強さで光を放射する球体として説明できます。これは、電球が光を放つ仕組みに似ています。
ポイントライトを緑色で発光するように設定し、x座標上の位置をアニメーションさせます。
PointLight {
    id: light2
    color: Qt.rgba(0.1, 1.0, 0.1, 1.0)
    ambientColor: Qt.rgba(0.1, 0.1, 0.1, 1.0)
    position: Qt.vector3d(0, 300, 0)
    shadowMapFar: 2000
    shadowMapQuality: Light.ShadowMapQualityHigh
    visible: pointLightCheckBox.checked
    castsShadow: checkBoxShadows.checked
    brightness: pointLightSlider.value
    SequentialAnimation on x {
        loops: Animation.Infinite
        NumberAnimation {
            to: 400
            duration: 2000
            easing.type: Easing.InOutQuad
        }
        NumberAnimation {
            to: 0
            duration: 2000
            easing.type: Easing.InOutQuad
        }
    }
}
スポットライト
スポットライトはポイントライトと似ていますが、全方向ではなく、一方向に向かって円錐状に光を放つ点が異なります。円錐角を除けば、スポットライトはポイントライトと同じ特性と性質を持っています。
暖色系の光を放つスポットライトを設定し、Y座標での回転をアニメーション化します。
SpotLight {
    id: light4
    color: Qt.rgba(1.0, 0.9, 0.7, 1.0)
    ambientColor: Qt.rgba(0.0, 0.0, 0.0, 0.0)
    position: Qt.vector3d(0, 250, 0)
    eulerRotation.x: -45
    shadowMapFar: 2000
    shadowMapQuality: Light.ShadowMapQualityHigh
    visible: spotLightCheckBox.checked
    castsShadow: checkBoxShadows.checked
    brightness: spotLightSlider.value
    coneAngle: 110
    innerConeAngle: 70
    PropertyAnimation on eulerRotation.y {
        loops: Animation.Infinite
        from: 0
        to: -360
        duration: 10000
    }
}
シーンモデルの設定
まず、シーンの床と後壁として機能する2つの長方形モデルを追加します。これらは、光や影を確認するのに役立ちます。
Model {
    source: "#Rectangle"
    y: -200
    scale: Qt.vector3d(15, 15, 15)
    eulerRotation.x: -90
    materials: [
        PrincipledMaterial {
            baseColor: Qt.rgba(0.8, 0.6, 0.4, 1.0)
        }
    ]
}
Model {
    source: "#Rectangle"
    z: -400
    scale: Qt.vector3d(15, 15, 15)
    materials: [
         PrincipledMaterial {
            baseColor: Qt.rgba(0.8, 0.8, 0.9, 1.0)
        }
    ]
}
次に、Y軸を中心に回転するメインのロゴモデルを追加します。
Model {
    id: logoDefault
    source: "qtlogo.mesh"
    scale: Qt.vector3d(5000, 5000, 5000)

    property variant material
    materials: [ material ]

    property bool animate: true
    NumberAnimation on eulerRotation.y {
        running: logoDefault.animate
        loops: Animation.Infinite
        duration: 5000
        from: 0
        to: -360
    }
}
また、各ライトタイプの位置や回転を示すために、小さな立方体のモデルも追加します。これらの立方体は、ユーザーが関連するスライダーを操作すると拡大します。
Model {
    // Directional Light Marker
    property real size: directionalLightSlider.highlight ? 0.2 : 0.1
    source: "#Cube"
    position: light1.position
    rotation: light1.rotation
    scale: Qt.vector3d(size, size, size * 2)
    materials: [
        PrincipledMaterial {
            baseColor: light1.color
            lighting: PrincipledMaterial.NoLighting
        }
    ]
    castsShadows: false
    visible: directionalLightCheckBox.checked
}
Model {
    // Point Light Marker
    source: "#Sphere"
    position: light2.position
    rotation: light2.rotation
    property real size: pointLightSlider.highlight ? 0.2 : 0.1
    scale: Qt.vector3d(size, size, size)
    materials: [
        PrincipledMaterial {
            baseColor: light2.color
            lighting: PrincipledMaterial.NoLighting
        }
    ]
    castsShadows: false
    visible: pointLightCheckBox.checked
}
Node {
    // Spot Light Marker
    position: light4.position
    rotation: light4.rotation
    property real size: spotLightSlider.highlight ? 0.2 : 0.1
    scale: Qt.vector3d(size, size, size)
    Model {
        source: "#Cone"
        castsShadows: false
        eulerRotation.x: 90
        materials: PrincipledMaterial {
            baseColor: light4.color
            lighting: PrincipledMaterial.NoLighting
        }
    }
    visible: spotLightCheckBox.checked
}
設定パネルから、ユーザーは影を表示したり、各ライトの可視性や明るさを個別に調整したりできます。
© 2026 The Qt Company Ltd. Documentation contributions included herein are the copyrights of their respective owners. The documentation provided herein is licensed under the terms of the GNU Free Documentation License version 1.3 as published by the Free Software Foundation. Qt and respective logos are trademarks of The Qt Company Ltd. in Finland and/or other countries worldwide. All other trademarks are property of their respective owners.
