Qt Quick 3D - XR 簡単な入力例
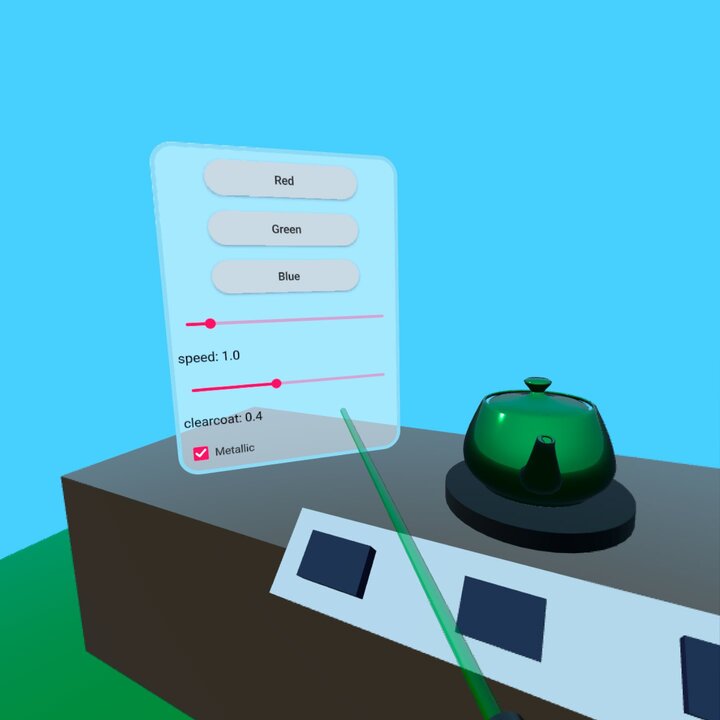
Qt Quick 3D XR のコントローラ入力をデモします。

この例では、Qt Quick 3D XR の低レベル入力 API を使用して、シーン内の 2D および 3D オブジェクトと対話する方法を示します。xr_simpleサンプルの基本構造に従っています。
コントローラ入力
この例では、XrController の位置からray picking を行います:
XrController {
    id: rightController
    controller: XrController.RightController
    poseSpace: XrController.AimPose

    property QtObject hitObject

    onRotationChanged: {
        const pickResult = xrView.rayPick(scenePosition, forward)
        if (pickResult.hitType !== PickResult.Null) {
            pickRay.hit = true
            pickRay.length = pickResult.distance
            hitObject = pickResult.objectHit
            cursorSphere.position = pickResult.scenePosition
            cursorSphere.visible = true
        } else {
            pickRay.hit = false
            pickRay.length = 50
            hitObject = null
            cursorSphere.visible = false
        }
    }

    Node {
        id: pickRay
        property real length: 50
        property bool hit: false

        Model {
            eulerRotation.x: -90
            scale: Qt.vector3d(0.005, pickRay.length/100, 0.005)
            source: "#Cone"
            materials: PrincipledMaterial {
                baseColor: rightTrigger.pressed ? "#99aaff" : "#cccccc"
                lighting: PrincipledMaterial.NoLighting
            }
            opacity: 0.8
        }
    }

    Node {
        z: 5
        Model {
            eulerRotation.x: 90
            scale: Qt.vector3d(0.05, 0.10, 0.05)
            source: "#Cylinder"
            materials: PrincipledMaterial {
                baseColor: "black"
                roughness: 0.2
            }
        }
    }
}
これは以下の機能を実行します:
- 何かにぶつかったら、
pickRayの長さを変えて、ぶつかったものに触れるようにする。pickRayは半透明の円錐形(先細りの円柱)で、ユーザーがどこを狙っているかを示す。また、cursorSphereをレイが当たるポイントに移動します。(cursorSphereは半透明の球体で、XrView の子です。) hitObjectプロパティを、当たったオブジェクトに設定します。
また、コントローラの一般的な表現として、黒い円柱を使用しています。
この例では、ExampleButton.qml ファイルに簡単な3Dプッシュボタンを作成しました。(ボタンの動作の詳細はここでは説明しません。) トリガーが押されると反応するように、XrInputAction を作成します:
XrInputAction {
    id: rightTrigger
    controller: XrInputAction.RightController
    actionId: [XrInputAction.TriggerPressed, XrInputAction.TriggerValue, XrInputAction.IndexFingerPinch]
    onTriggered: {
        const button = rightController.hitObject as ExampleButton
        if (button && button !== panel.activeButton) {
            panel.activeButton = button
        }
    }
}
rightTrigger アクションは、ハンドトラッキングと異なるタイプのコントローラの両方をサポートするために、いくつかの異なるIDに反応します。アクションがトリガーされると、上記で設定したhitObject がExampleButton タイプかどうかをチェックします。その場合、ボタンがアクティブになります。
3Dコントローラーが2Dコンテンツとインタラクションできるようにするには、XrVirtualMouse :
XrInputAction {
    id: rightThumbstickX
    controller: XrInputAction.RightController
    actionId: [XrInputAction.ThumbstickX]
}
XrInputAction {
    id: rightThumbstickY
    controller: XrInputAction.RightController
    actionId: [XrInputAction.ThumbstickY]
}

XrVirtualMouse {
    view: xrView
    source: rightController
    leftMouseButton: rightTrigger.pressed
    scrollWheelX: rightThumbstickX.value
    scrollWheelY: rightThumbstickY.value
}
まず、サムスティックの水平方向と垂直方向の位置を検出するアクションを2つ追加します。次に、XrController を位置ソースとして、XrVirtualMouse を作成します。先に作ったrightTrigger のアクションを使ってマウスのプレス/リリースを生成し、サムスティックのアクションを使ってマウスホイールのイベントを生成します。
最後に、pickRay がオブジェクトに当たったときに、触覚フィードバックを追加します:
XrHapticFeedback {
    controller: XrHapticFeedback.RightController
    condition: XrHapticFeedback.RisingEdge
    trigger: pickRay.hit
    hapticEffect: XrSimpleHapticEffect {
        amplitude: 0.5
        duration: 30
        frequency: 3000
    }
}
ハプティック効果は、pickRay.hit プロパティがfalse からtrue になるたびにトリガーされます。
XrItem
3Dシーンに2Dユーザー・インターフェイスを埋め込む通常の方法は、XRでも機能しますが、単位サイズが1センチメートルなので、ユーザー・インターフェイスを有用なものにするには、スケーリングする必要があります。XrItem タイプは、3Dアイテムの物理的なサイズと2Dサーフェスの論理的なサイズを設定することで、スケーリングを自動的に行う便利な方法を提供します。
XrItem {
    width: 75
    height: 100
    x: -100
    y: height + table.height + 5
    z: 40
    eulerRotation.y: 45
    color: "transparent"
    contentItem: Rectangle {
        color: Qt.rgba(1, 1, 1, 0.5)
        border.width: 5
        border.color: "lightblue"
        height: 400
        width: 300
        radius: 25
    ...
        }
    }
XrItem 、3次元に配置し、幅75cm、高さ100cmに設定する。次に、コンテンツ・アイテムとして長方形を追加し、300 x 400ユニットに設定します。残りのQt Quick UI要素は、通常の方法で矩形の子として追加されるので、ここでは表示しません。2Dコンテンツは、XrItem を埋めるように自動的に拡大縮小されます。
© 2025 The Qt Company Ltd. Documentation contributions included herein are the copyrights of their respective owners. The documentation provided herein is licensed under the terms of the GNU Free Documentation License version 1.3 as published by the Free Software Foundation. Qt and respective logos are trademarks of The Qt Company Ltd. in Finland and/or other countries worldwide. All other trademarks are property of their respective owners.

