Microsoft Azure DevOps Integration
Azure DevOps offers several services for augmenting development workflows, including Pipelines which can be used for Continuous Integration (CI) and Continuous Delivery (CD) of your project. Automated GUI tests created with Squish can be easily executed as part of these pipeline processes.
For executing a Squish test as part of a pipeline, the Squish Integration extension can be used. It is available on Microsoft marketplace: Squish Integration.
The extension adds two tasks: one to run Squish tests, and another to create Azure DevOps results with the help of Test Center.
The Pipeline Agent
Test execution requires a test environment. For Squish GUI tests, self-hosted agents (e.g., a local PC or laptop) or Virtual Machines (VMs) offered by the Azure cloud can be used. To use the self-hosted solution, you have to install the Azure Pipeline agent.
Squish tests require access to a display, either a physical or virtual one. For Windows, the pipeline agent can be started in at least two different ways: as a service or as a process. As services do not have such access, the DevOps agent cannot be launched as a service to run Squish tests. Therefore, the agent has to be started as a process. For more details on running tests on Windows, see Automation on Windows.
Squish Task
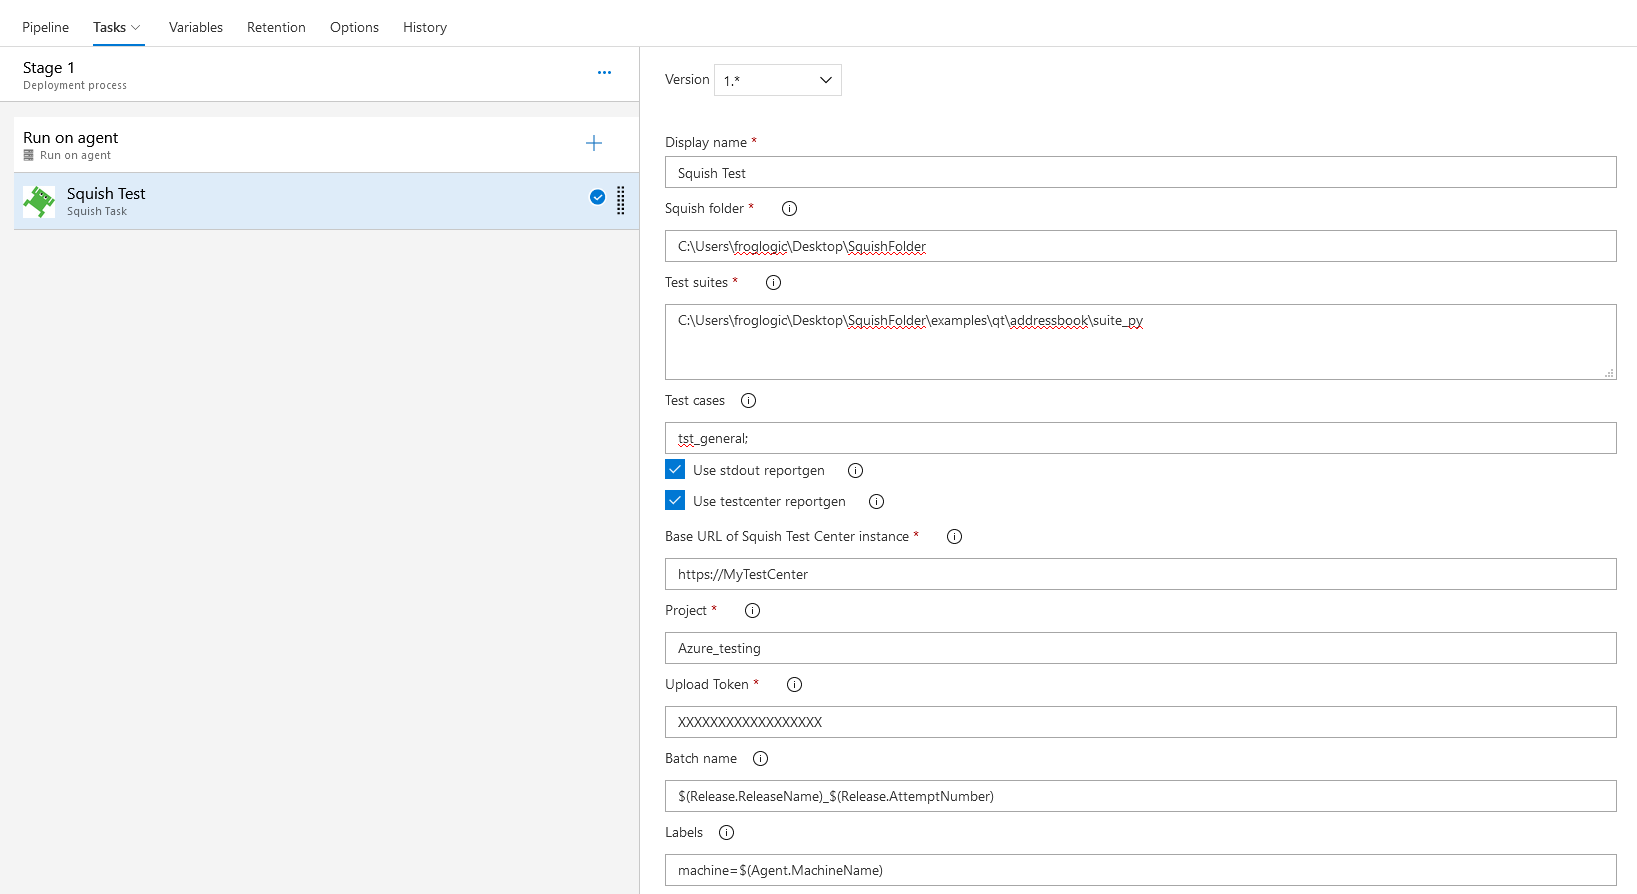
The Squish Task can be added to a build or a release Pipeline stage, with the goal to run Squish GUI tests and gather results. To use this task, you must have Squish installed on the agent that will be running the task. Some settings of the task require special attention in order to work properly:
- Squish folder (required) - Path to Squish installation folder on the agent.
- Test suites (required) - Path to Squish test suites, one path per line.
- Test cases - Names of test cases to execute from the test suite. Separate values using a semi-colon (;).
- Use stdout reportgen - Whether Squish should output the test result to
stdout, which can then be seen in the console of Azure DevOps. - Use Test Center reportgen - Whether Squish should use the Test Center
reportgen. If selected, additional settings are required:- Base URL of Test Center instance (required) - The URL of the Test Center instance that should receive the results.
- Project (required) - The Test Center project to push the results to.
- Upload token (required )- The Test Center upload token to use for pushing the results.
- Batch name - The name of the batch to create with the result. If left empty, Test Center will automatically generate a new batch. Pipeline variables can be used here.
- Labels - List of ;-separated items that will be used to tag the results, in the form of "OS=Windows". Pipeline variables can be used here.
This task can be executed in parallel on different agents, enabling you to have the same set of Squish GUI tests run on multiple environments and, if wanted, have those results pushed to the same batch in Test Center. The state of this task is directly linked to the results of Squish GUI tests: success if all tests passed without failures, warning if some tests contain failures, and failed if an error was encountered.
Test Center Task
This task is targeted for Test Center users of Azure DevOps traceability. If a mapping exists between Squish GUI tests and Azure DevOps tests in Test Center, this task can be used to trigger the creation of new runs and results in Azure DevOps based on the mapping. The settings required to run this task are the same as the ones needed to do it manually:
- Base URL of Test Center instance (required) - The URL of the Test Center instance used as the origin of the push action.
- Project (required) - The Test Center project used as source of the mapping.
- Batch name (required) - The name of the batch that contains the results to be pushed into Azure DevOps.
Example: Azure DevOps Configuration
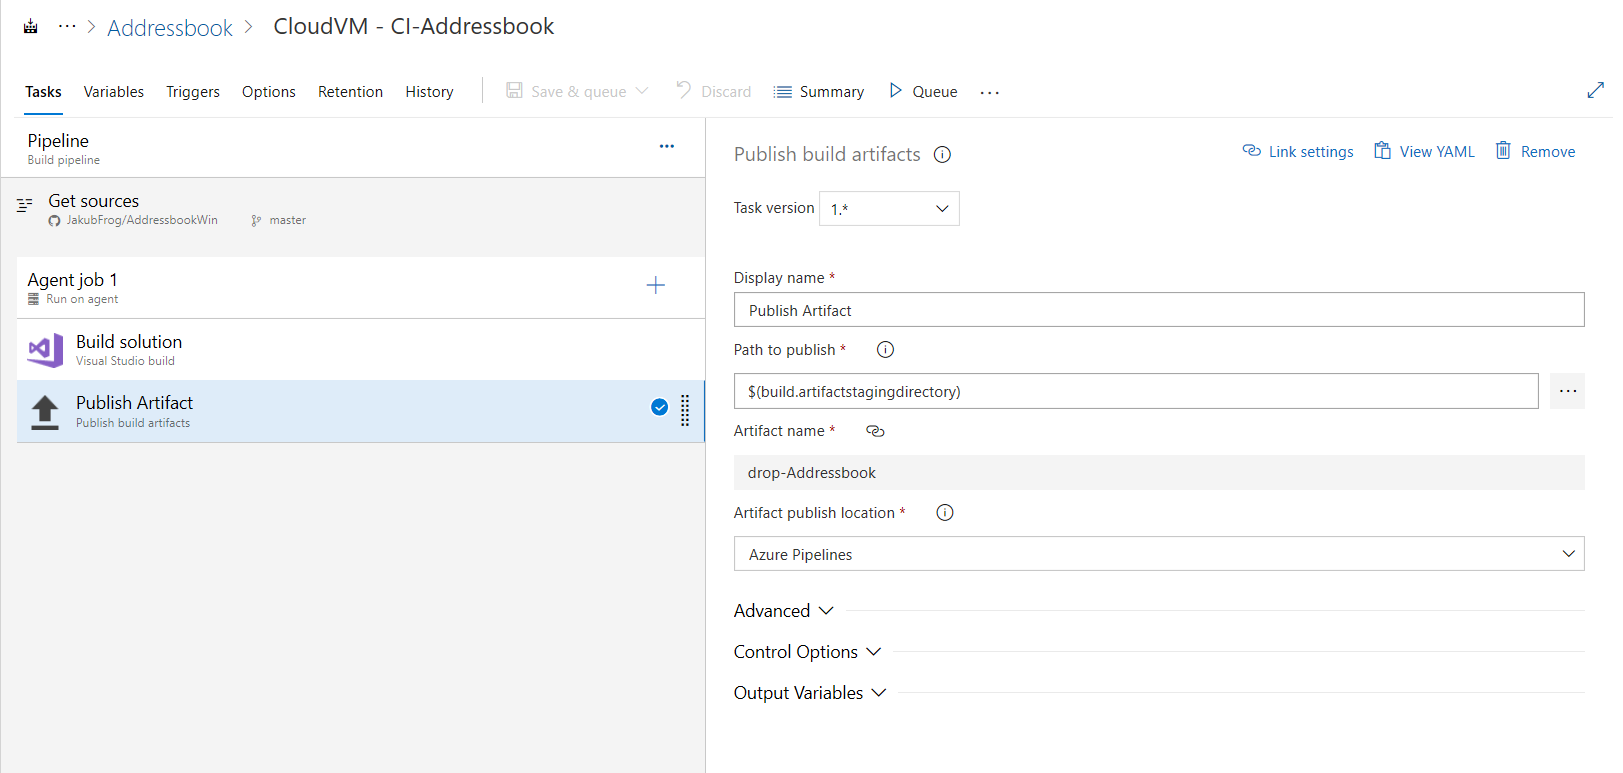
- In the Azure DevOps space, create a Build Pipeline.
We will not cover this step in detail as it depends highly on your project and the way you build your application. In this example, we used Hosted VS2017 Agent pool. The build artifacts (that is, the Application Under Test) are published in Azure Pipelines.
- In the Azure DevOps space, create a Release Pipeline.
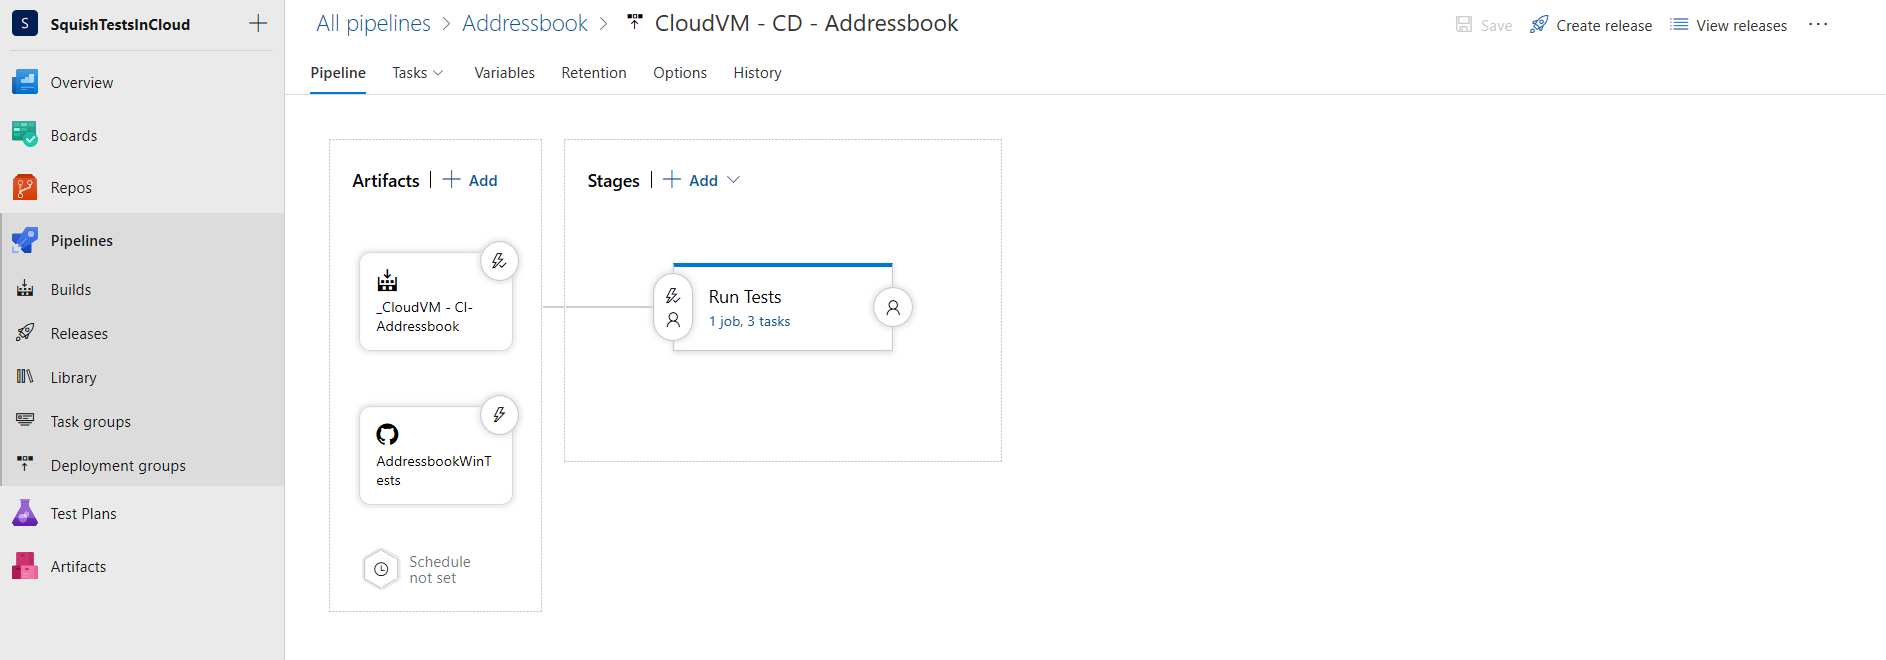
The artifacts for the Release Pipeline include:
- The AUT, published in the previous step.
- Squish GUI tests stored in an external GitHub repository.
- Install Squish on the DevOps Agent.
This step can be done manually or as part of the Release Pipeline. In the former approach, run the Squish installer on the DevOps Agent and follow the installation wizard.
In the latter approach, first deliver the Squish installer and perform unattended installation as a task in the Release Pipeline.
- Execute Squish tests.
Add a Squish Task to the Build/Release Pipeline, and adapt the settings to your setup.
- Push results into Azure DevOps from Test Center.
Push the results for the mentioned batch in Test Center into Azure DevOps if a mapping was previously made between Azure DevOps tests and Squish GUI tests in the Traceability page, as instructed in: Integration for Azure DevOps.
© 2025 The Qt Company Ltd.
Documentation contributions included herein are the copyrights of
their respective owners.
The documentation provided herein is licensed under the terms of the GNU Free Documentation License version 1.3 as published by the Free Software Foundation.
Qt and respective logos are trademarks of The Qt Company Ltd. in Finland and/or other countries worldwide. All other trademarks are property
of their respective owners.
