Jenkins Integration
Jenkins is known as a Continuous Integration (CI) tool. It allows you to kick off processing jobs in response to events, or on a regular schedule. With Jenkins, you can also monitor executions and examine the results. Jenkins is commonly used to build software, or run regression tests.
Using the plugin described in this section, it is possible to run Squish tests as part of a Jenkins job.
Installing the Jenkins Plugin
Before installing or updating the plugin, read the Release Notes and README file.
You can either use the froglogic Update Center to install the plugin or download and install it manually.
froglogic Update Center
froglogic Update Center offers all Jenkins plugins developed by froglogic. To make the Update Center accessible from a Jenkins instance, use the UpdateSites Manager plugin.
Once the UpdateSites Manager plugin is installed, open Manage Jenkins > Manage UpdateSites. Next, add a new, custom Update Site.
To configure the connection with froglogic Update Center, provide:
- ID: froglogic-update-center
- URL: https://jenkins-update-center.froglogic.com/update-center.json
- CA Certificate: content of the froglogic Update Center certificate
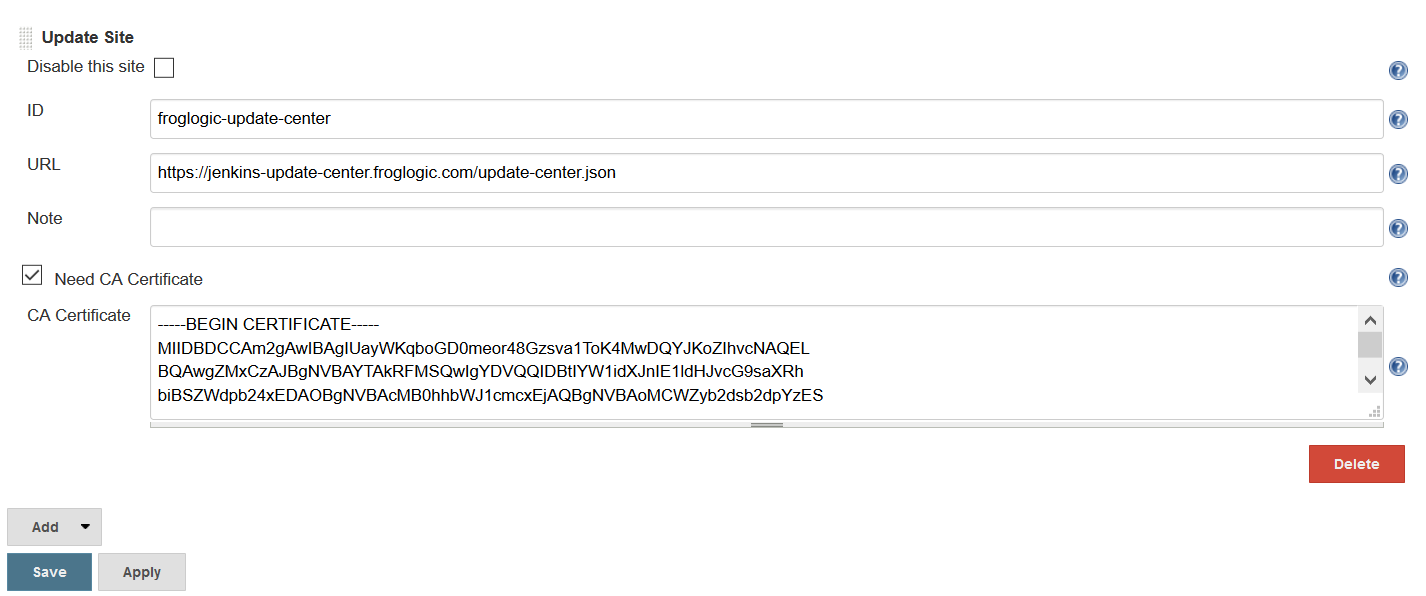
froglogic Update Center configuration
When the update site configuration is done, open Manage Jenkins > Manage Plugins and update the plugin list by clicking on the Check now button. froglogic's plugins should be displayed on the Updates, Available or Installed list accordingly to the current plugin status.

Available Jenkins Plugin
In some cases, Jenkins restart after the new version installation might be required to make the plugin works correctly.
Manual Installation
The newest Squish Plugin can be downloaded from here. The minimum required Jenkins version is listed in the ReleaseNotes.txt
To install the plugin, simply download the SquishPlugin.hpi file and move or copy it into JENKINS_HOME/plugins where JENKINS_HOME is the Jenkins home directory. Once the file is in the right place, it can be enabled simply by restarting Jenkins. After the restart, there should be an entry for the Squish plugin in the Jenkins plugin manager.
Squish Jenkins Plugin Dependencies
The Squish plugin for Jenkins has some dependencies on other standard Jenkins plugins which need to be installed. The first time you try to load this plugin, it may fail, listing the missing plugins. You can resolve this issue by installing them from the Jenkins Plugin Manager. The plugins are:
- Pipeline: API (workflow-api)
- Pipeline: Step API (workflow-step-api)
- Plain Credentials Plugin (plain-credentials)
- Structs Plugin (structs)

The Jenkins Plugin Manager.
Using the Plugin
Important: Next to each Squish plugin configuration field, the  button is displayed. Click the button to see the detailed configuration field description and possible value examples.
Note: For Windows nodes executions, Squish tests will fail if the Jenkins node is started as Windows Service and a Jenkins plugin starts squishserver by itself. If Squish tests must be executed on the Jenkins server, make sure Jenkins is not installed as Windows Service. Jenkins can be started alternatively by running java -jar jenkins.war from the command line.
Squish Global Configuration
After checking that the Squish plugin is correctly loaded, add Squish installations to Jenkins Global Tool Configuration by selecting Manage Jenkins > Global Tool Configuration > Squish installations. It's possible to specify many Squish installations. For each of them, specify an installation path and a unique name.
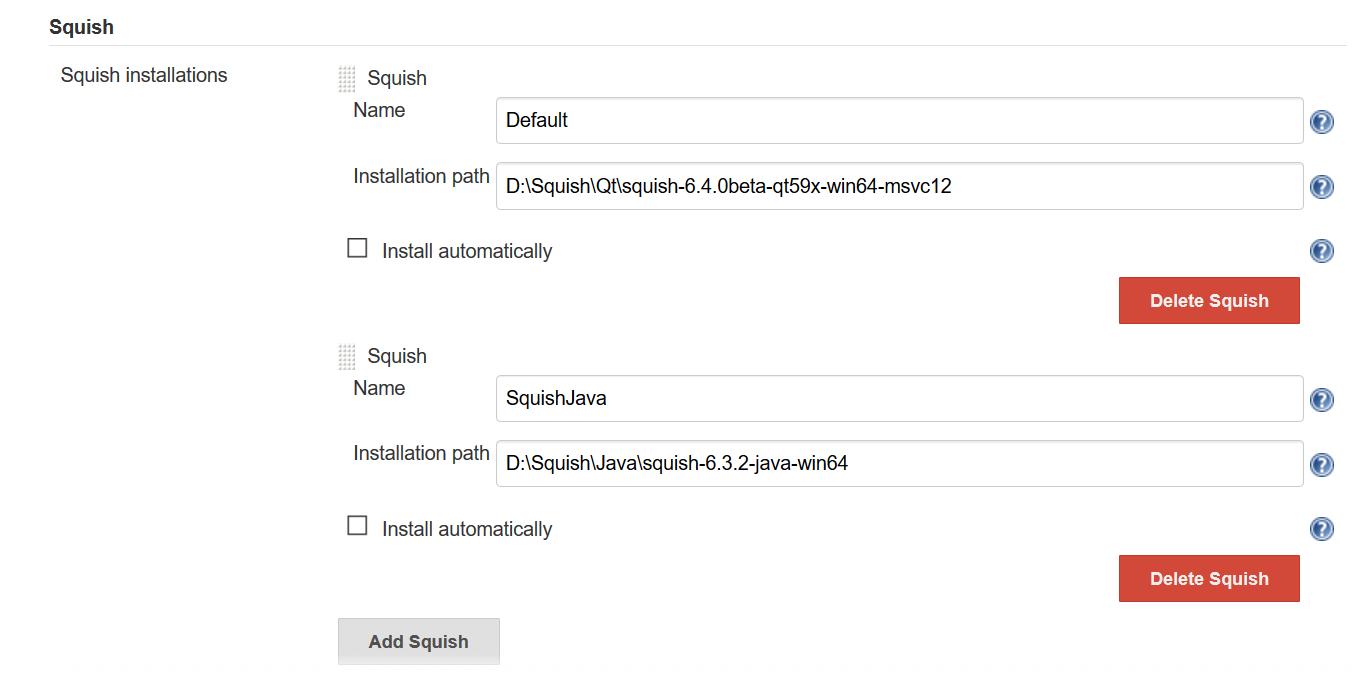
Jenkins Global Tool Configuration.
The next step is to define a global plugin configuration in Configure System. Usually, there is no need to change anything in that section.
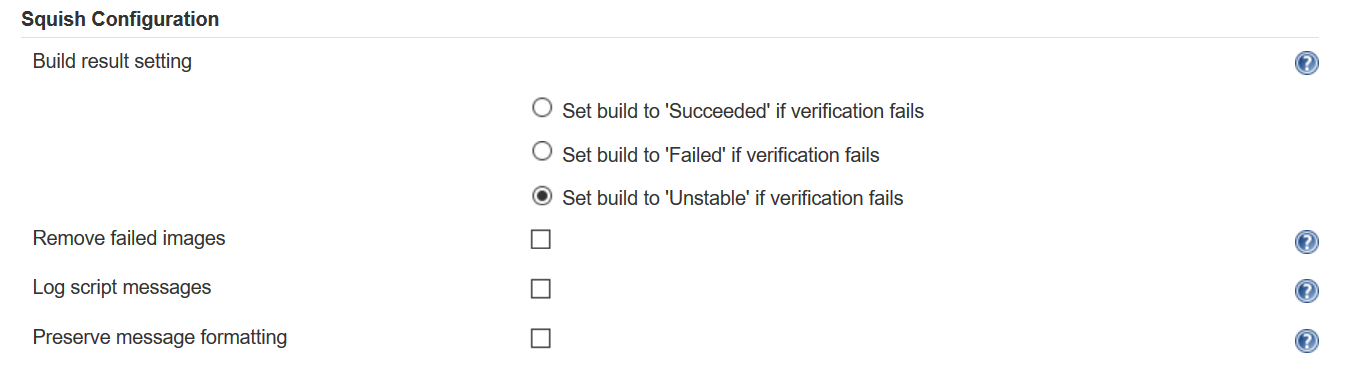
Jenkins Global Configuration.
Freestyle Projects
To run Squish tests in the Jenkins build process, you must adapt a job configuration to include Squish. Here we will use the address book example that is shipped with Squish.
The only thing left to do is to add a Squish build step to the project configuration. Now one of the specified Squish packages can be selected from the drop-down list. Next, set up the test suite and optionally, the test cases which you want to be carried out. Additionally, host and port may be specified to use an already running squishserver. In the screenshot, we have added one Squish build step which executes the tst_adding test case of the suite_py test suite.
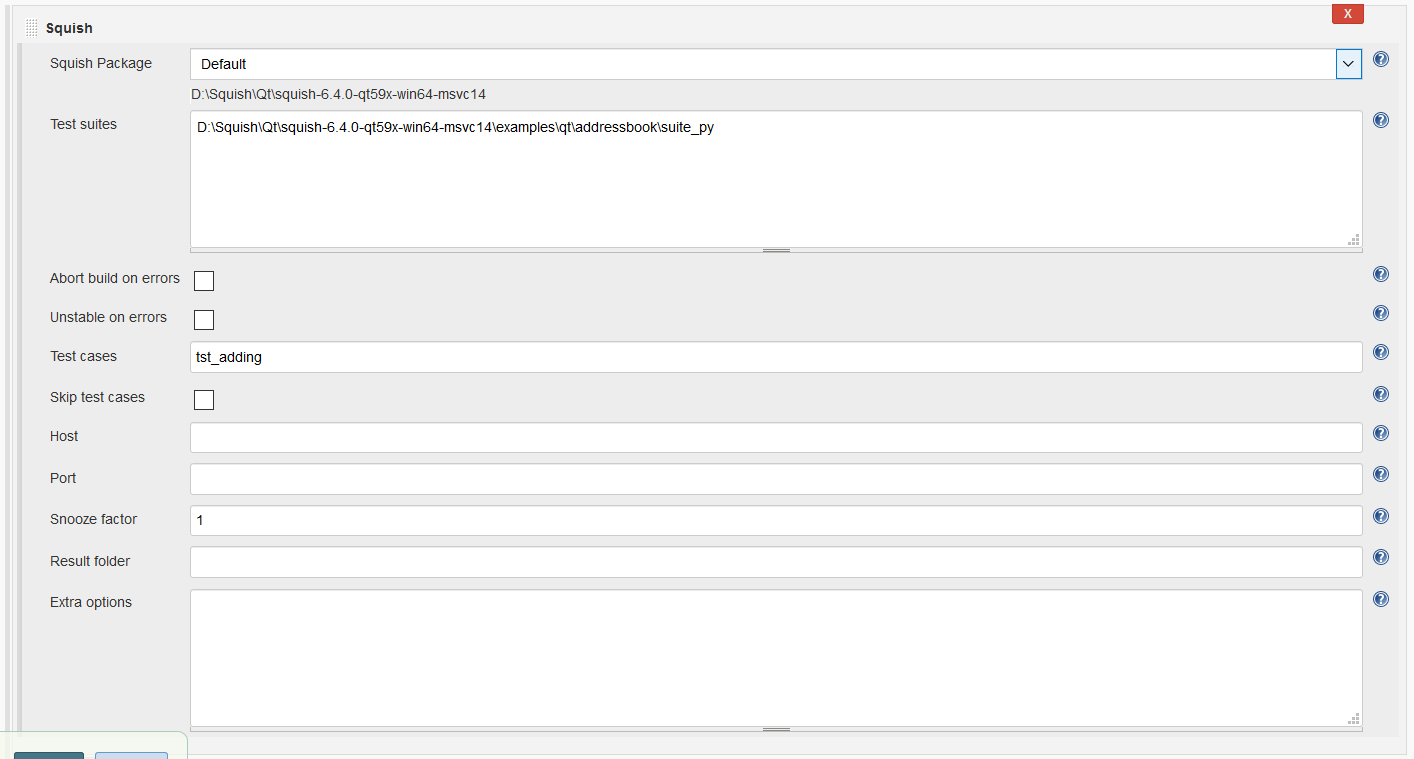
Jenkins Job Configuration.
After selecting Save or Apply to apply the changes to the Jenkins project, you can run it.
Pipeline Jobs
To run Squish tests in the Jenkins Pipeline, you can use Squish Build Step in our Pipeline script.
To generate proper code, you can use Jenkins built-in Pipeline Syntax functionality.
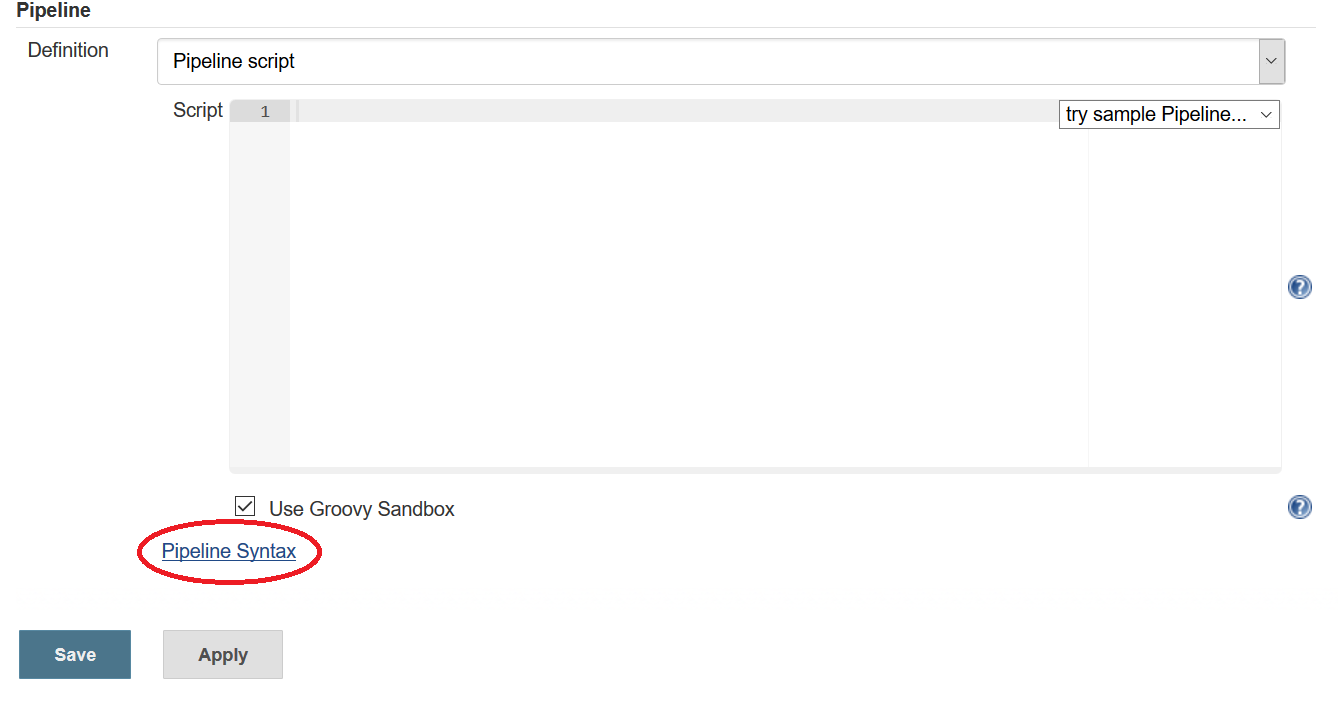
Pipeline Syntax.
As a Sample Step, select squish: Runs Squish tests.

Squish Step selection.
After doing that, you can define the configuration the same way you do for Freestyle projects. When the configuration is ready, click on Generate Pipeline Script.
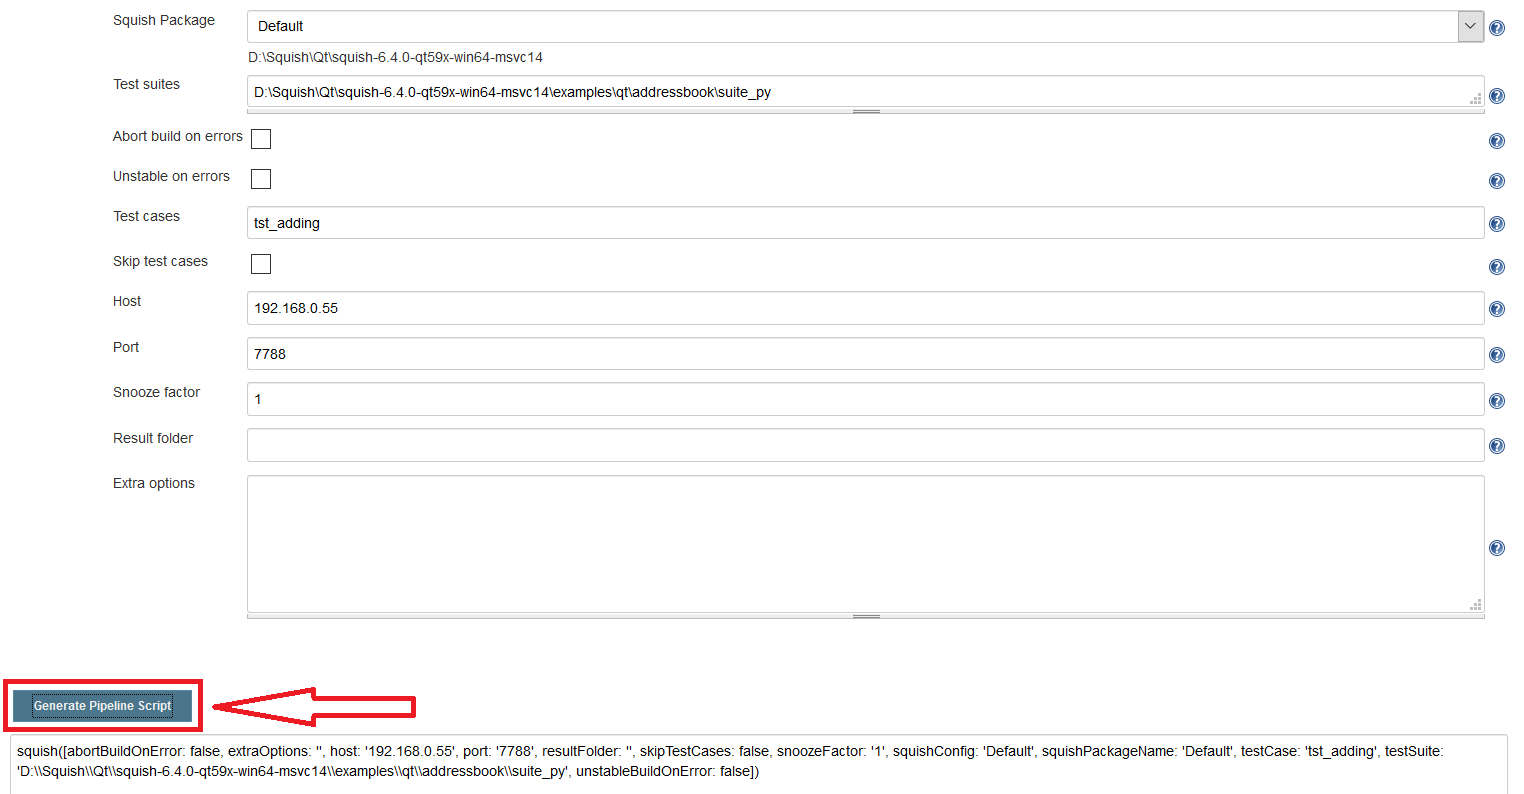
Generate Pipeline Script.
Now you can use the generated step in the Pipeline job.
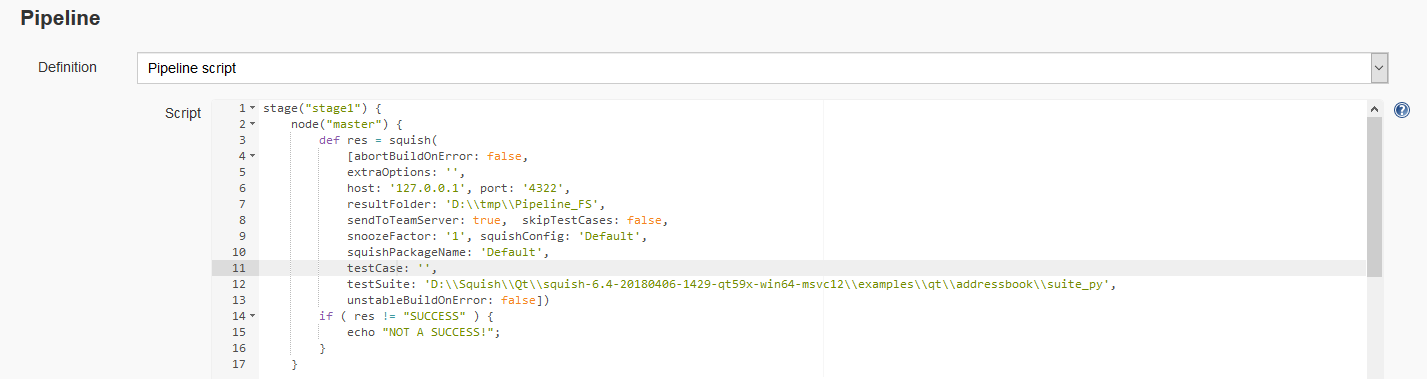
Squish Plugin usage.
Note that the Squish Pipeline Step doesn't set a build result. It returns a test execution status based on test results, global and job configurations. Using that status a user may implement the desired handling.
Extra Options supported in Jobs and Pipelines
The Extra Options configuration field is intended to specify additional arguments to squishrunner and squishserver.
Each option and possible arguments have to be given in separate lines.
Supported squishrunner options:
--webbrowser(see Playback option –webbrowser)--webbrowserargs(see Playback option –webbrowser)--device(see Playback option –device)--launcherargs(see--launcherargsat squishrunner –testsuite: Running tests in batch mode--resultdir(see squishrunner –resultdir: Setting the Result Directory)--retry(see Playback option –retry)--timeout(see Playback option –timeout)--abortOnFail(see Playback option –abortOnFail)--tags(see Playback option –tags)--random(see Playback option –random)--scriptargs(see Playback option –scriptargs)
The --scriptargs option with the following parameters needs to be provided at the end. For example:
--webbrowser
firefox
--device
016d24ab5227e2ff
--abortOnFail
--scriptargs
--param1
value1
--param2
value2
Supported squishserver --config options (see Configuring squishserver for more details):
--config addAUT:--config addAUT aut path
--config addAppPath:--config addAppPath path
--config addAttachableAUT:--config addAttachableAUT aut [host:]port
--config setResponseTimeout:--config setResponseTimeout seconds
--config setAUTPostMortemTimeout:--config setAUTPostMortemTimeout milliseconds
--config setAUTTimeout--config setAUTTimeout seconds
--config setCursorAnimation--config setCursorAnimation on|off
Execution Results
The summary page lists links to the Squish report page and later on to HTML Reports.
The Jenkins Build Summary - HTML Reports.
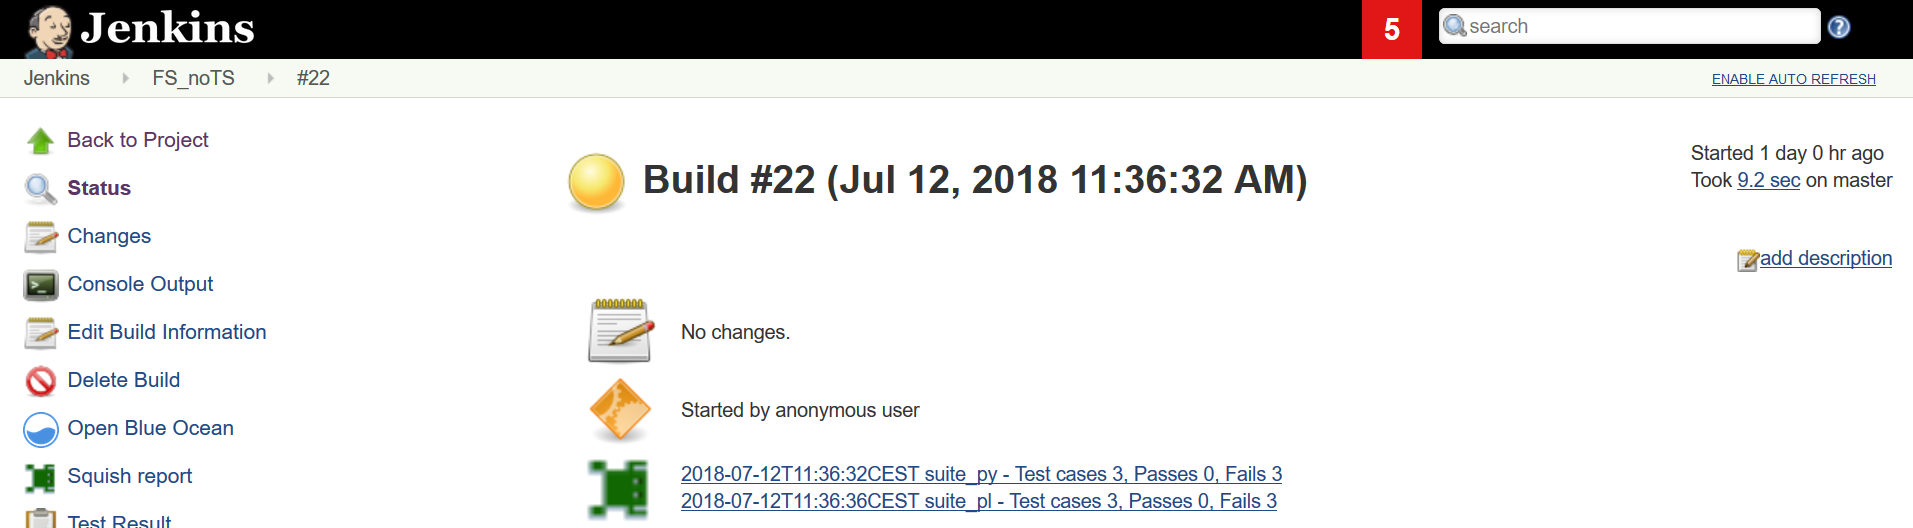
The Squish report page appears inside Jenkins:
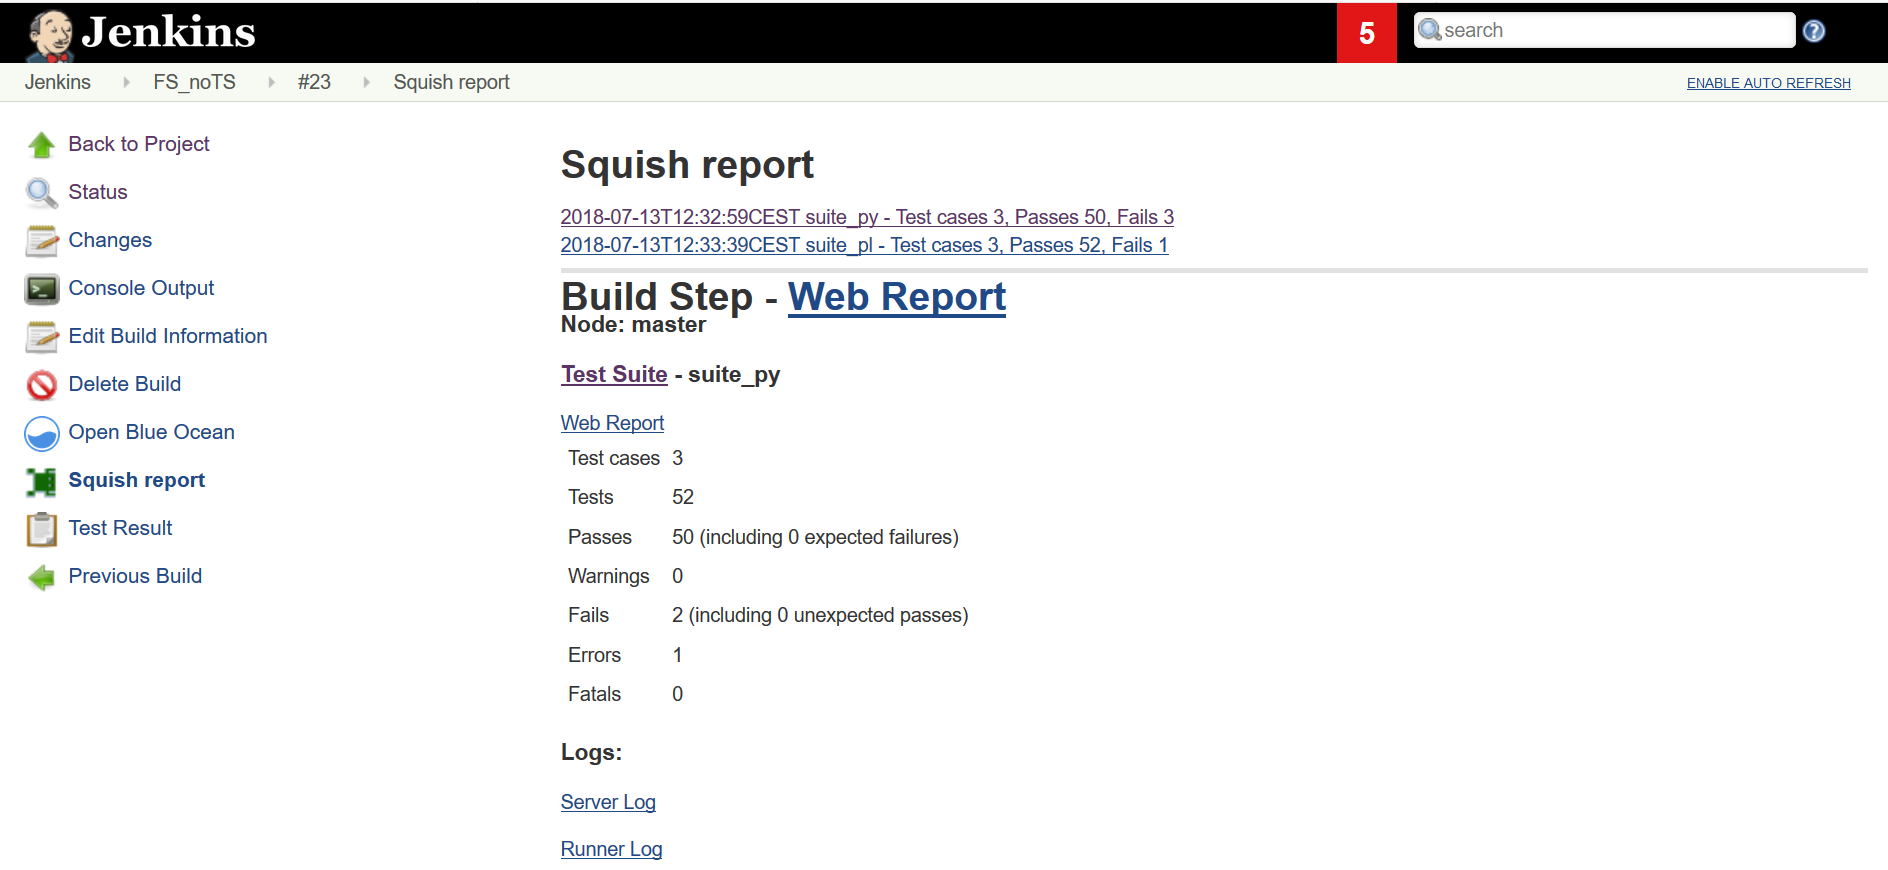
Jenkins Squish Results.
Integration with Test Center
With the Jenkins plugin, it's possible to send execution results directly to Test Center instead of generating the HTML report.
Global Configuration
To configure the connection between Jenkins and Test Center, select Manage Jenkins > Configure System. In the Test Center Configuration section, provide the URL of the Test Center and the credentials for accessing it.

Jenkins Global Test Center Configuration.
While setting up the credentials, select Secret Text in the Kind field. In the Secret field, enter an Upload Token generated in the Test Center.
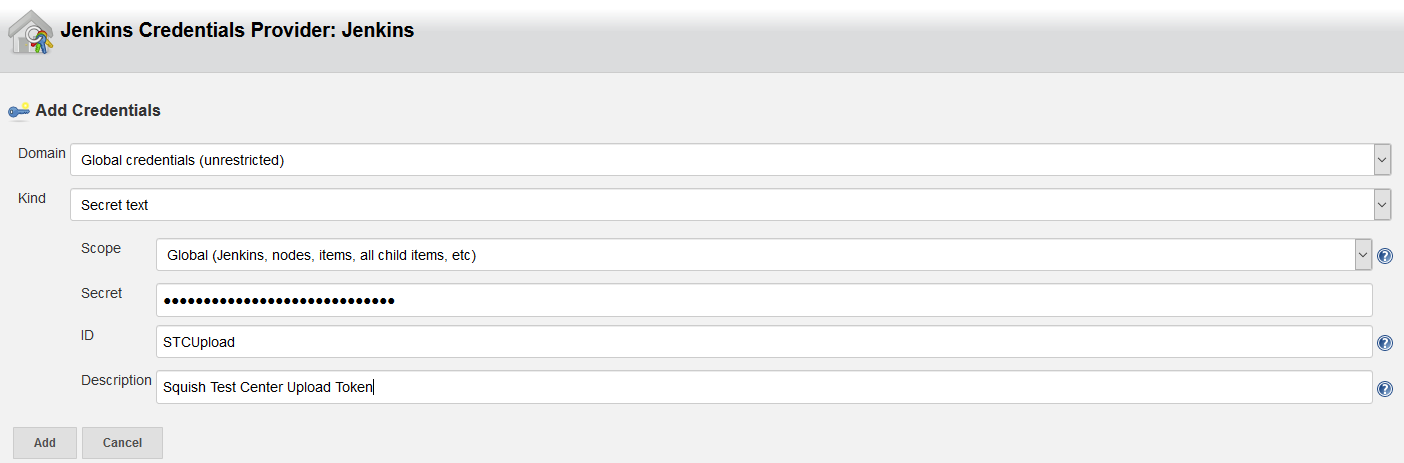
Test Center Upload Token.
Test the connection by selecting the Verify Configuration button.
Job Configuration
When the connection with Test Center is configured, open the job configuration page. At the bottom of the Squish build step, select the Send results to the Test Center option. After the option has been activated, new configuration fields appear. Provide the necessary information and save the job configuration.

Jenkins Job Test Center Configuration.
Test Execution Results
After the job execution, if a job was configured to send results to Test Center, the summary page lists links to respective Test Center batch pages.

Test Center Build Summary.
© 2025 The Qt Company Ltd.
Documentation contributions included herein are the copyrights of
their respective owners.
The documentation provided herein is licensed under the terms of the GNU Free Documentation License version 1.3 as published by the Free Software Foundation.
Qt and respective logos are trademarks of The Qt Company Ltd. in Finland and/or other countries worldwide. All other trademarks are property
of their respective owners.
