How to Do Automated Batch Testing
This section shows different approaches to running tests from the command-line and processing the results.
Uploading results directly to Test Center
This section shows how to use squishrunner, the command-line program, to generate and upload XML test results directly to Test Center. After you have done this, you can see detailed reports and results from a web browser that is pointed to your Test Center instance.
For demonstration, we will look at the results produced by running the example suite_addressbook_py. The test case checks whether entering some data into a simple addressbook AUT works as expected.
When using the testcenter report generator, we provide the URL of a running instance of Test Center. The squishserver should be already running as well, or else we can use the --local option.
squishrunner --testsuite suite_addressbook_py --reportgen testcenter,http://localhost:8800/project/MyProject?token=MyToken&label=MyLabelKey1%3DMyLabelValue1&label=OS%3DLinux&batch=MyBatch
The URL provided for Test Center contains additional information in its query string that determines how it is organized in the results database.
- A project name, MyProject
- Some form of authentication, which could be a username and password, or in this case, an upload token, MyToken. See Test Center documentation for details.
- 0 or more
label=, each can contain a key=value pair, where the = is URL-encoded as %3D. The labels encoded in the URL above areMyLabelKey1=MyLabelValue1, andOS=Linux. - A batch name, MyBatch, which can be an arbitrary string. Branch names or Version numbers are often used here.
Project Names, Batches and Labels are concepts used to organize and select test reports in the web interface, and are explained in more detail here.
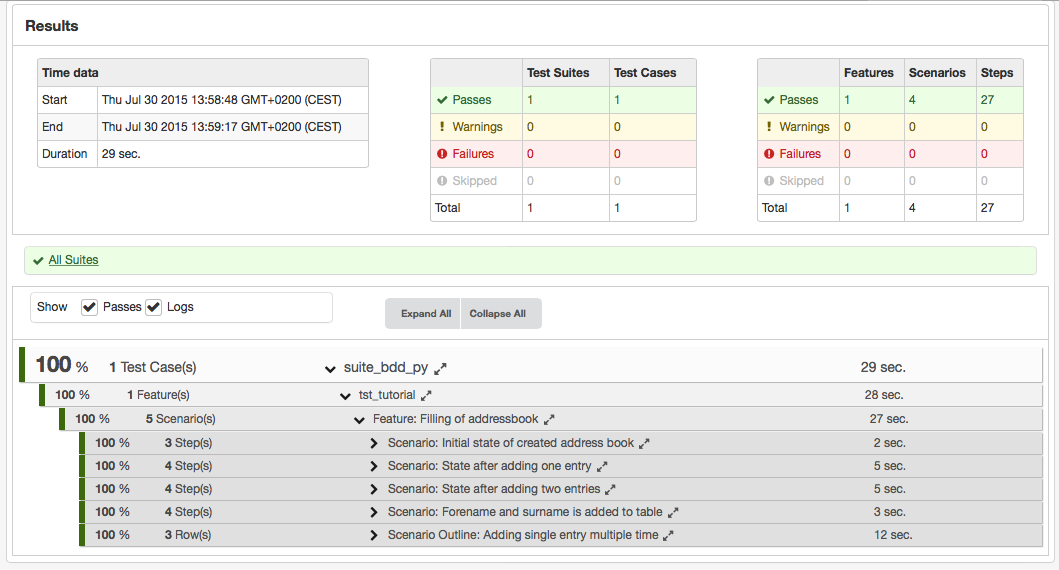
After the results are uploaded, an HTML report can be seen by navigation from a web browser to the URL of Test Center.
Generating XML Test Results
Squish's use of XML means that test results can easily be processed into formats suitable for other tools to use.
To put things in concrete terms we will look at an XML test results file produced by running an example suite_addressbook_py test suite that contains one test case. The test case checks whether entering some data into a simple addressbook AUT works as expected.
By default, squishrunner prints test results to stdout as plain text.
To generate an XML report, we run the test suite using squishrunner with the --reportgen option, specifying a version of our XML output format.
squishrunner --testsuite suite_addressbook_py --reportgen xml3.5,/tmp/results
The valid values for --reportgen depend on the Squish version, and are listed in squishrunner –reportgen: Generating Reports.
Generating XML and uploading to Test Center (2 steps)
Previously, we generated and uploaded results to Test Center in one step, using squishrunner. In this section, we show the same thing in 2 separate steps.
To make squishrunner use the XML report generator, specify --reportgen xml3.5 on the command line. If you want to get the XML output written into a file instead of stdout, specify --reportgen xml3.5,directorypath, e.g.:
squishrunner --host computerB.froglogic.com --testsuite suite_addressbook_py --reportgen xml3.5,/tmp/results
The XML report will be written into the directory /tmp/results.
Next, we can upload the report to Test Center for further analysis, using the testcentercmd command-line tool.
testcentercmd --url=http://localhost:8800 --token=MyToken upload AddressBook /tmp/results --label=MyLabelKey1=MyLabelValue1 --label=OS=Linux --batch=MyBatch
The command above has the following options.
- The URL of a running instance of Test Center
http://localhost:8800. - An upload token,
MyToken. See Test Center documentation for more details. - A command,
upload. - A project name, in this case
AddressBook. - A directory (or a zip file) of XML test results to upload
- 0 or more labels, or key=value pairs for tagging the result in the database
- An optional batch name,
MyBatch, also for the purposes of organizing in the Test Center database.
Project Names, Batches and Labels are concepts used to organize and select test reports in the web interface, and are explained in more detail here.
The xml Report Format
If you are trying to export test results to another system that is not covered in Third-Party Add-Ons, it is straightforward to write a program that parses the XML produced by Squish. This section describes the file format.
The document starts with the <?xml?> tag which identifies the file as an XML file and specifies the encoding as UTF-8. Next comes the Squish-specific content, starting with the SquishReport tag which has a version attribute set to 3.5. This tag may contain one or more test tags. The test tags themselves may be nested—i.e., there can be tests within tests—but in practice Squish uses top-level test tags for test suites, and nested test tags for test cases within test suites. (If we export the results from the Test Results view there will be no outer test tag for the test suite, but instead a sequence of test tags, one per test case that was executed.)
The test tag has a type attribute used to store the type of the test. Every test tag must contain a prolog tag as its first child with a time attribute set to the time the test execution started in ISO 8601 format, and must contain an epilog tag as its last child with a time attribute set to the time the test execution finished, again in ISO 8601 format. In between the prolog and epilog there must be at least one verification tag, and there may be any number of message tags (including none).
Every verification tag may contains several sub elements.
The uri tag contains the relative path and filename of the test script or verification point that was executed, and the lineNo tab contains the number of the line in the file where the verification was executed. If uri starts with x-testsuite: or x-testcase: or x-results: the path is relative to respectively the test suite, test case or results directories. If file path is outside of the mentioned directories, the uri tag will contain the abosulute file path.
The scriptedVerificationResult tag is used to specify the verification point type. There are other possible types too: screenshotVerificationResult, propertyVerificationResult or tableVerificationResult.
The screenshotVerificationResult is for screenshot verifications or "propertyVerificationResult" for property verifications (e.g. calls to the Boolean test.vp(name) function) or an empty string for any other kind of verification (such as calls to the Boolean test.verify(condition) function), and tableVerificationResult is for table verification points results.
Every verificaton point's result tag has two attributes: a time attribute set to the time the result was generated in ISO 8601 format, and a type attribute whose value is one of PASS, FAIL, XPASS, XFAIL, FATAL, or ERROR. In addition the scriptedVerificationResult tag should contain at least one detail tag whose text describes the result. Normally, two tags text and detail are present, one that describes the result and the other whose text gives a more detailed description of the result. For screenshot verifications there will be additional tags, one objectName whose content is the symbolic name of the relevant GUI object, and one failedImage whose content is either the text "Screenshots are considered identical" (for passes), or the URI of the actual image (for fails, i.e., where the actual image is different from the expected image).
In addition to verification tags, and at the same level (i.e., as children of a test tag), there can be zero or more message tags. These tags have two attributes, a time attribute set to the time the message was generated in ISO 8601 format, and a type attribute whose value is one of LOG, WARNING, or FATAL. The message tag's text contains the message itself.
Here is an example report of a test suite run. This test suite had just one test case, and one of the screenshot verifications failed. We have changed the line-wrapping and indentation for better reproduction in the manual.
<?xml version="1.0" encoding="UTF-8"?>
<SquishReport version="3.4" xmlns="http://www.froglogic.com/resources/schemas/xml3">
    <test type="testsuite">
        <prolog time="2015-06-19T11:22:27+02:00">
            <name><![CDATA[suite_test]]></name>
            <location>
                <uri><![CDATA[file:///D:/downloads/simple]]></uri>
            </location>
        </prolog>
        <test type="testcase">
            <prolog time="2015-06-19T11:22:27+02:00">
                <name><![CDATA[tst_case1]]></name>
                <location>
                    <uri><![CDATA[x-testsuite:/tst_case1]]></uri>
                </location>
            </prolog>
            <verification>
                <location>
                    <uri><![CDATA[x-testcase:/test.py]]></uri>
                    <lineNo><![CDATA[2]]></lineNo>
                </location>
                <scriptedVerificationResult time="2015-06-19T11:22:27+02:00" type="PASS">
                    <scriptedLocation>
                        <uri><![CDATA[x-testcase:/test.py]]></uri>
                        <lineNo><![CDATA[2]]></lineNo>
                    </scriptedLocation>
                    <text><![CDATA[Verified]]></text>
                    <detail><![CDATA[True expression]]></detail>
                </scriptedVerificationResult>
            </verification>
            <verification>
                <location>
                    <uri><![CDATA[x-testcase:/test.py]]></uri>
                    <lineNo><![CDATA[3]]></lineNo>
                </location>
                <scriptedVerificationResult time="2015-06-19T11:22:27+02:00" type="FAIL">
                    <scriptedLocation>
                        <uri><![CDATA[x-testcase:/test.py]]></uri>
                        <lineNo><![CDATA[3]]></lineNo>
                    </scriptedLocation>
                    <text><![CDATA[Comparison]]></text>
                    <detail><![CDATA['foo' and 'goo' are not equal]]></detail>
                </scriptedVerificationResult>
            </verification>
            <epilog time="2015-06-19T11:22:27+02:00"/>
        </test>
        <epilog time="2015-06-19T11:22:27+02:00"/>
    </test>
</SquishReport>
Generating HTML Test Results
Squish has a legacy HTML output format which is convenient for creating a nicely-formatted report for your web browser, without using Test Center.
For demonstration we will look at HTML results produced by running the example suite_addressbook_py test suite we used before. The test case checks whether entering some data into a simple addressbook AUT works as expected.
To generate the HTML report, we run the test suite using squishrunner. In this example, we will use --local instead of specifying a squishserver.
squishrunner --testsuite suite_addressbook_py --local --reportgen html,/tmp/results
As you probably noticed, we used the --reportgen option again and provided html as a value. The syntax is the same as we used for other report types. Besides of mentioning the report type we also specified the results directory /tmp/results where the final data will end up. If the directory already exists and contains results from the previous executions, the new execution results will be appended to the existing ones and produce an aggregated report.
Since we specified html format, squishrunner will generate the HTML report in the specified directory. You can open the index.html results file in any web browser for viewing and analyzing.
Distributed Tests
In this section we will see how to remotely run tests on a different machine. For example, let's assume that we develop tests on computer A, and we want to run them on an AUT located on computer B.
The first step is to install Squish and the AUT on the target computer (computer B). Note though, that we do not need to do this step for Squish for Web. Now—except if we are using Squish for Web on computer B—we must tell the squishserver the name of the AUT's executable and where the executable is located. This is achieved by running the following command:
squishserver --config addAUT <name_of_aut> <path_to_aut>
Later we will connect from computer A to the squishserver on computer B. By default the squishserver only accepts connections from the local machine, since accepting arbitrary connections from elsewhere might compromise security. So if we want to connect to the squishserver from another machine we must first register the machine which will try to establish a connection for executing the tests (computer A in this example), with the machine running the AUT and squishserver (computer B). Doing this ensures that only trusted machines can communicate with each other using the squishserver.
To perform the registration, on the AUT's machine (computer B) we create a line like this in <SQUISHDIR>/etc/squishserverrc:
ALLOWED_HOSTS = <ip_addr_of_computer_A>
<ip_addr_of_computer_A> must be the IP address of computer A. (An actual IP address is required; using a hostname won't work.) For example, on our network the line is:
ALLOWED_HOSTS = 192.168.0.3
(On Windows the file can be called squishserverrc or squishserverrc.txt at your option.)
If you want to specify the IP addresses of several machines which should be allowed to connect to the squishserver, you can put as many IP addresses on the ALLOWED_HOSTS line as you like, separated by spaces. And if you want to allow a whole group of machines which have similar IP addresses, you can use wildcards. For example, to allow all those machines which have IP addresses that start with 192.168.0, to connect to this squishserver, you can specify an IP address of 192.168.0.*.
Once we have registered computer A, we can run squishserver on computer B, ready to listen to connections, which can now come from computer B itself or from any of the allowed hosts, for example, from computer A.
We are now ready to create test cases on computer A and have them executed on computer B. First, we must start squishserver on computer B (by default it starts on port 4322; see squishserver for a list of available options):
squishserver
By default, the Squish IDE starts squishserver locally on startup and connects to this local squishserver to execute the tests. To connect to a squishserver on a remote machine, select Edit > Preferences > Squish > Servers > Add > Remote server and enter the IP address of the machine running the remote squishserver in the Hostname/IP field (computer B). Change the port number only if the squishserver is started with a non-standard --port option. In this case, set it to match that port number.

The Servers preferences pane
Now we can execute the test suite as usual. One immediately noticeable difference is that the AUT's GUI is not visible locally, but on the remote server. After the test has finished, the results become visible in the Squish IDE on computer A as usual.
It is also possible to do remote testing from the command line. The command is the same as described earlier, only this time we must also specify the host of computer B's squishserver using the --host option:
squishrunner --host computerB.froglogic.com --testsuite suite_addressbook
The host can be specified as an IP address or as a name.
This makes it possible to create, edit, and run tests on a remote machine via the Squish IDE. And by adding the --host option to the shell script, batch file, or other script file used to automatically run tests, it is possible to automate the testing of applications located on different machines and platforms.
Note: When Squish tools are executed, they always check their license key. This shouldn't matter when using a single machine, but might cause problems when using multiple machines. If the default license key directory is not convenient for using with automated tests, it can be changed by setting the SQUISH_LICENSEKEY_DIR environment variable to a directory of your choice. This can be done in a shell script or batch file. See Environment Variables.
© 2025 The Qt Company Ltd.
Documentation contributions included herein are the copyrights of
their respective owners.
The documentation provided herein is licensed under the terms of the GNU Free Documentation License version 1.3 as published by the Free Software Foundation.
Qt and respective logos are trademarks of The Qt Company Ltd. in Finland and/or other countries worldwide. All other trademarks are property
of their respective owners.
