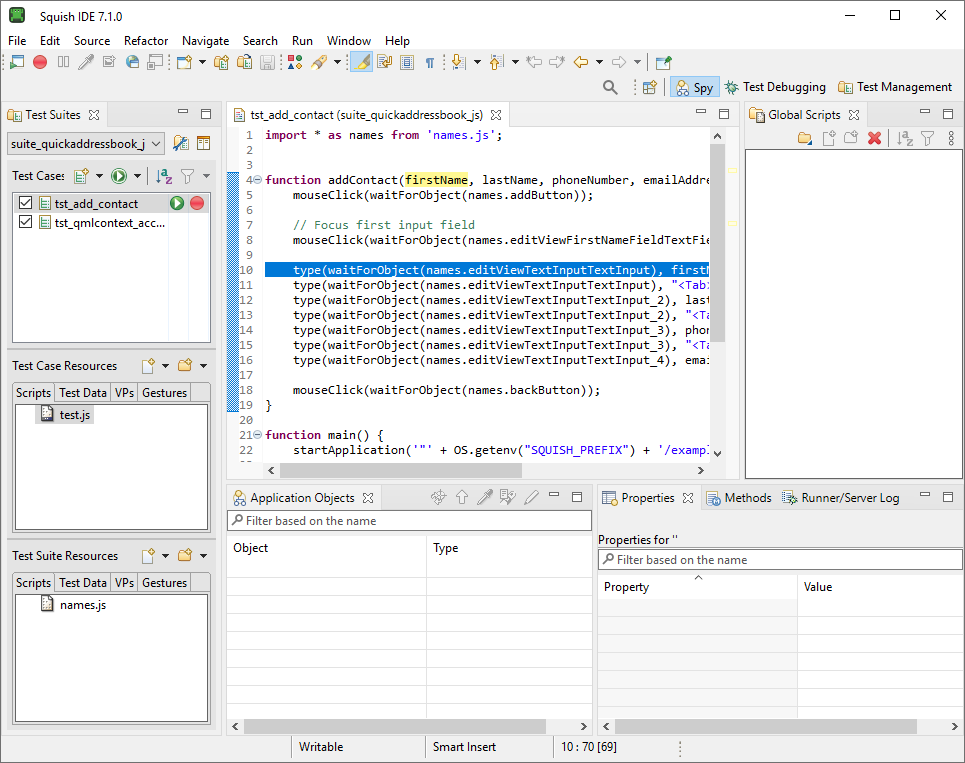
Main window
This section contains information about:
- Main window actions
- Squish servers toolbar
- Perspectives
- Control Bar window
- MBT Model Editor
- MBT Test Case Editor
Main window actions
You can access all the Squish IDE actions and dialogs that are available in the current context from the menu bar. Use the toolbar for instant access to a number of the actions.
The main window's toolbar
Add Symbolic Name action
The Add Symbolic Name action adds a new symbolic name to the object map when the Object Map view is open. To invoke the action, click the New button in the Symbolic Names section.
Click the New button in the Real Name section to add one or more properties that Squish should use to match the new symbolic name. For more information, see Object Map and Editing an Object Map.
Activate Editor action
The Activate Editor action switches the focus to the last active editable view, such as the Editor, Object Map, or Test Suite Settings view.
To invoke the action, click Window > Navigation > Activate Editor or press F12.
Check Object Existence action
The Check Object Existence action marks items in the Object Map view as being absent ( ) or present (
 ).
).
The action is only enabled if the Squish IDE is spying—for example, stopped at a breakpoint or when the AUT is running as a result of invoking the Launch AUT action—and when an item in the object map is selected.
To invoke the action, click the Check Existence button or select Check Object Existence in the context menu.
Close action
The Close action closes the last active editable view, such as the Editor, Object Map, or Test Suite Settings view.
To invoke the action, click File > Close or press Ctrl+W.
Close All action
The Close All action closes the last active editable view, such as the Editor, Object Map, or Test Suite Settings view.
To invoke the action, click File > Close All or press Shift+Ctrl+W.
Close Perspective action
The Close Perspective action closes the active perspective. The Squish IDE provides standard perspectives. If another perspective is available in the main toolbar, it becomes the active one.
To invoke the action, click Window > Close Perspective.
See also the Close All Perspectives action.
If the standard perspectives are used, you usually do not need this action because the Squish IDE automatically switches between perspectives as necessary.
Close All Perspectives action
The Close All Perspectives action closes all perspectives.
To invoke the action, click Window > Close All Perspectives.
If the standard perspectives are used, you usually do not need this action because the Squish IDE automatically switches between perspectives as necessary.
Content Assist action
The Content Assist action provides code completion.
To invoke the action, click Edit > Content Assist or press Ctrl+Space. If a completion is available, it is inserted. Otherwise, the message No completion available is briefly shown in the status bar. Attempting completion mid-way through typing a word or when there is no word opens a list of possible completion words.
Convert Line Delimiters To action
The Convert Line Delimiters To action opens a submenu of plain text file line ending conventions that you can apply to the active Editor view's contents.
However, we do not recommend using this option, as the Squish IDE detects and handles different line ending conventions automatically. Therefore, you should not need to make changes manually. To enforce a particular line ending convention regardless of platform, set the New text file line delimiter preferences in Edit > Preferences > General > Workspace.
Copy action
The Copy action ( ) copies any selected text (e.g., in an editable view) to the clipboard.
To invoke the action, click Edit > Copy, press Ctrl+C, or select the Copy action in the context menu.
See also the Cut, Paste, and Select All action.
Customize Perspective action
The Customize Perspective action opens the Customize Perspective dialog where you can customize a predefined or custom perspective. For example, you can select the toolbars, menus, and submenus that are visible in the perspective. To change the views shown in a perspective, close some and open new ones using the Show View action.
Cut action
The Cut action ( ) copies any selected text (e.g., in an editable view) to the clipboard and then deletes the selected text from the view.
To invoke the action, click Edit > Cut, press Ctrl+X, or select Cut in the context menu.
See also the Copy, Delete, Paste, and Select All action.
Delete action
The Delete action ( ) deletes the selected item (e.g., a test case) or the selected text (e.g., in an editable view).
To invoke the action, click Edit > Delete, press the Delete key, or select the Delete option in the context menu.
See also the Copy and Cut action.
If the deletion can be undone using the Undo action, it is performed immediately. If the deletion is irreversible (e.g., deleting a test case), a confirmation dialog opens.
In the Search view, this action removes any selected matches from the view.
Delete Test Suite action
The Delete Test Suite action removes a test suite from the Squish IDE's workspace and optionally permanently deletes the entire test suite from disk.
To invoke the action, click File > Delete Test Suite, which opens a confirmation dialog. Click the No button to cancel the operation. If the Delete Test Suite on Disk checkbox is unchecked (which is the default), it is safe to click the Yes button to remove the test suite from the workspace and close any of its associated views. To add the test suite to the workspace again, select the Open Test Suite action.
If you really want to delete the entire test suite, that is, both remove it from the Squish IDE's workspace and delete the test suite and all its associated test cases, test data, and so on, from disk, then check the Delete Test Suite on Disk checkbox and click the Yes button. This action cannot be undone, so use it with care.
File action
The Squish IDE provides two different File actions.
The first File action ( ) invokes the Search dialog where you can search for text inside files and activates the File Search tab. To invoke this action, click Search > File.
See also the Search action.
The second File action performs a search in the current file for the selected text—or if no text is selected, for the word containing the cursor—and presents the search results in the Search view.
To invoke the action, click Search > Text > File.
See also the Project, Working Set, and Workspace action.
Find Actions action
The Find Actions action opens a search dialog for finding actions, perspectives, and views in the Squish IDE. Start typing the name of the action, perspective, or view to see a list of matches. Use the up and down arrow keys to select an item in the list and press Enter to select it. Or, press Esc to cancel.
To invoke the action, click Window > Navigation > Find Actions or press Ctrl+3.
Find and Replace action
The Find and Replace action finds and optionally replaces text in the active editable view.
To invoke the action, click Edit > Find and Replace or press Ctrl+F. This opens the Find/Replace dialog.
Find Next action
The Find Next action finds the next occurrence of the selected text or the text that was last searched for (e.g., using the Find and Replace action).
To invoke the action, click Edit > Find Next or press Ctrl+K.
Find Previous action
The Find Previous action finds the previous occurrence of the selected text or the text that was last searched for (e.g., using the Find and Replace action).
To invoke the action, click Edit > Find Previous or press Shift+Ctrl+K.
Go To Line action
The Go To Line action moves the cursor of the currently active Editor to the line specified by the user.
To invoke the action, click Navigate > Go To Line, or press Ctrl-L.
Import Test Resource action
The Import Test Resource action ( ) opens the Import Squish Resource dialog where you can import scripts, test data, and verification points into a test case or a test suite.
To invoke the action, click File > Import Test Resource.
See also the New Squish Test Data and New Squish Test Script dialog.
Last Edit Location action
The Last Edit Location action ( ) moves the cursor to the position it had when the file being edited was last saved.
To invoke the action, click the Last Edit Location toolbar button or press Ctrl+Q.
Launch AUT action
The Launch AUT ( ) action runs the AUT without doing any recording, and changes the Squish IDE's perspective to the Spy Perspective, where you can interact with the AUT and examine the state of its internal objects.
To invoke the action, click Run > Launch AUT or press the Launch AUT () toolbar button.
You can terminate the AUT either normally—for example, by clicking its close button—or by invoking the Quit AUT ( ) action. Once the AUT has terminated, the Squish IDE returns to the Test Management Perspective.
Maximize Active View or Editor action
The Maximize Active View or Editor action maximizes the active view (e.g., an Editor view). That is, makes the view occupy as much of the Squish IDE's central area as possible, and hides all the other views. If the active view is already maximized, this action reverses the effect. That is, restores the maximized view and all the other views that were affected to their previous sizes and positions.
When a view is maximized, the Squish IDE shows at least one Restore toolbar button ( ), and toolbar buttons for all the other views that were hidden. Clicking the Restore button has the same effect as toggling the action again. Clicking any of the toolbar buttons representing one of the views makes that view visible again, with the maximized view becoming smaller to accommodate the newly visible view.
To toggle the action, click Window > Navigation > Maximize Active View or Editor, press Ctrl+M, or click the view's Maximize ( ) or Restore ( ) button.
Minimize Active View or Editor action
The Minimize Active View or Editor action minimizes the view. That is, it hides the view and adds a toolbar button representing the view and a Restore toolbar button ( ).
To invoke the action, click Window > Navigation > Minimize Active View or Editor or press the view's Minimize button ( ).
).
To reverse the action, click either the toolbar button that represents the minimized view or the Restore toolbar button ( ).
Move action
The File > Move action is inherited from the Eclipse IDE. It is not functional in the Squish IDE.
New action
The New action creates new test cases and test suites and imports shared test scripts and test data.
To open the New dialog, click the New toolbar button (but not its menu indicator) or File > New > Other or press Ctrl+N.
To open the New menu, click the New toolbar button's menu indicator or File > New or press Alt+Shift+N.
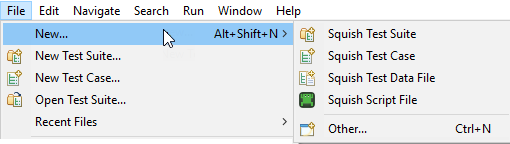
The New actions menu
Select the New Test Suite menu option to open the New Test Suite wizard, which is described in the tutorials. Select the Squish Test Suite option to open the New Test Suite wizard.
Select the Squish Test Case option to open the New Squish Test Case wizard. Enter a test case name and click the Finish button to create a new empty test case. Alternatively, select the New Test Case action in the Test Suite view. This way adds a default test name that you can change.
Select the Squish Test Data File option to open the New Squish Test Data dialog. Similarly, select the Squish Script File option to open the New Squish Test Script dialog.
Select the MBT Model File option to open the New MBT model dialog.
Select the Other option to open the New dialog.
New Test Case action
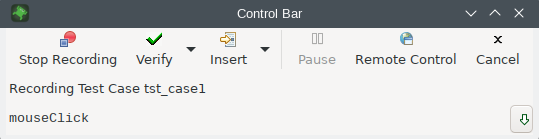
To create a new empty test case, click the New Script Test Case ( ) button in the Test Suites view. The test case appears in the Test Cases list with the name
 tst_case1. The name is selected for editing, so you can rename the test case by typing a new name. You can edit the empty test case either manually by typing in a script or by recording a script that you can then edit.
Alternatively:
- Click File > New Test Case or File > New > Squish Test Case to open the New Squish Test Case wizard.
- Click File > New > Other (or press Ctrl+N) to open the New dialog and first click the New Test Case item and then the Next button.
New Test Suite action
To create a new test suite, click the New Test Suite ( ) button in the Test Suites view. This opens the New Squish Test Suite wizard. Alternatively, click File > New Test Suite.
Another way to open the wizard is to click File > New... > Other... (or press Ctrl+N) to open the New dialog) and select the Squish Test Suite.
Next Annotation action
The Next Annotation action ( ) moves the text cursor to the next annotation in the active Editor view. In this context, an annotation means a marker associated with a line in a test script file. For example, if a test script has a syntax error or a breakpoint, the Squish IDE marks the affected lines by putting a suitable icon to the left of the line numbers shown in the Editor view.
To invoke the action, click the Next Annotation toolbar button or press Ctrl+.. The text cursor moves to the next annotation it finds. This key combination invokes the Show Next Match action if you press it when a Search view is active.
By default, the action moves to the next error or warning. To select other types of annotations, click the toolbar button's menu.
See also the Previous Annotation action.
Next Editor action
The Next Editor action opens an Editors list that you can navigate by pressing Ctrl+F6 (next) and Shift+Ctrl+F6 (previous). When you release the Ctrl key, the selected Editor view becomes active.
To invoke the action, click Window > Navigation > Next Editor or press Ctrl+F6.
See also the Previous Editor action. However, it is more convenient to press Shift+Ctrl+E to open the Switch to Editor dialog.
Next Perspective action
The Next Perspective action opens a list of Perspectives that you can navigate by pressing Ctrl+F8 (next) and Shift+Ctrl+F8 (previous). When you release the Ctrl key, the selected perspective becomes active.
To invoke the action, click Window > Navigation > Next Perspective or press Ctrl+F8. See also the Previous Perspective action.
To switch directly to another perspective, click its toolbar button. To choose from the available perspectives, click the Open Perspective ( ) button or select Window > Open Perspective.
In practice, you rarely need to manually change between the standard Squish perspectives because the Squish IDE switches between them automatically depending on context.
Next View action
The Next View action opens a Views list that you can navigate by pressing Ctrl+F7 (next) and Shift+Ctrl+F7 (previous). When you release the Ctrl, the selected view becomes active.
To invoke the action, click Window > Navigation > Next view or press Ctrl+F7.
See also the Previous View action.
To switch directly to another (visible) view, click it. To open a view, click Window > Show and choose a view from the submenu or click the Other submenu item and choose a view from the Show View dialog.
Open Test Suite action
The Open Test Suite action ( ) opens the Open Test Suite dialog where you can select the test suite to open. Click the OK button to open the test suite.
To invoke this action, click File > Open Test Suite.
The Squish IDE can hold any number of test suites. The Test Suites view's combobox shows the current test suite. You can select another test suite in the combobox.
To remove a test suite from the Squish IDE's workspace, use the Delete Test Suite action.
Open Perspective action
The Open Perspective action ( ) opens (i.e., changes to) a perspective.
To invoke the action, click Window > Open Perspective and choose a perspective from the submenu, or click the Other submenu item and choose a perspective from the Open Perspective dialog.
To switch directly to another perspective, click its toolbar button. To choose from the available perspectives, click the Open Perspective ( ) button.
In practice, you rarely need to manually change between the standard Squish perspectives because the Squish IDE switches between them automatically depending on context.
Paste action
The Paste action ( ) inserts any text from the clipboard into the active Editor view at the current cursor position.
To invoke the action, click Edit > Paste, press Ctrl+V, or select the Paste action in the context menu.
See also the Copy and Cut action.
Preferences action
The Preferences action invokes the Preferences dialog through which much of the Squish IDE's behavior can be customized.
To invoke the action, click Edit > Preferences or Preferences in the application menu on macOS.
Previous Annotation action
The Previous Annotation action ( ) moves the text cursor to the previous annotation in the active Editor view. In this context, an annotation means a marker associated with a line in a test script file. For example, if a test script has a syntax error or a breakpoint, the Squish IDE marks the affected lines by putting a suitable icon to the left of the line numbers shown in the Editor view.
To invoke the action, click the Previous Annotation button or press Ctrl+,. The text cursor moves to the next annotation it finds. This key combination invokes the Show Previous Match action if you press it when a Search view is active.
By default, the action moves to the next error or warning. To select other types of annotations, click the toolbar button's menu.
See also the Next Annotation action.
Previous Editor action
The Previous Editor action opens an Editors list that you can navigate by pressing Ctrl+F6 (next) and Shift+Ctrl+F6 (previous). When you release the Ctrl key, the selected Editor view becomes active.
To invoke the action, click Window > Navigation > Previous Editor or press Shift+Ctrl+F6.
See also the Next Editor action. However, it is more convenient to press Shift+Ctrl+E to open the Switch to Editor dialog.
Previous Perspective action
The Previous Perspective action opens a list of Perspectives that you can navigate by pressing Ctrl+F8 (next) and Shift+Ctrl+F8 (previous). When you release the Ctrl key, the selected perspective becomes active.
To invoke the action, click Window > Navigation > Previous Perspective or press Shift+Ctrl+F8.
See also, the Next Perspective action.
To switch directly to another perspective, click its toolbar button. To choose from the available perspectives, click the Open Perspective ( ) button or select Window > Open Perspective.
In practice, you rarely need to manually change between the standard Squish perspectives because the Squish IDE switches between them automatically depending on context.
Previous View action
The Previous View action opens a Views list that you can navigate by pressing Ctrl+F7 (next) and Shift+Ctrl+F7 (previous). When you release the Ctrl key, the selected view becomes active.
To invoke the action, click Window > Navigation > Previous or press Shift+Ctrl+F7.
See also, the Next View action.
To switch directly to another (visible) view, click it. To open a view, click Window > Show and choose a view from the submenu or click the Other submenu item and choose a view from the Show View dialog.
Project action
The Project action performs a search in the current project's files for the selected text—or if no text is selected, for the word containing the cursor—and presents the search results in a Search view.
To invoke the action, click Search > Text > Project.
See also the File, Working Set, and Workspace action.
Properties action
The Properties action shows the properties of the file shown in the active editor, such as the path, size, and permissions.
To invoke the action, click File > Properties or press Alt+Enter.
Quit AUT action
The Quit AUT () action terminates an AUT that was launched using the Launch AUT () action.
To invoke the action, click Run > Quit AUT or press the Quit AUT () button. Once the AUT has terminated, the Squish IDE returns to the Test Management Perspective.
Record Snippet action
The Record Snippet action, (Record ( ) on the Squish IDE toolbar), causes Squish to launch the AUT (if necessary) and begin recording a snippet into the active test case.
This action is disabled unless focus is on the text editor widget, and the cursor is located at a valid place to insert the snippet.
To finish recording, click the Control Bar window's Stop Recording( ) button. The recorded script is inserted into the active editor's text at the current cursor position.
If the AUT is not already started, the recording will begin with a call to the ApplicationContext startApplication(autName) function. Delete this line if the script already contains this call.
To cancel recording, click the Control Bar window's Cancel button. This leaves the test case unchanged.
To invoke the action, click Run > Record Snippet.
Do not click the Record Test Case (Record ()) button in the Test Suites view's Test Cases list to insert a snippet since this will replace the entire test case's script with the recorded snippet. If you do this by mistake, immediately invoke the Undo action to restore the original test case's script.
See also How to Edit and Debug Test Scripts.
Record Test Case action
The Record Test Case action (Record ()) causes Squish to launch the AUT and begin recording a new test script in the active test case. If the test case already has a test script, the newly recorded script will completely replace the original, so only use this action when you have created a new empty test case.
If you start recording a new test script on a non-empty test case by mistake, click the Control Bar window's Cancel button to stop the recording. The test case is left unchanged. If you completed the recording and overwrote a non-empty test case by mistake, immediately invoke the Undo action to restore the original test case's script.
To invoke the action, click the Record Test Case (Record ()) button to the right of the test case listed in the Test Suites view's Test Cases list, or select Run > Record Test Case.
Redo action
The Redo action ( ) redoes the action that was previously undone with the Undo action.
To redo each action that you undid, one at a time, repeatedly click Edit > Redo or press Ctrl+Y.
Refresh action
The Refresh action ( ) reloads a file (e.g., in an editor view) that changed outside the Squish IDE.
To invoke the action, click File > Refresh or press F5.
Externally editing files that are shown in the Squish IDE is not recommended. At least close the relevant editor view before editing files externally.
Remote Control action
The Remote Control ( ) action opens the Remote Control dialog where you can control remote test systems directly from within Squish IDE.
Remove All Breakpoints action
The Remove All Breakpoints action ( ) removes all the breakpoints. If you click the Resume action to resume the test, it will run to completion, or to an error, until you add one or more new breakpoints.
To invoke the action, click Run > Remove All Breakpoints.
See also the Toggle Breakpoint action, which adds breakpoints.
Rename action
The File > Rename action is inherited from the Eclipse IDE. It is not functional in the Squish IDE.
Reset Perspective action
The Reset Perspective action opens a confirmation dialog, where you can click the Reset Perspective button to reset the current perspective to its default settings.
To invoke the action, click Window > Reset Perspective.
Resume action
The Resume action ( ) resumes the execution of a test case that stopped at a breakpoint.
To invoke the action, click Run > Resume, press F8, or click the Debug view's Resume toolbar button ( ).
See also the Terminate and Step Over action, Test Debugging perspective, and How to Edit and Debug Test Scripts.
Run Test Case action
The Run Test Case ( ) action runs (replays) the selected test case.
To invoke the action, click the Run Test Case () button to the right of the test case listed in the Test Suites view's Test Cases list, or click Run > Run Test Case.
To run all of a test suite's test cases, click the Run Test Suite ( ) button.
Save action
The Save action ( ) saves any changes in the active editable view, such as the Editor, Object Map, or Test Suite Settings view.
To invoke the action, click the Save toolbar button, select File > Save, or press Ctrl+S.
See also Save All action.
Save All action
The Save All action ( ) saves any unsaved changes in all the editable views, such as the Editor, Object Map, or Test Suite Settings view.
To invoke the action, click File > Save All or press Shift+Ctrl+S.
By default, the Squish IDE prompts you to save unsaved changes when you exit it. Also, it automatically saves unsaved changes every five minutes. To change these preferences, select Edit > Preferences > General > Workspace and set the Workspace save interval option.
Save Perspective As action
The Window > Save Perspective As action opens the Save Perspective As dialog where you can save a perspective under a new name. Click the Save button to create a new perspective with all the current perspective's views and their positions and sizes.
To delete a perspective, select Edit > Preferences > General > Perspectives. Select the perspective to delete and click the Delete button. The Squish IDE depends on the availability of the Test Management, Test Debugging, and Spy perspective, so don't delete them.
Search action
The Search action ( ) invokes the Search dialog where you can search for text in files.
To invoke the action, click Search > Search or press Ctrl+H.
See also the File action.
Select All action
The Select All action selects all the text in the active view for those views that support the operation, such as editor views and the Test Results, Test Summary, and Runner/Server Log view.
To copy selected text to the clipboard, click the Copy action.
In the Test Results view, only the visible text is copied, so you must expand the results to copy their details.
To invoke the Select All action, click Edit > Select All, press Ctrl+A, or click the Select All option in the context menu.
Server Settings
The Edit > Server Settings action invokes the Squish Server Settings dialog where you can control various aspects of the squishserver that the Squish IDE uses when recording and playing back tests.
Show Active Keybindings action
The Show Active Keybindings action shows the currently active keyboard shortcuts.
To invoke the action, click Help > Show Active Keybindings or press Shift+Ctrl+L.
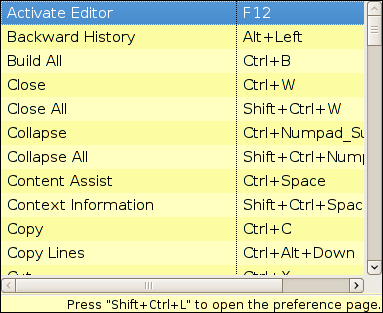
The Show Active Keybindings popup
When the popup is open, press Shift+Ctrl+L to open Preferences > General > Keys.
Show System Menu action
The Show System Menu action opens the active view's system menu, which contains options to close, minimize (iconize), and maximize the view, as well as view-type-specific options.
To invoke the action, click Window > Navigation > Show System Menu or press Alt+-.
Show View action
The Show View action opens a view that isn't already open.
To open a view:
- Click Window > Show View and choose a view. Click the Other option to open the Show View dialog and search for a view.
- Press Shift+Alt+Q, Q to open the Show View dialog.
- Press Shift+Alt+Q and wait until a list of Show View commands opens. Select a view in the list or use the keyboard shortcuts next to the view names.
Show View Menu action
The Show View Menu action opens the current view's view menu ( ).
).
To invoke the action, click Window > Navigation > Show View Menu or press Ctrl+F10.
Show Whitespace Characters action
The Show Whitespace Characters action ( ) toggles the display of whitespace characters in editor views. When active, spaces are shown as cdots (vertically centered periods), tabs are shown as right-pointing chevrons, and newlines are shown as paragraph marks.
To toggle the action on or off, click the Show Whitespace Characters () button.
Skip All Breakpoints action
The Skip All Breakpoints action marks all the breakpoints to be skipped if you resume the test by using the Resume action. This means that the test will run to completion or to an error.
To invoke the action, click Run > Skip All Breakpoints or press Ctrl+Alt+B.
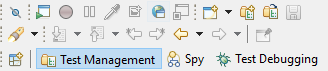
Spy action
The Spy ( ) action changes the current perspective to the Spy perspective.
In practice, you rarely need to manually change between the standard Squish perspectives because the Squish IDE switches between them automatically depending on context.
To invoke the action, click Window > Open Perspective > Spy or the Spy button.
See also How to Use the Spy.
Step Into action
The Step Into ( ) action continues the execution of a test case that has been stopped, for example, at a breakpoint. If the statement to execute is a function call, this action steps into the function and executes the function's first statement.
To invoke the action, click Run > Step Into, press F5, or click the Step Into button.
See also the Step Over, Step Return, and Resume action, Test Debugging perspective, and How to Edit and Debug Test Scripts.
Step Over action
The Step Over ( ) action continues the execution of a test case that has been stopped, for example, at a breakpoint. If the statement to execute is a function call, this action executes the call (without stepping into the called function) ready to continue from the statement that follows the call.
To invoke the action, click Run > Step Over, press F6, or click the Step Over button.
See also the Step Into, Step Return, and Resume action, the Test Debugging perspective, and How to Edit and Debug Test Scripts.
Step Return action
The Step Return ( ) action continues the execution of a test case that has been stopped, for example, at a breakpoint. If the statement to execute is inside a function call (e.g., as the result of invoking the Step Over action), this action immediately completes the execution of the function, ready to continue from the statement that follows the call to the function that has just been finished.
To invoke the action, click Run > Step Return, press F7, or click the Step Return button.
See also the Step Into, Step Over, and Resume action, and the Test Debugging perspective.
Suspend action
The Run > Suspend action is inherited from the Eclipse IDE. It is not needed or functional in the Squish IDE.
Switch to Editor action
The Switch to Editor action opens the Switch to Editor dialog where you can activate a currently open editor.
To invoke the action, click Window > Navigation > Switch to Editor or press Shift+Ctrl+E.
Alternatively, you can click the Editor view tab to activate the editor.
Terminate action
The Terminate( ) action terminates the execution of a test case that has stopped at a breakpoint.
To invoke the action, click Run > Terminate in the Test Debugging perspective, press Ctrl+F2, or click the Terminate() button.
See also the Resume action, Test Debugging perspective, and How to Edit and Debug Test Scripts.
Test Debugging action
The Test Debugging ( ) action changes the current perspective to the Test Debugging perspective.
In practice, you rarely need to manually change between the standard Squish perspectives because the Squish IDE switches between them automatically depending on context.
To invoke the action, click Window > Open Perspective > Test Debugging or the Test Debugging button.
Test Management action
The Test Management ( ) action changes the current perspective to the Test Management perspective.
This is the default perspective that you can change in Edit > Preferences > General > Perspectives.
In practice, you rarely need to manually change between the standard Squish perspectives because the Squish IDE switches between them automatically depending on context.
To invoke the action, click Window > Open Perspective > Test Management or the Test Management button.
Toggle Block Selection Mode action
The Toggle Block Selection Mode ( ) action toggles between the standard and block selection modes. In standard mode text is selected linearly, as if the entire file was a single very long string of text, from the cursor position to the position dragged to by the mouse or selected to by keyboard navigation (with the Shift key held down). In block mode text is selected as a rectangle with the cursor position marking one corner and the position dragged to by the mouse or selected to by keyboard navigation (with the Shift key held down) marking the diagonally opposite corner.
The selection mode defaults to standard mode. To toggle between standard and block mode, click the Toggle Block Selection Mode ( ) toolbar button or press Shift+Alt+A.
Toggle Breakpoint action
The Toggle Breakpoint ( ) action adds or removes a breakpoint on the line containing the cursor. You use the action when editing a test script or when a test run has been stopped at a breakpoint.
To invoke the action, click Run > Toggle Breakpoint or press Shift+Ctrl+B.
Toggle Line Breakpoint action
The Toggle Line Breakpoint ( ) action adds or removes a breakpoint on the line containing the cursor.
To invoke the action, click Run > Toggle Line Breakpoint. Usually, you can use the Toggle Breakpoint action instead.
Toggle Method Breakpoint action
The Run > Toggle Method Breakpoint () action is inherited from the Eclipse IDE. It is not functional in the Squish IDE.
Toggle Watchpoint action
The Run > Toggle Watchpoint ( ) action is inherited from the Eclipse IDE. It is not functional in the Squish IDE.
Undo action
The Undo action ( ) undoes the last action you did or redid by using the Redo action.
To undo each action that you did, one at a time, repeatedly click Edit > Undo or press Ctrl+Z.
Use Step Filters action
The Run > Use Step Filters ( ) action is inherited from the Eclipse IDE. It is not functional in the Squish IDE.
Working Set action
The Working Set action opens the Select Working Sets dialog where you can create or modify a working set. Click the OK button to perform a search from the working set's files. The search is for the selected text—or if no text is selected, for the word containing the cursor. The search results open in the Search view.
To invoke the action, click Search > Text > Working Set.
See also, the File, Project, and Workspace action.
Workspace action
The Workspace action searches from the current workspace's files for the selected text—or if no text is selected, for the word containing the cursor. The search results open in the Search view.
To invoke this action, click Search > Text > Workspace or press Ctrl+Alt+G.
See also the File, Project, and the Working Set action.
Squish servers toolbar
The Squish servers toolbar enables you to change the default server configuration used to execute tests. Configure the list of servers to select from in the Servers preferences pane.
To show the Squish servers toolbar, click Window > Customize perspective > Toolbar Visibility and check the Squish servers checkbox.
Perspectives
The Squish IDE provides three perspectives with all the necessary functionality. You can create custom perspectives either from scratch or based on any of the Squish perspectives but you don't usually need to because the Squish IDE remembers the changes you make and applies them when switching perspectives.
Spy perspective
The Squish IDE switches to the Spy perspective when you invoke the Launch AUT action. This perspective shows the Application Objects, Properties, and Methods view, in addition to views already open, such as the Test Suites view and any open Editor views. You can also click the Spy button to switch to this perspective.
The Spy perspective
To return to the default perspective, Test Management, invoke the Quit AUT action.
See also How to Use the Spy.
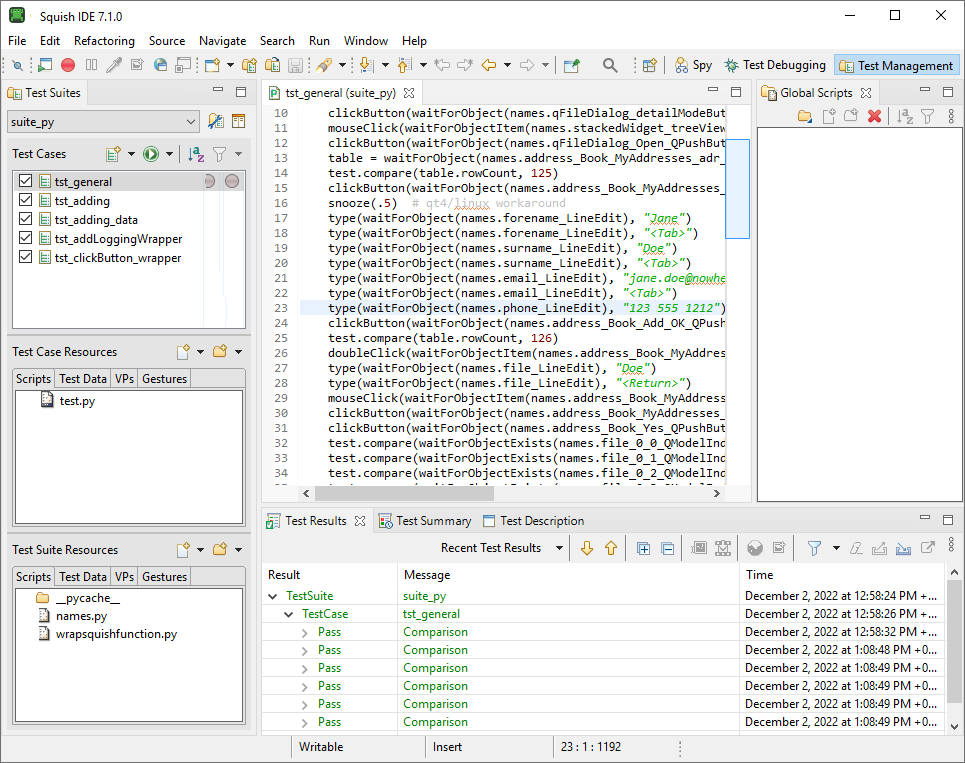
Test Management perspective
The Squish IDE starts with the Test Management perspective and switches to it when you close one of the other perspectives. This perspective shows the Test Suites, Test Results, and Test Summary view, in addition to any open Editor views.
You can also click the Test Management button to switch to this perspective.
The Test Management perspective
If you open the Runner/Server Log view (by selecting the Show View action), it is shown in this perspective.
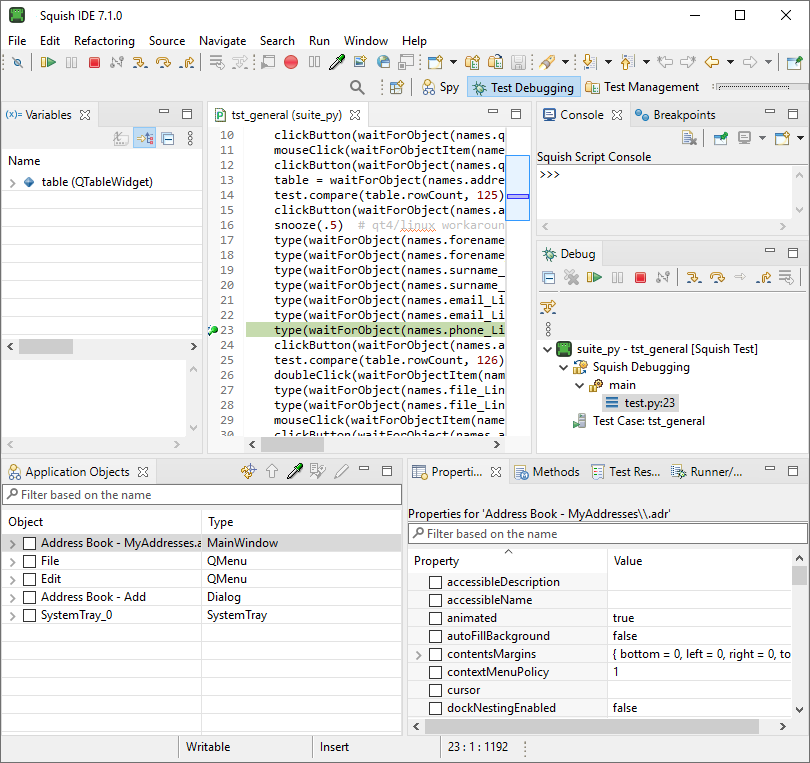
Test Debugging perspective
The Squish IDE automatically switches to the Test Debugging perspective when it reaches a breakpoint. This perspective shows the Application Objects, Properties, Methods, Debug, Console, and Variables view, in addition to any open Editor views.
You can also click the Test Debugging button to switch to this perspective.
The Test Debugging perspective
To return to the default perspective, Test Management, either invoke the Resume action to complete the test run or the Terminate action to cancel it.
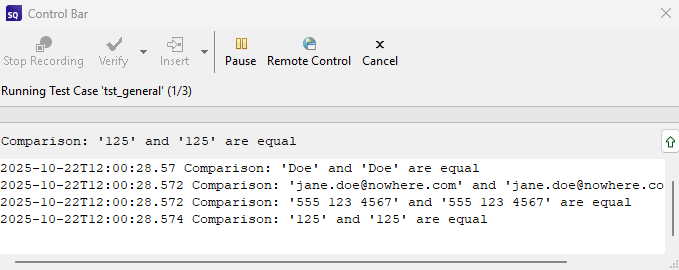
Control Bar window
When you record a test or test snippet or run a test, the Control Bar window appears and the Squish IDE's main window disappears. Once the test run or recording completes or you cancel it, the Control Bar window closes and the Squish IDE's main window reappears.
The main benefit of the Control Bar is that it occupies much less space than the IDE, leaving screen space for the GUI of your AUT. However, if the AUT is remote, there is no reason to hide the IDE when tests are running, so you can configure Control Bar and Main Window Behavior during Test Execution in Preferences - Squish - Playback to always show the IDE.
If you are running a suite of tests, a progress bar shows you how close you are to finishing it.
The Down (![]() ) button in the bottom right corner of the window toggles display of a log window.
) button in the bottom right corner of the window toggles display of a log window.
Stop Recording action
The Stop Recording() action stops recording a snippet into an existing test. In addition, you can select the action you want to finish recording a test but want to leave Squish to actually close the AUT. Or if you make a mistake and want to start again. See also How to Edit and Debug Test Scripts.
Verify menu actions
The Verify ( ) menu actions insert different types of verification points. They hide the Control Bar window and show the Squish IDE's main window, possibly in front of the AUT. The Squish IDE automatically switches to the Spy perspective with the Verification Point Creator view visible, ready for you to insert verifications. After you insert verification points, the Squish IDE's main window is hidden and the Control Bar window is shown so that recording can continue. To resume recording without inserting verifications, close the Verification Point Creator view.
The actions are only available during recording.
For more information, see How to Create and Use Verification Points.
Properties action
The Verify () > Properties ( ) action inserts a property verification.
Screenshot action
The Verify () > Screenshot ( ) action inserts a screenshot verification.
Table action
The Verify () > Table ( ) action inserts a table verification.
Visual action
The Verify () > Visual ( ) action inserts a visual verification.
Search Image action
The Verify () > Verify Image ( ) action switch the Squish IDE into a mode for inserting a Boolean test.imagePresent(imageFile, [parameterMap], [searchRegion]) function call into the test script.
OCR Text action
The Verify () > OCR Text ( ) action switch the Squish IDE into a mode for inserting a Boolean test.ocrTextPresent(text, [parameterMap], [searchRegion]) function call into the test script.
Insert menu actions
The Insert ( ) menu actions switch the Squish IDE into a mode for inserting functions into test scripts. These actions are only available during recording.
Each of these insert commands can have an optional delay before the operation is performed. Hold down a keyboard modifier before invoking the Insert action.
- Shift - 3 seconds
- Ctrl - 5 seconds
- Ctrl + Shift - 10 seconds
mouseClick(<Image>) action
The Insert () > mouseClick(<Image>) ( ) action inserts a mouseClick(screenPoint, modifierState, button) function that operates based on the location of an image on the screen.
doubleClick(<Image>) action
The Insert () > doubleClick(<Image>) ( ) action inserts a doubleClick(screenPoint, modifierState, button) function that operates based on the location of an image on the screen.
tapObject(<Image>) action
The Insert () > tapObject(<Image>) ( ) action inserts a tapObject(screenPoint, modifierState) touch function that operates based on the location of an image on the screen.
mouseClick(<OCR>) action
The Insert () > mouseClick(<OCR>) ( ) action inserts a mouseClick(screenPoint, modifierState, button) function that operates based on the location of a specified text.
doubleClick(<OCR>) action
The Insert () > doubleClick(<OCR>) ( ) action inserts a doubleClick(screenPoint, modifierState, button) function that operates based on the location of a specified text.
tapObject(<OCR>) action
The Insert () > tapObject(<OCR>) ( ) action inserts a tapObject(screenPoint, modifierState) touch function that operates based on the location of a specified text.
Start Video Capture action
The Insert () > Start Video Capture ( ) action inserts a test.startVideoCapture(message) function into the test script. The inserted script statement does not pass any arguments to the function, so the function uses the default message and the current application context. After the insertion, the recording can continue.
When you record a scripted test case, this action is disabled after you click it and the Stop Video Capture action is enabled.
Note: During snippet recording, the Squish IDE cannot determine whether a video capture would be active at the point where the recorded snippet is inserted. Thus, the action is always enabled and the generated script code might throw an exception when being run if test.startVideoCapture is invoked twice with the same application context.
Stop Video Capture action
The Insert () > Stop Video Capture ( ) action inserts a test.stopVideoCapture(message) function into the test script. The inserted script statement does not pass any arguments to the function, so the function uses the default message and the current application context. After the insertion, the recording can continue.
When you record a scripted test case, this action is disabled after you click it and the Start Video Capture action is enabled.
Note: During snippet recording the Squish IDE cannot determine whether a video capture would be active at the point where the recorded snippet is inserted. Thus, the action is always enabled and the generated script code might throw an exception when being run if test.stopVideoCapture is invoked twice with the same application context.
Comment action
The Insert () > Comment ( ) action opens an Insert Comment dialog where you can insert a free-form comment into the test script. After the insertion, the recording can continue.
Pause action
The Pause button is enabled only during playback. Click it for behavior similar to setting a breakpoint to now. The action hides the Control Bar, switches Squish IDE to Test Debug perspective, and shows the main window, which enables you to step through lines of code and inspect variables.
Remote Control action
The Remote Control () action opens the Remote Control dialog for viewing and controlling the remote test system from the Squish IDE.
Cancel action
Click the Cancel ( ) action to cancel recording the test or snippet or replaying the test. If you cancel recording, the recorded test script lines are not inserted into the test case. If you cancel replay, the test results that have been logged so far are retained, but the replay is canceled, so no more test results are logged.
© 2025 The Qt Company Ltd.
Documentation contributions included herein are the copyrights of
their respective owners.
The documentation provided herein is licensed under the terms of the GNU Free Documentation License version 1.3 as published by the Free Software Foundation.
Qt and respective logos are trademarks of The Qt Company Ltd. in Finland and/or other countries worldwide. All other trademarks are property
of their respective owners.
