Search Image Selection
To open the Search Image Selection dialog, choose the Insert > mouseClick(<Image>), Insert > doubleClick(<Image>), or Insert > tapObject(<Image>) action from the Control Bar. If no images have been stored in the test suite, the Image Selection Editor view opens.
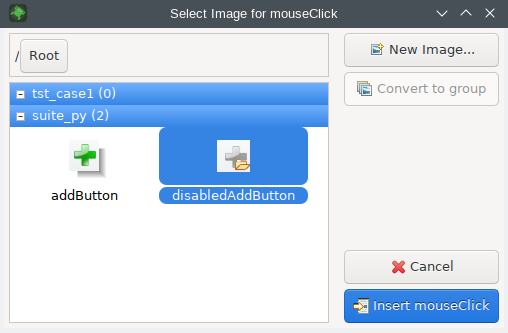
This dialog displays the list of available images and Image Groups stored in the test suite's shared/searchImages as well as the test case's searchImages/ directory. The Image Groups are distinguished by a folder icon overlay. Double-click an image group to display its contents. The path to the currently displayed group is displayed in the top frame. Click on the group buttons to return the view to the respective image group or to the root of the hierarchy.
When you have selected the desired image, you can click Insert <action>, which first attempts to execute the Image Search and (upon success) inserts the respective script statement into the test script.
You can insert an optional delay before the operation is performed. Hold down a keyboard modifier before clicking Insert <action>.
- Shift - 3 seconds
- Ctrl - 5 seconds
- Ctrl + Shift - 10 seconds
If the existing images are not suitable, click New Image... to take a screenshot and open the Image Selection Editor view. New images are placed in the Test Suite Resources.
If you select an image and then click Convert to Group, the image will be moved into a folder with the same base name as the image, and after that, the folder can be used as an Image Group. You will see the folder overlay over the image icon after doing this.
If you double-click on an Image Group, it will open and then you will see its contents. When the group is open like that, you can click New Image in 'imageGroupName' to add a new image directly to that Image Group.
To cancel the insertion of an image-based script statement and return to the main recording mode, click the Cancel button.
© 2025 The Qt Company Ltd.
Documentation contributions included herein are the copyrights of
their respective owners.
The documentation provided herein is licensed under the terms of the GNU Free Documentation License version 1.3 as published by the Free Software Foundation.
Qt and respective logos are trademarks of The Qt Company Ltd. in Finland and/or other countries worldwide. All other trademarks are property
of their respective owners.
