Custom effects and materials in Qt 5
Use custom shader utilities to create custom effects in previous Qt Design Studio versions built with Qt 5 and Qt 5.15.
Note: To learn how to use and create effects in Qt Design Studio projects built with Qt 6 as Target Qt Version, see Effects.
Creating custom effects and materials
Create custom effects and materials using the custom shader utilities available in Components > Qt Quick 3D Custom Shader Utilities. Each effect or material must have a fragment shader that completes all the functions needed to calculate the shaded color. The material system also offers ready-made functions to help you implement the material.
You can create dielectric, metallic, and transparent materials, point lights, area lights, ambient occlusion, shadowing, two-sided polygons, index-of-refraction, and fragment cutoff (masking). For more information, see Qt Quick 3D Custom Material Reference.
Creating custom effects
Note: Use the method described here to create custom effects in Qt Design Studio 4.0 or older versions in projects created with Qt 5 or Qt 5.15 as Target Qt Version.
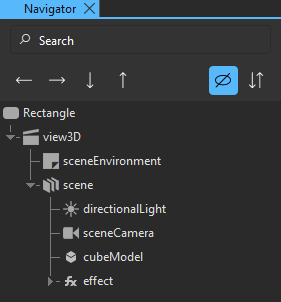
By default, the custom effect component contains a Pass component and a Shader component in the fragment stage. You can add passes, shaders, and other shader utilities to the effect.
The fragment shader component has a placeholder for the path to the shader file. You need to create shader files in code. For more information, see Creating Shader Files. Specify the path to the shader file to use in the Properties view.
To create a custom effect:
- Drag an Effect component from Components > Qt Quick 3D Effects > Qt Quick 3D Custom Shader Utilities to a model component in Navigator.
- Select the Effect component in Navigator to adjust the values of its properties in the Properties view.
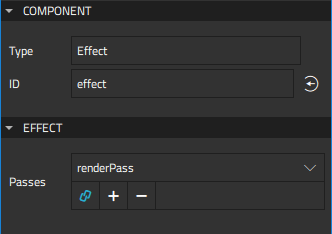
- Use the Passes property to select the pass components for the effect.
- Select the renderPass component in Navigator to specify values for its properties in Properties.
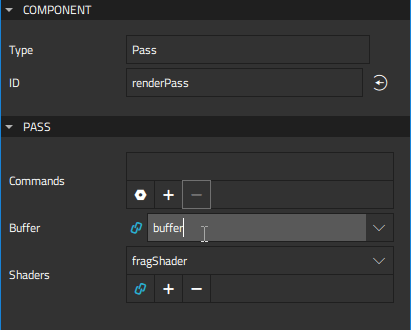
- To run commands during the pass, drag the following command components from Components > Qt Quick 3D Custom Shader Utilities to Effect > renderPass in Navigator:
- Blending
- Buffer
- Buffer Blit
- Buffer Input
- Cull Mode
- Depth Input
- Render State
- Set Uniform Value
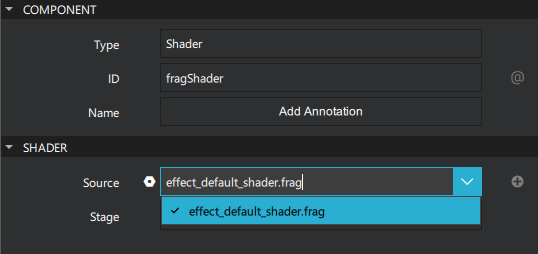
- Select the fragShader component in Navigator > Effect to set the path to the shader files using the Source property in Properties.
Creating custom materials
Note: Use the method described here to create custom materials in Qt Design Studio 3.4 or older versions in projects created with Qt 5 or Qt 5.15 as Target Qt Version.
By default, the Custom Material component contains two Shader components, a Shader Info, and a Pass component. You can add shaders, passes, and other shader utilities to the material.
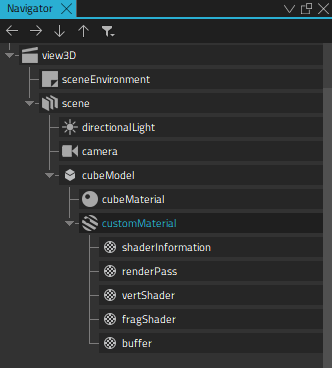
By default, fragment and vertex shaders have placeholders for the paths to the shader files. Specify the paths to the shader files to use in the shader properties.
The Shader Info component specifies the shader component and version, as well as the options used by the shader based on the selected shader key values, such as diffuse or specular lighting, refraction, transparency, displacement, transmissiveness, glossiness, and alpha cutout.
Use shaders with the Pass component to customize the material. A pass can contain multiple rendering passes and other commands. Use a Buffer component to allocate a buffer for storing intermediate rendering results.
To create a custom material:
- Drag a Custom Material component from Components > Qt Quick 3D Custom Shader Utils to a model component in Navigator.
- Select the Custom Material component in Navigator to adjust the values of its properties in the Properties view.
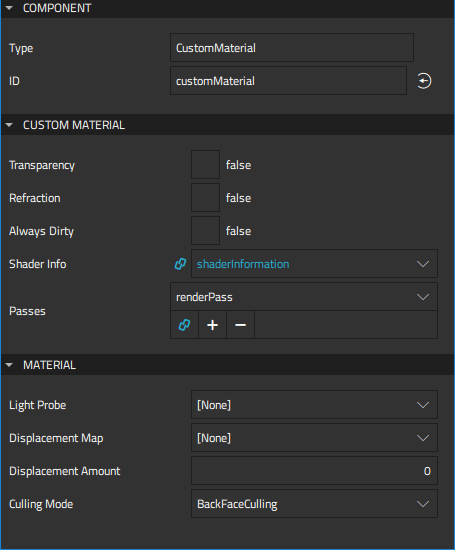
- Select the Transparency check box to make the material transparent, and Refraction to specify that the material is reflective.
- Select the Always dirty check box to refresh the the material every time it is used.
- In the Shader Info field, select the shader info component to use, and in the Passes field, select the pass components for the effect.
- In the Material group, select the light probe, displacement map and amount, and culling mode to use.
- Select the shaderInfo component in Navigator to adjust the values for its properties in Properties.

- Select the renderPass component in Navigator to adjust the values for its properties in Properties.
- To execute commands during the pass, drag the following command components from Components to the renderPass component in Navigator:
- Blending
- Buffer Blit
- Buffer Input
- Cull Mode,
- Depth Input
- Render State
- Set Uniform Value
Qt Design Studio creates the command components at the same level as the pass component and automatically adds them to the Commands field.
- To allocate a buffer for the pass, drag a Buffer component to the Custom Material component. Then select the buffer in the Buffer field.
- To add a shader to a pass, drag a Shader component from Components to the pass component in Navigator. Qt Design Studio creates the shader components at the same level as the pass component and automatically adds them to the Shaders field.
- Select the shader components in Navigator to set the paths to the shader files in the Source field in Properties.
Available under certain Qt licenses.
Find out more.
