3D Repeater
The 3D Repeater component is used to create multiple similar items in a 3D scene. Like other view types, 3D Repeater needs a model and a delegate. The delegate sets the item to use and the model sets the structure of the items in the 3D Repeater component.
The model can be any of the supported data models. Additionally, like delegates for other views, a delegate for the 3D Repeater can access its index within the repeater, as well as the model data relevant to the delegate.
Note: 3D Repeater owns all items it instantiates. Removing or dynamically deleting an item created by 3D Repeater results in unpredictable behavior.
Note: 3D Repeater can only repeat objects derived from Nodes.
For more information, see Repeater3D in the Qt Quick 3D documentation.
3D Repeater properties
You can specify the Model and the Delegate property for a 3D Repeater
Model
The Model property specifies the model providing data for the repeater. You can only use the Model property in the Properties view to set a numeric model or to bind to QML based models. You can use the Code view to define any of the supported data models as the value of the Model property:
- A number that indicates the number of delegates to be created by the repeater.
- A model, such as a ListModel component, or a QAbstractItemModel subclass.
- A string list.
- An object list.
The type of model affects the properties that are exposed to the delegate.
Delegate
The Delegate property specifies a template defining each object instantiated by the repeater. Currently, the Delegate property needs to be defined in code using the Edit mode or the Code view. Delegates are exposed to a read-only index property that indicates the index of the delegate within the repeater. For more information, see Delegate in the Qt Quick 3D documentation.
If the model is a model object, such as a ListModel, the delegate can access all model roles as named properties, in the same way that delegates do for view classes like ListView.
Adding a 3D Repeater component with a numeric model
This section explains how to add a 3D Repeater component with a numeric model to your Qt Design Studio project. For an example, you will add a 3D Repeater component and a numeric model to draw four cubes.
To add a 3D Repeater component:
- Drag a 3D Repeater component from Components to scene in Navigator.
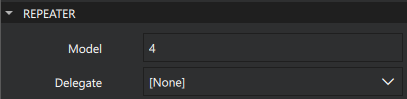
- Select 3D Repeater in Navigator and in Properties, set Model to, for example, 4.
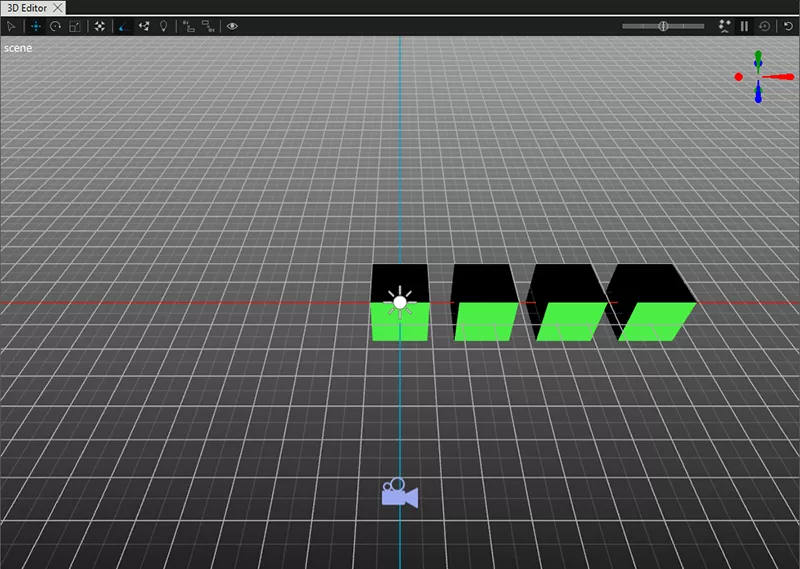
Now, you have set up the 3D Repeater component to use a numeric model that draws four instances of the same item. Next, you need to add the item to draw. In this example we are using a Cube:
- From Components, drag a Cube to _Repeater3D in Navigator. Now, four cubes are drawn to the scene, but they are drawn to the exact same place. Next, use Binding Editor to create a binding that sets the location to increase by, for example, 150 for each of the cubes.
- Select cube in Navigator and in Properties select
 next to Translation > X.
 - Select Set Binding to open Binding Editor.
- In Binding Editor, enter
index * 150.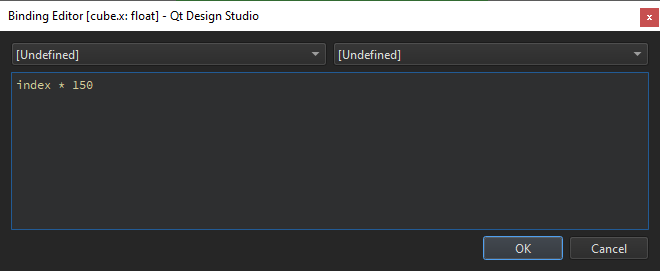
- Select OK and go to the 3D view to see the result.
Adding a 3D Repeater component with a List Model
This section explains how to add a 3D Repeater component with a list model to your Qt Design Studio project. For an example, you will add a 3D Repeater component and a list model to draw three spheres of different size.
To add a 3D Repeater component:
- Drag a 3D Repeater component from Components to scene in Navigator.
- You need to enter the QML code for the ListModel manually. Go to the Code view, and enter the following code inside the root object:
ListModel {
    id: planetModel
    ListElement {
        name: "Mars"
        radius: 3.39
    }
    ListElement {
        name: "Earth"
        radius: 6.37
    }
    ListElement {
        name: "Venus"
        radius: 6.05
    }
}
The default root object for a Qt Design Studio project is
Rectangle. Paste the ListModel code insideRectangle, for example, like this:Rectangle { width: Constants.width height: Constants.height color: Constants.backgroundColor ListModel { id: planetModel ListElement { name: "Mars" radius: 3.39 } ListElement { name: "Earth" radius: 6.37 } ListElement { name: "Venus" radius: 6.05 } } View3D { id: view3D anchors.fill: parent ... - In the Code view, add
model: planetModelto theRepeater3Dobject to determine that you want to use theListModelas the model for 3D Repeater:Repeater3D { id: repeater3D model: planetModel }
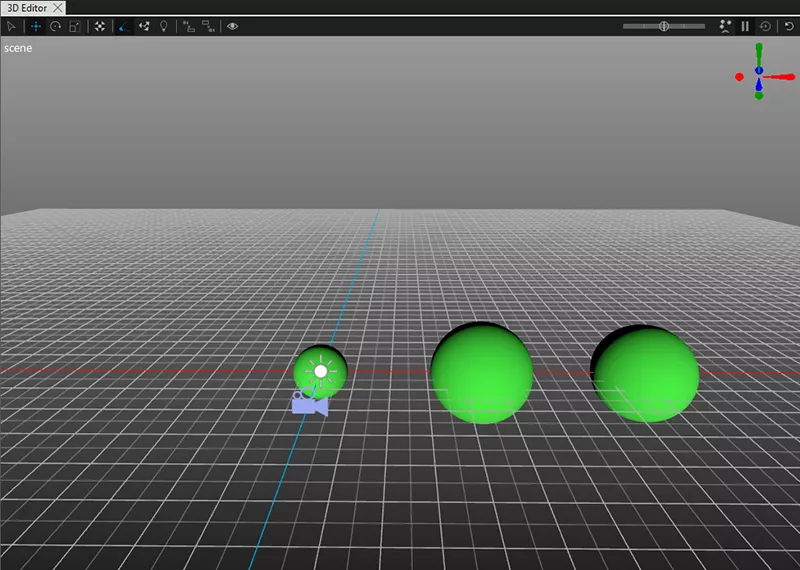
Now, you have set up the 3D Repeater component to use a ListModel to draw the items. Next, you need to add the item to draw. In this example, you are using a Sphere:
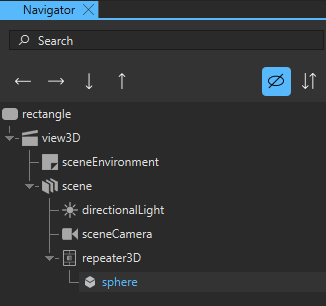
- From Components, drag a Sphere to _Repeater3D in Navigator.
- Select sphere in Navigator and in the Properties view, select next to Scale > X.
- Select Set Binding to open Binding Editor.
- In Binding Editor, enter
radius. This sets the X scale to the radius value defined in the list model for each of the spheres that are drawn.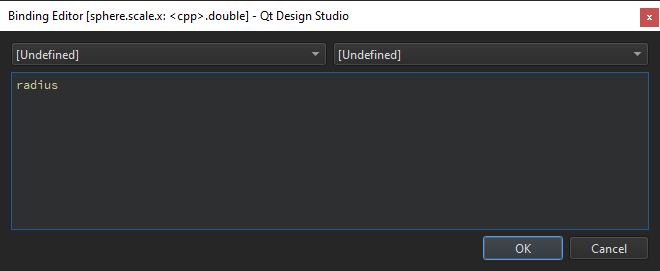
- Select OK.
- Repeat steps 2 to 5 for Scale > Y and Scale > Z.
Now, three spheres of different size are drawn but they are drawn in the same position so you need to change the position to see all the spheres:
- Select sphere in Navigator and in the Properties view, select next to Translation > X.
- Select Set Binding to open Binding Editor.
- In Binding Editor, enter
index * 1000. This sets the X location to increase by 1000 for each of the spheres that are drawn.
- Select OK and go to the 3D view to see the result. You need to zoom out to see all the spheres.
Available under certain Qt licenses.
Find out more.
